I still remember the first time I tried to make crispy ravioli in my air fryer like it was yesterday. It was one of those Tuesday nights when you want something that feels indulgent but doesn't require a culinary degree or three hours of your life you'll never get back. I stood in my kitchen, staring at a package of store-bought cheese ravioli, thinking there had to be a better way than the traditional deep-frying method that left my entire house smelling like a fast-food joint for days. The air fryer was sitting there, practically winking at me, and I thought, "Why not?"
What happened next was nothing short of magical. The ravioli emerged with edges so crispy they shattered like autumn leaves under your teeth, while the centers stayed molten and creamy, creating this incredible textural contrast that had me doing a little victory dance right there on my kitchen tiles. The best part? No oil splatters on my backsplash, no lingering fried food smell, and no guilt about consuming what felt like a gallon of oil. I ate half the batch standing up, burning my tongue repeatedly because patience has never been my strong suit when something tastes this good.
Since that fateful evening, I've perfected this technique through what my friends now call my "ravioli obsession phase" — a time when I tested every possible variable from temperature to timing to seasoning blends. I tried different brands of ravioli, experimented with various coatings, and even made my own from scratch (which, let's be honest, is a weekend project for when you're feeling particularly ambitious). The result is a method so foolproof that I've turned even the most kitchen-phobic friends into air fryer ravioli evangelists. Picture yourself pulling a basket of these golden beauties from your air fryer, the cheese bubbling through the pasta like lava, the aroma of garlic and herbs filling your kitchen, and knowing that in less than fifteen minutes, you'll be experiencing what I genuinely believe is the best appetizer known to mankind.
Let me walk you through every single step — by the end, you'll wonder how you ever made it any other way.
What Makes This Version Stand Out
This isn't just another air fryer recipe thrown together for content. This is the result of dozens of tests, burnt tongues, and happy taste-testers who kept demanding more. Here's why this version will ruin all other ravioli for you forever:
- The Shatter Factor: The coating creates an armor so crispy it makes an audible crack when you bite into it, yet somehow doesn't overwhelm the delicate pasta beneath. It's like each ravioli is wearing a perfectly tailored crispy jacket that knows exactly when to get out of the way.
- Zero Oil, All Glory: Traditional fried ravioli swims in oil like it's training for the Olympics, but these beauties need nothing more than a whisper of cooking spray. You get all the satisfaction of fried food with none of the greasy aftermath that makes you need a nap and maybe a shower.
- Speed Demon Status: From frozen to plate in under twelve minutes. That delivery pizza you were considering? It'll take longer to arrive, cost three times as much, and won't make you feel like a kitchen wizard.
- Party MVP: I've served these at game nights, book clubs, and that awkward office party where nobody knew what to bring. They disappear faster than free concert tickets, and people will corner you for the recipe while their mouths are still full.
- Make-Ahead Magic: Prep a triple batch on Sunday, freeze them raw, and you've got instant appetizers for the entire week. They go from freezer to air fryer to your face with no thawing required.
- The Dip Factor: These ravioli don't just tolerate sauce — they demand it. The nooks and crannies created by the air frying process grab onto marinara like they're long-lost lovers reuniting after years apart.
Alright, let's break down exactly what goes into this masterpiece...
Inside the Ingredient List
Before we dive into the cooking chaos, let's talk about what actually makes these ravioli sing. Because here's the thing — you can't just throw any old ingredients together and expect magic. Well, you can, but you'll end up with sad, soggy pasta pockets that taste like disappointment and broken dreams.
The Foundation: Choosing Your Ravioli Wisely
The ravioli you select is basically the lead actor in this production, and if you cast poorly, no amount of air fryer wizardry can save the show. I learned this the hard way after buying the cheapest store brand I could find — the pasta was so thick it could have been used as roofing material, and the filling tasted like someone had whispered the word "cheese" in its general direction. Fresh ravioli from the refrigerated section works beautifully, but honestly, the frozen stuff often holds up better in the air fryer because it doesn't fall apart during the cooking process. Look for ravioli that's about two inches across — anything smaller and you're making fancy pizza rolls, anything larger and they won't cook through properly. The filling is your playground: classic ricotta and spinach is foolproof, but I've had tremendous success with butternut squash, mushroom, and even lobster ravioli for those "treat yourself" moments.
The Crunch Crew: Building Your Coating
This is where most recipes go completely off the rails, treating the coating like an afterthought when it's actually the whole point. You need three players in this game: flour for adhesion, egg wash for binding, and breadcrumbs for that satisfying crunch that makes people close their eyes when they bite into it. The flour should be all-purpose — don't get fancy with whole wheat or coconut flour unless you want your ravioli to taste like health food. For the egg wash, I add a splash of milk and a pinch of salt, which helps it adhere better and seasons the coating from the inside out. The breadcrumbs are where you can get creative — panko gives you those big, flaky crunch pieces, while regular breadcrumbs create a more even coating. I mix both because I'm apparently high-maintenance about my breadcrumbs.
The Flavor Makers: Herbs and Seasonings
Plain breadcrumbs are like white walls — technically functional but deeply boring. You need to jazz them up with a blend that makes people ask, "What IS that amazing smell?" Garlic powder is non-negotiable, onion powder adds depth, dried oregano brings that Italian restaurant vibe, and smoked paprika gives everything a gorgeous color and subtle complexity. I keep a jar of my "magic blend" premixed because once you start making these ravioli, you'll be making them a lot. Fresh herbs are lovely but skip them here — they'll burn in the air fryer and taste like you're eating potpourri.
The Unexpected Star: Parmesan Cheese
Here's where we get a little wild. Mixing finely grated Parmesan into your breadcrumb coating doesn't just add flavor — it creates these little umami bombs that get all crispy and caramelized in the air fryer. The key is using the powdery stuff from the green can, not the fancy fresh-grated cheese you save for pasta. I know, I know — food snobs are gasping right now. But the dehydrated cheese works better here because it doesn't release oil and make your coating greasy. Trust me on this one, I've done the side-by-side tests, and the fancy cheese version was a sad, oily mess.
Everything's prepped? Good. Let's get into the real action...
The Method — Step by Step
- Prep Your Station Like a Pro: Set up three shallow dishes in a row — this is your assembly line, and trust me, you don't want to be hunting for the egg wash while your hands are covered in flour. In the first dish, add a cup of all-purpose flour seasoned with salt and pepper. The second dish gets your egg wash — two eggs beaten with two tablespoons of milk and a pinch of salt. The third dish holds your seasoned breadcrumb mixture: one cup of panko, half cup of regular breadcrumbs, your herb blend, and that secret Parmesan we talked about. Line them up like ducks in a row, and for the love of all that is holy, put paper towels underneath because this gets messy in the best possible way.
- The Triple Dip Dance: Here's where the magic happens, and yes, you need to commit to the full process. Take a ravioli and coat it completely in flour — every edge, every corner. Shake off the excess like you're trying to get sand off your feet at the beach. Next, dunk it in the egg wash, making sure it's fully submerged. Let the excess drip off for about three seconds — any longer and the coating gets too thick, any shorter and the breadcrumbs won't stick. Finally, press it into the breadcrumb mixture, really working those crumbs into every crevice. Flip and repeat, then gently press again. This double coating is what gives you that professional crunch that makes people think you went to culinary school.
- Preheating Is Not Optional: Set your air fryer to 375°F and let it preheat for at least five minutes. This is crucial — putting your ravioli into a cold air fryer is like trying to toast bread in a cold oven. You want that immediate blast of hot air to start crisping the coating from second one. While it's heating, arrange your coated ravioli on a plate in a single layer. Don't stack them — the coating needs time to set up, and stacking creates pressure points where the breadcrumbs will fall off.
- The Arrangement Strategy: Here's where most people mess up — they crowd the basket like they're trying to fit a week's worth of laundry into a carry-on. Each ravioli needs its personal space, about half an inch between pieces. Hot air needs to circulate freely to create that all-over crunch. Depending on your air fryer size, you'll probably need to work in batches. I know, I know — patience is annoying. But undercrowding means each batch takes six minutes instead of twelve, and the results are infinitely better. Trust the process.
- The Mid-Cook Flip: At the three-minute mark, pull out the basket and give it a gentle shake. The ravioli should release easily — if they stick, they're not ready to flip yet. Use tongs to turn each piece over, and here's the key: give them the lightest mist of cooking spray on the newly exposed side. This isn't about adding fat — it's about helping the breadcrumbs achieve that golden-brown color that makes them look like they came from a restaurant kitchen. Don't drown them, just a whisper of spray.
- Reading the Signs: Your ravioli are done when they're golden brown with darker edges that look almost caramelized. The cheese inside should be bubbling up through any small cracks in the pasta — that's your visual cue that everything's molten and perfect. This usually happens around the six-minute mark, but air fryers vary like snowflakes. If your ravioli are larger or you like them extra crispy, give them another minute. But stay close — they go from perfect to burnt faster than you can say "I should have set a timer."
- The Resting Revelation: I know, you're dying to bite into one immediately. But here's a truth bomb — let them rest for two minutes on a wire rack. This isn't just food safety (molten cheese burns are no joke), it's science. The filling needs time to settle, the coating needs to set, and the steam needs to distribute evenly. Those two minutes feel like an eternity, but they're the difference between good ravioli and life-changing ravioli. Plus, it gives you time to warm up your marinara sauce.
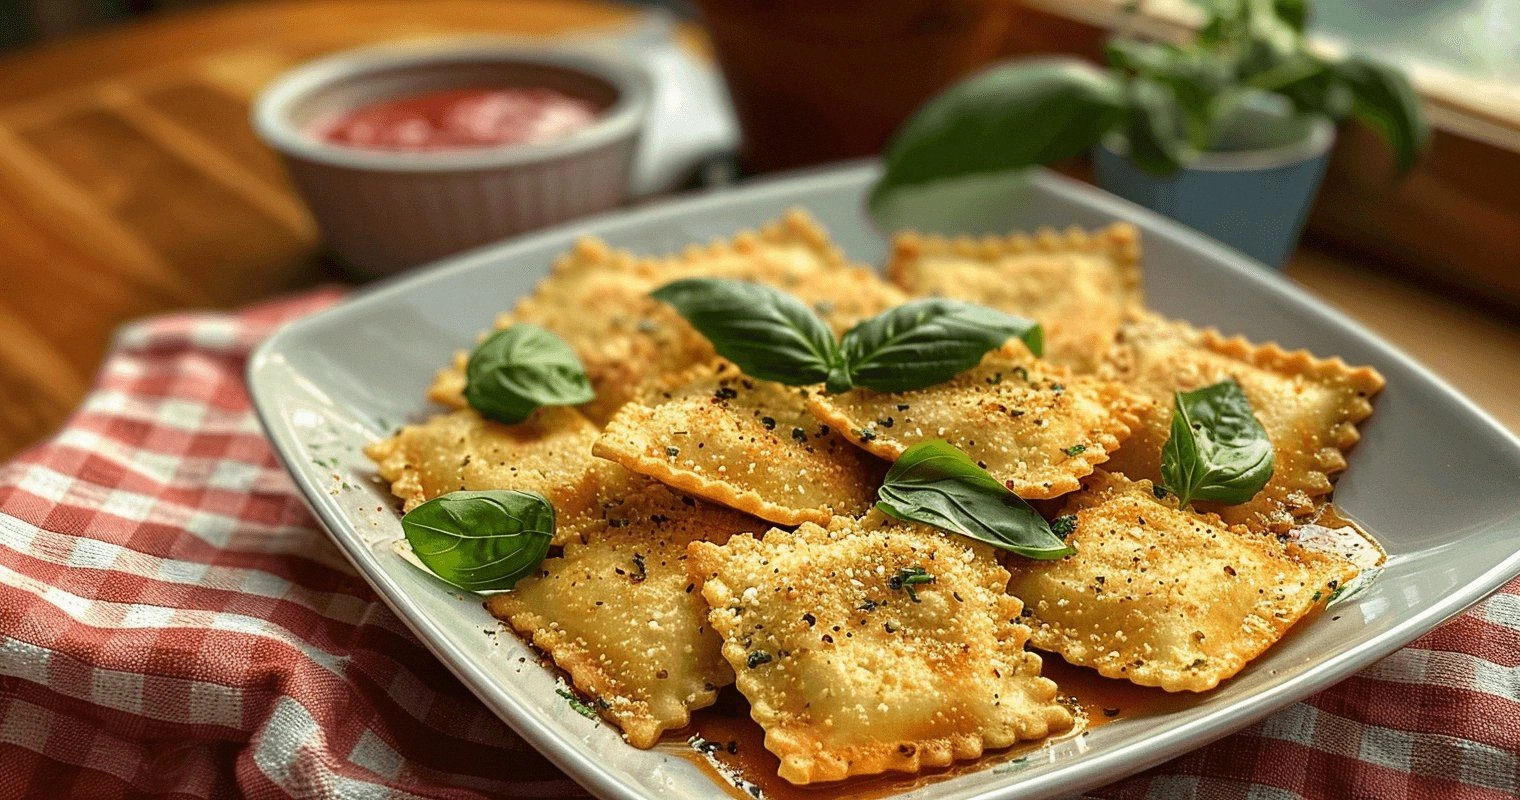
- Serving Like You Mean It: Arrange your ravioli on a platter with a small bowl of warm marinara in the center for dipping. But here's the pro move — drizzle a little bit of good olive oil over the top and sprinkle with fresh parsley. It adds color, freshness, and makes you look like you know what you're doing even if you just learned how to turn on your air fryer last week. Serve immediately with lots of napkins because things are about to get deliciously messy.
That's it — you did it. But hold on, I've got a few more tricks that'll take this to another level...
Insider Tricks for Flawless Results
Now that you've got the basic method down, let's talk about the tiny details that separate the amateurs from the ravioli masters. These are the secrets I've hoarded like a dragon guarding treasure, learned through burnt batches, soggy disappointments, and moments where I questioned everything I thought I knew about air frying.
The Temperature Rule Nobody Follows
Everyone wants to crank their air fryer to 400°F thinking hotter is better, but that's like turning your oven to broil for cookies — technically possible but catastrophically wrong. 375°F is the sweet spot where the outside gets crispy before the inside turns to lava. I tested every temperature from 325°F to 400°F, and 375°F consistently produced ravioli that were golden and crunchy without being burnt or still frozen in the center. If you're cooking from frozen (which I often do because planning ahead is for people with their lives together), add two minutes to the cooking time but keep the temperature the same. Your patience will be rewarded with ravioli that taste like they were made by someone who actually knows what they're doing.
Why Your Nose Knows Best
Here's something they don't tell you in air fryer manuals — your nose is actually the most sophisticated piece of kitchen equipment you own. About four minutes into cooking, you'll start smelling something amazing. That's your cue to start paying attention. When the aroma shifts from "bready and mild" to "nutty and toasted," you're about one minute away from perfection. If you smell anything approaching burnt, you've already gone too far. I ruined three batches before I learned to trust my nose over the timer. Now I set a timer for five minutes but start hovering around minute four, ready to pull them at the first whiff of that perfect toasted smell.
The 5-Minute Rest That Changes Everything
I know I mentioned resting earlier, but this deserves its own moment because it's that important. After cooking, transfer your ravioli to a wire rack and walk away for five minutes. I mean it — actually walk away. Don't poke, don't prod, don't "just check if they're cool enough." This rest does three things: it lets the filling settle so it doesn't explode out like a cheesy volcano when you bite in, it allows the coating to achieve its final crispy state, and it gives the flavors time to meld together into something greater than the sum of their parts. My friend Sarah ignored this step and bit into one immediately — the filling shot out like a cheese-filled missile and burned her chin. Don't be like Sarah.
The Breadcrumb Blend Secret
Here's where I get a little controversial — skip the Italian-seasoned breadcrumbs. They're usually stale and over-salted, and they taste like someone decided "Italian" means "dump in every dried herb we have." Instead, buy plain panko and regular breadcrumbs, then season them yourself. My ratio is 70% panko to 30% regular breadcrumbs. The panko gives you those big, flaky crunch pieces, while the regular breadcrumbs fill in the gaps and help everything adhere. For seasoning, keep it simple: garlic powder, onion powder, dried oregano, and a little smoked paprika for color. That's it. Anything more and you're making herbed breadcrumbs, not air fryer ravioli coating.
The real secret? Make a big batch of this seasoned breadcrumb mixture and keep it in a mason jar. It stays fresh for months, and you'll find yourself using it on everything from chicken cutlets to fish sticks. I labeled mine "Magic Dust" because that's basically what it is — a sprinkle of this stuff makes anything crispy and delicious.
Creative Twists and Variations
This recipe is a playground. Here are some of my favorite ways to switch things up when I'm feeling fancy or when I need to impress people who think I actually have my life together:
The Breakfast Ravioli
Use cheese ravioli but swap the savory coating for something sweeter — cinnamon sugar mixed with a little cornstarch for extra crunch. Serve with maple syrup for dipping and watch people's minds explode when they realize they're eating pasta for breakfast. Add some cooked bacon bits to the breadcrumb mixture if you're feeling particularly rebellious about conventional meal boundaries.
The Everything Bagel Version
Replace the breadcrumb mixture with Everything Bagel seasoning mixed with panko. The sesame seeds, poppy seeds, and dried garlic create this incredible texture and flavor that makes these taste like the best bagel you've ever had, except it's pasta and it's fried. Serve with cream cheese mixed with chives for dipping — it's weird and wonderful and people will ask you for the recipe while looking slightly confused.
The Buffalo Wing Twist
Add a tablespoon of Frank's RedHot to your egg wash, then mix some cayenne pepper into your breadcrumb coating. After cooking, toss the hot ravioli in a mixture of melted butter and more hot sauce. Serve with blue cheese dressing and celery sticks. It's like someone asked, "What if buffalo wings and ravioli had a baby?" and the answer was delicious.
The Dessert Ravioli
Fill your ravioli with something sweet — Nutella, sweetened ricotta with lemon zest, or even pumpkin pie filling. Coat in graham cracker crumbs mixed with a little sugar and cinnamon. Air fry until golden, then dust with powdered sugar. Serve warm with vanilla ice cream. It's like someone turned your favorite Italian dessert into bite-sized crispy pockets of joy.
The Loaded Potato Style
Use potato and cheese filled ravioli, then add crumbled cooked bacon and shredded cheddar to your breadcrumb mixture. After cooking, top with a dollop of sour cream and chopped chives. It's all the flavors of a loaded baked potato but in crispy pasta form. This one is dangerous — I ate an entire batch while standing at my kitchen counter, telling myself I'd just have "one more."
The Mediterranean Dream
Mix crumbled feta into your breadcrumb coating along with dried oregano and lemon zest. Use spinach and ricotta ravioli, and serve with a dipping sauce made from Greek yogurt, cucumber, garlic, and dill. It's like someone transported your favorite Greek restaurant appetizer into crispy pasta form. The lemon zest in the coating is the secret — it brightens everything and makes you feel like you're eating on a patio in Santorini instead of standing over your air fryer in your pajamas.
Storing and Bringing It Back to Life
Fridge Storage
If you somehow have leftovers (and that's a big if), let the ravioli cool completely on a wire rack, then store them in an airtight container with paper towels between layers. They'll keep for up to three days in the fridge, though honestly, they've never lasted more than 24 hours in my house. The key is making sure they're completely cool before storing — any residual heat creates steam, and steam is the enemy of crispy things. Don't stack them more than two layers deep, or the weight will crush the bottom ones into sad, flat discs.
Freezer Friendly
Here's where this recipe really shines — you can freeze them after coating but before cooking. Arrange them in a single layer on a baking sheet, freeze until solid, then transfer to a freezer bag with pieces of parchment paper between layers. They'll keep for up to two months, and you can cook them straight from frozen — just add two minutes to the cooking time. I always have a bag stashed in my freezer for emergency snack attacks or unexpected guests who think I actually plan these things.
Best Reheating Method
The air fryer works for reheating too — 350°F for 3-4 minutes brings back most of the crispy magic. The microwave is a hard pass unless you enjoy soggy disappointment. If you must use an oven, place them on a wire rack over a baking sheet at 375°F for about 8 minutes. Pro tip: give them a light spray of oil before reheating — it helps re-crisp the coating and makes them taste almost as good as fresh. Almost.