Introduction
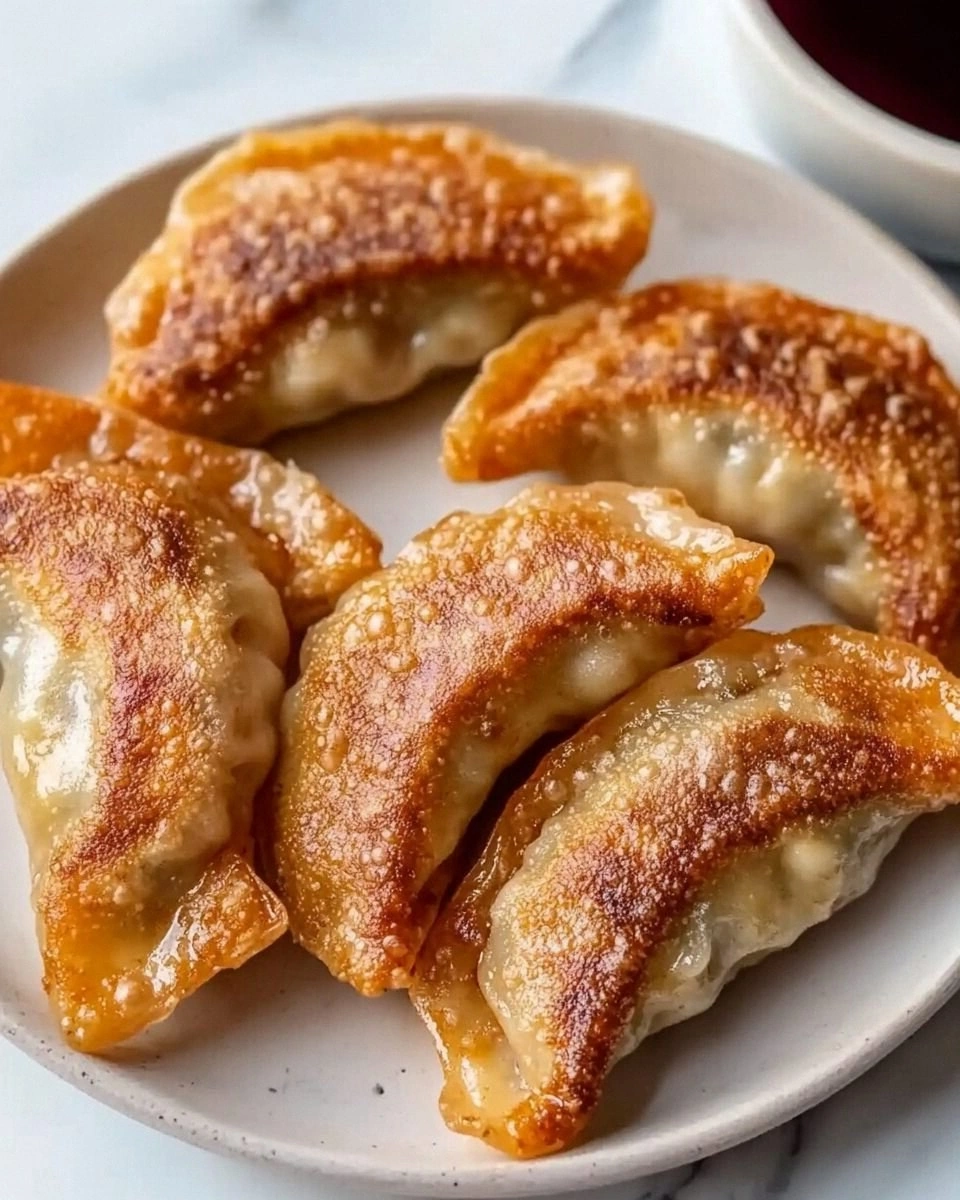
I was in a frantic rush, the kitchen a whirlwind of clattering pans and half‑finished sauces, when a friend dared me to make the best chicken potstickers in the world. I laughed, but the craving for that perfect marriage of crispy skin and savory, juicy filling had already taken hold. I set out to create a version that would make your taste buds do a happy dance and your friends beg for the recipe. I promise, this isn’t just another dumpling recipe – it’s the ultimate pan‑fried chicken potsticker experience.
Picture the scene: the skillet sizzles, a thin golden crust forms, and the steam rises like a fragrant cloud. The aroma is a blend of toasted sesame, fresh garlic, and the faint sweetness of cabbage, pulling you into a sensory vortex. Every bite delivers a crunch that shatters like thin ice, followed by a burst of tender chicken, crisp vegetables, and a subtle umami hit from soy sauce. The heat from the pan warms your hands, the sound of sizzling is music, and the sight of perfectly browned edges is a visual treat. This is the moment when cooking becomes an adventure, and the result is a dish that feels like a warm hug from a long‑lost family member.
What sets this version apart is a secret blend of techniques that elevate texture, flavor, and convenience. I’ve cracked the code to a dough that stays supple, a filling that stays moist, and a pan‑fry that locks in the golden crunch without burning. No more soggy wrappers or dry fillings – this is hands down the best version you'll ever make at home. The result is a dish that’s perfect for a quick weeknight dinner, an impressive appetizer for guests, or a comforting snack after a long day.
I’ll walk you through every single step, from the dough to the final garnish. By the end, you’ll wonder how you ever made it any other way. Let’s dive in.
What Makes This Version Stand Out
- Flavor: A delicate balance of umami, sweet, and a hint of heat that coats the potstickers like velvet, leaving a lingering savory aftertaste.
- Texture: Crispy edges that shatter like thin ice, a tender filling that melts in your mouth, and a dough that remains supple even after frying.
- Speed: The entire process takes less than an hour, making it a perfect weeknight dinner or a last‑minute party treat.
- Versatility: The recipe works with chicken or pork, and you can swap in tofu or a veggie mix for a vegetarian twist.
- Make‑ahead Friendly: The dough can be prepped a day ahead, the filling can be assembled in bulk, and the potstickers can be frozen before frying.
- Crowd‑Pleaser: Whether you’re feeding a family or entertaining friends, the golden, crisp potstickers always get rave reviews.
- Ingredient Quality: Fresh, seasonal produce, high‑grade soy sauce, and a touch of sesame oil bring depth without overpowering.
- Method Simplicity: No fancy equipment required – a skillet, a rolling pin, and a few basic kitchen staples are enough.
Alright, let's break down exactly what goes into this masterpiece…
Inside the Ingredient List
The Flavor Base
Soy sauce is the backbone of umami in this dish. It enriches the chicken with depth and balances the sweetness of the cabbage. Skipping it would leave the potstickers bland, like a plain toast. You can swap for tamari if you’re gluten‑free, but keep the saltiness in check. When buying soy sauce, look for a low‑sodium option to control the salt level in the final dish.
The Texture Crew
Napa cabbage provides a subtle crunch and a mild sweetness that contrasts the savory filling. Carrots add a pop of color and natural sweetness, while fresh ginger and garlic bring aroma and a hint of spice. If you’re short on napa, Chinese cabbage or regular cabbage can work, but the flavor profile will shift slightly. The green onions finish the filling with a fresh, oniony bite.
The Unexpected Star
The egg, lightly beaten, acts as a binder that keeps the filling cohesive during frying. It also adds a silky texture that melts into the filling. If you’re vegan, replace the egg with a splash of water or a plant‑based binder like aquafaba. The egg’s presence is subtle yet transformative.
The Final Flourish
Sesame oil and rice vinegar finish the filling with a bright, nutty flavor that cuts through the richness of the chicken. A touch of chili oil gives a subtle heat that wakes up the palate. The cornstarch in the dough keeps the wrappers from becoming soggy during frying. If you prefer a thicker dough, add a tablespoon of cornstarch to the flour mixture.
Everything's prepped? Good. Let's get into the real action…
The Method — Step by Step
Begin by mixing the flour, water, salt, and pepper in a large bowl until a sticky dough forms. The dough should be tacky but not overly wet; add a little more water if it feels dry. Knead for about five minutes, then cover with a damp cloth and let it rest for 15 minutes. This rest period hydrates the flour and makes rolling easier. The dough will be the foundation of those crisp, golden edges.
While the dough rests, prepare the filling. In a large skillet, heat the sesame oil over medium heat. Add the minced garlic and ginger, sautéing until fragrant (about 30 seconds). Then toss in the shredded chicken, cabbage, carrots, and green onions. Cook until the vegetables soften slightly, about three minutes. The goal is a moist mixture that holds together without being wet.
Add the soy sauce, rice vinegar, black pepper, and chili flakes to the skillet. Stir to combine, then remove from heat. Let the mixture cool for a few minutes so it doesn’t break the dough when you add it. This cooling step is crucial; if the filling is too hot, it will melt the wrappers during assembly.
In a separate bowl, whisk the beaten egg and then fold it into the cooled filling. The egg binds the ingredients together, preventing the potstickers from falling apart. If you’re vegan, use a tablespoon of water or a plant‑based binder instead. Mix thoroughly until the filling is uniform and slightly moist.
Roll out the rested dough on a lightly floured surface until it’s about 1/8 inch thick. Cut into 30 equal circles using a round cutter or a small glass. The circles should be uniform to ensure even cooking. If any dough tears, patch it with a small piece of dough and press gently to seal.
Place a spoonful of the filling onto the center of each wrapper. Fold the wrapper in half to create a half‑moon shape, then pinch the edges together to seal. Be sure to leave a small gap for steam to escape. The edges should be tightly sealed to prevent leakage during frying.
Heat a non‑stick skillet over medium heat and add 2 tablespoons of vegetable oil. Once the oil shimmers, arrange the potstickers in a single layer, flat side down. Do not crowd them; give each potsticker enough space to brown evenly. The skillet should be hot enough that the potstickers sizzle upon contact.
After the bottoms are golden brown, add a splash of water (about 1/4 cup) to the skillet. Cover immediately with a lid to trap steam. This steam creates the perfect environment for the potstickers to cook through. Keep the lid on for 4–5 minutes, then remove the lid and let the remaining water evaporate. The result is a crisp, golden exterior and a tender interior.
Once the water has evaporated, turn the heat to medium‑high and let the potstickers finish frying for another 1–2 minutes. The final sear gives them that coveted crunch. Remove the potstickers from the skillet and let them rest on a paper towel to absorb excess oil. Plate them immediately for the best texture.
Serve hot with a dipping sauce made of soy sauce, rice vinegar, a splash of sesame oil, and a pinch of chili flakes. The sauce coats the potstickers like velvet, enhancing every bite. Garnish with sliced green onions for a fresh finish. The aroma alone will make everyone at the table crave a second helping. I dare you to taste this and not go back for seconds.
That's it — you did it. But hold on, I've got a few more tricks that'll take this to another level…
Insider Tricks for Flawless Results
The Temperature Rule Nobody Follows
Many cooks fry their potstickers at a low temperature, resulting in soggy wrappers. The secret is a hot pan that sizzles immediately. Aim for a medium‑high heat; the skillet should emit a faint hiss when oil is added. If the oil starts smoking, reduce the heat slightly. This technique ensures a crisp exterior while keeping the interior moist.
Why Your Nose Knows Best
The aroma of garlic and ginger sizzling is a signal that the base is ready. When the smell becomes fragrant but not burnt, it’s time to add the filling. This sensory cue ensures the filling doesn’t overcook. A burnt smell means the pan is too hot and the potstickers will have a bitter edge. Trust your nose; it’s the best sous‑chef you can have.
The 5‑Minute Rest That Changes Everything
After assembling the potstickers, let them rest on a lightly floured surface for 5 minutes. This allows the dough to relax, making the wrappers easier to seal and reducing the chance of cracks. It also lets the filling chill slightly, preventing it from seeping into the dough during frying. A simple rest makes a noticeable difference in texture.
Use a Small Amount of Cornstarch in the Dough
Adding a teaspoon of cornstarch to the flour mixture gives the wrappers a slightly crispier bite. It also helps the wrappers maintain their shape during the steam phase. If you’re allergic to wheat, consider a gluten‑free blend that includes cornstarch for the same effect.
Keep the Dipping Sauce Simple
A classic dipping sauce of soy sauce, rice vinegar, sesame oil, and chili flakes is all you need. Avoid adding too much sugar; it can overpower the delicate flavors. A splash of chili oil adds heat without masking the umami. The sauce should be balanced, not sweet or overly salty.
Freeze Before Frying for Quick Prep
If you’re short on time, assemble the potstickers and freeze them flat. When you’re ready to cook, just fry them straight from the freezer; they’ll cook just as well and save you the prep time. Make sure to separate them with parchment paper to prevent sticking. This trick is perfect for busy weeknights or last‑minute gatherings.
Creative Twists and Variations
This recipe is a playground. Here are some of my favorite ways to switch things up:
Pork & Spinach Fusion
Swap the chicken for ground pork and add fresh spinach to the filling. The pork brings a richer flavor, while the spinach adds a subtle earthiness. This variation is a hit with those who love a meaty, green twist.
Vegetarian Delight
Replace the chicken with diced tofu or a mix of mushrooms and bell peppers. Keep the soy sauce for umami and add a splash of miso for depth. This version is perfect for plant‑based diners who crave a savory, satisfying bite.
Spicy Korean Bulgogi Potstickers
Marinate the chicken in bulgogi sauce before mixing with the vegetables. The sweet, spicy sauce gives the potstickers a Korean flair. Top with sesame seeds and a drizzle of gochujang for an extra kick.
Sweet & Sour Chicken Potstickers
Add diced pineapple and a splash of sweet and sour sauce to the filling. The pineapple adds a tropical sweetness that balances the savory notes. Serve with a side of lime wedges for a bright finish.
Cheese‑Stuffed Potstickers
Fold a small cube of mozzarella or cheddar into the filling before sealing the wrappers. The cheese melts into a gooey center that contrasts the crisp exterior. This indulgent twist is a crowd‑pleaser at parties.
Asian Fusion with Coconut Milk
Replace half of the water in the dough with coconut milk for a subtle tropical flavor. Add a pinch of curry powder to the filling for an aromatic twist. This variation brings a creamy, fragrant element to the classic potsticker.
Storing and Bringing It Back to Life
Fridge Storage
Store uncooked potstickers in an airtight container in the refrigerator for up to 24 hours. Keep them on a paper towel to absorb excess moisture. When ready to cook, heat a skillet over medium heat and fry as usual. The potstickers will stay fresh and crisp.
Freezer Friendly
Place assembled potstickers on a parchment‑lined tray and freeze until solid. Transfer to a freezer bag and store for up to 3 months. When you’re ready to cook, fry directly from the freezer; no thawing needed. They’ll come out golden and delicious.
Best Reheating Method
To reheat, lightly spray the potstickers with oil and pan‑fry over medium heat for 2–3 minutes. Add a splash of water, cover, and let steam for 2 minutes. This technique restores the crispy exterior and keeps the interior moist. A tiny splash of water before reheating steams the potstickers back to perfection.