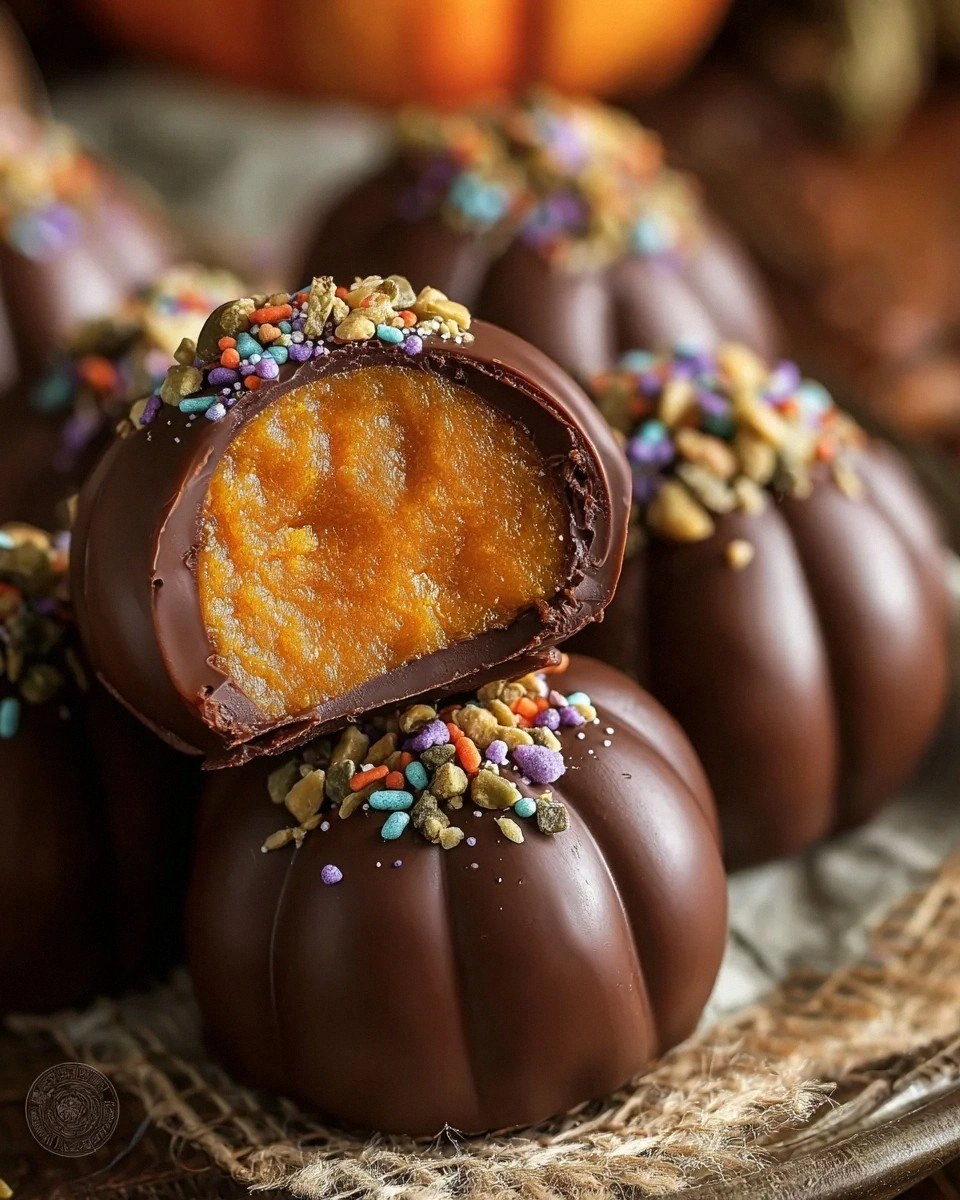
Picture this: I’m standing in my kitchen, the timer on the oven has just gone off, and I’ve realized I completely forgot the dessert for the friends‑over‑Saturday. Panic sets in, the pantry looks barren, and the only thing screaming for attention is a lone can of pumpkin puree I bought on a whim last month. I dared myself to whip up something that would satisfy the sweet tooth crowd without turning my tiny apartment into a smoke‑filled nightmare. The result? A batch of no‑bake vegan pumpkin truffles that turned my kitchen mishap into a triumph I’m still bragging about. This wasn’t just a quick fix; it was a revelation that a simple blend of pumpkin, warm spices, and silky chocolate can create a bite‑size marvel that feels indulgent yet stays guilt‑free.
The moment those truffles hit the plate, the aroma of cinnamon, nutmeg, and a whisper of ginger wrapped the room like a cozy blanket on a crisp autumn evening. I could hear the faint crackle of my friends’ forks as they dove in, see the glossy sheen of the chocolate coating catching the light, smell the subtle earthiness of pumpkin mingling with sweet maple, taste the perfect balance of creamy interior and crisp chocolate shell, and feel the satisfying “pop” as the truffle rolled between my fingertips. It was a sensory overload that made me realize I’d stumbled upon the ultimate holiday treat that could also survive a summer potluck.
What makes this version stand out from the sea of pumpkin desserts out there? Most recipes either bake the pumpkin into a cake that feels heavy, or they rely on dairy‑laden cream cheeses that sabotage the vegan vibe. This version skips the oven entirely, uses only plant‑based fats, and incorporates a secret ingredient—ground almond flour—that gives the truffles a buttery crumb without any butter. The result is a silky, melt‑in‑your‑mouth center that’s held together by the natural binding power of pumpkin and a touch of maple syrup, then dipped in velvety dark chocolate that hardens into a delicate shell. It’s like a tiny pumpkin‑spiced explosion wrapped in chocolate armor.
And here’s the kicker: I’m going to reveal a technique that most pumpkin dessert lovers overlook—lightly toasting the rolled oats before folding them in. This tiny step adds a subtle nutty depth that makes the truffles taste like they’ve been slow‑roasted in a kitchen fireplace. I dare you to taste this and not go back for seconds. Let me walk you through every single step — by the end, you’ll wonder how you ever made it any other way.
What Makes This Version Stand Out
- Flavor: The marriage of pumpkin’s natural sweetness with warm spices creates a comforting profile that rivals any pumpkin pie, while the dark chocolate coating adds a sophisticated bitterness that balances the sweetness.
- Texture: A creamy, almost mousse‑like interior meets a crisp, glossy chocolate shell, delivering a contrast that’s as satisfying as biting into a perfectly baked croissant.
- Simplicity: No oven, no fancy equipment—just a bowl, a microwave, and a handful of pantry staples. This is hands‑down the best version you’ll ever make at home.
- Uniqueness: Toasted oats and almond flour give a nutty backbone that most pumpkin desserts completely miss, making each bite feel layered and complex.
- Crowd Reaction: Even the most skeptical meat‑eaters ask for the recipe, and vegans swear it’s the only pumpkin dessert that feels truly indulgent.
- Ingredient Quality: Using 100 % pure pumpkin puree and high‑cocoa‑percentage vegan chocolate ensures no hidden sugars or dairy sneaks in.
- Method: The no‑bake approach preserves the bright pumpkin flavor that can sometimes get muted by long baking times.
- Make‑Ahead Potential: These truffles keep beautifully in the fridge for up to a week and freeze like a charm, so you can prep ahead for holiday parties.
Alright, let's break down exactly what goes into this masterpiece...
Inside the Ingredient List
The Flavor Base
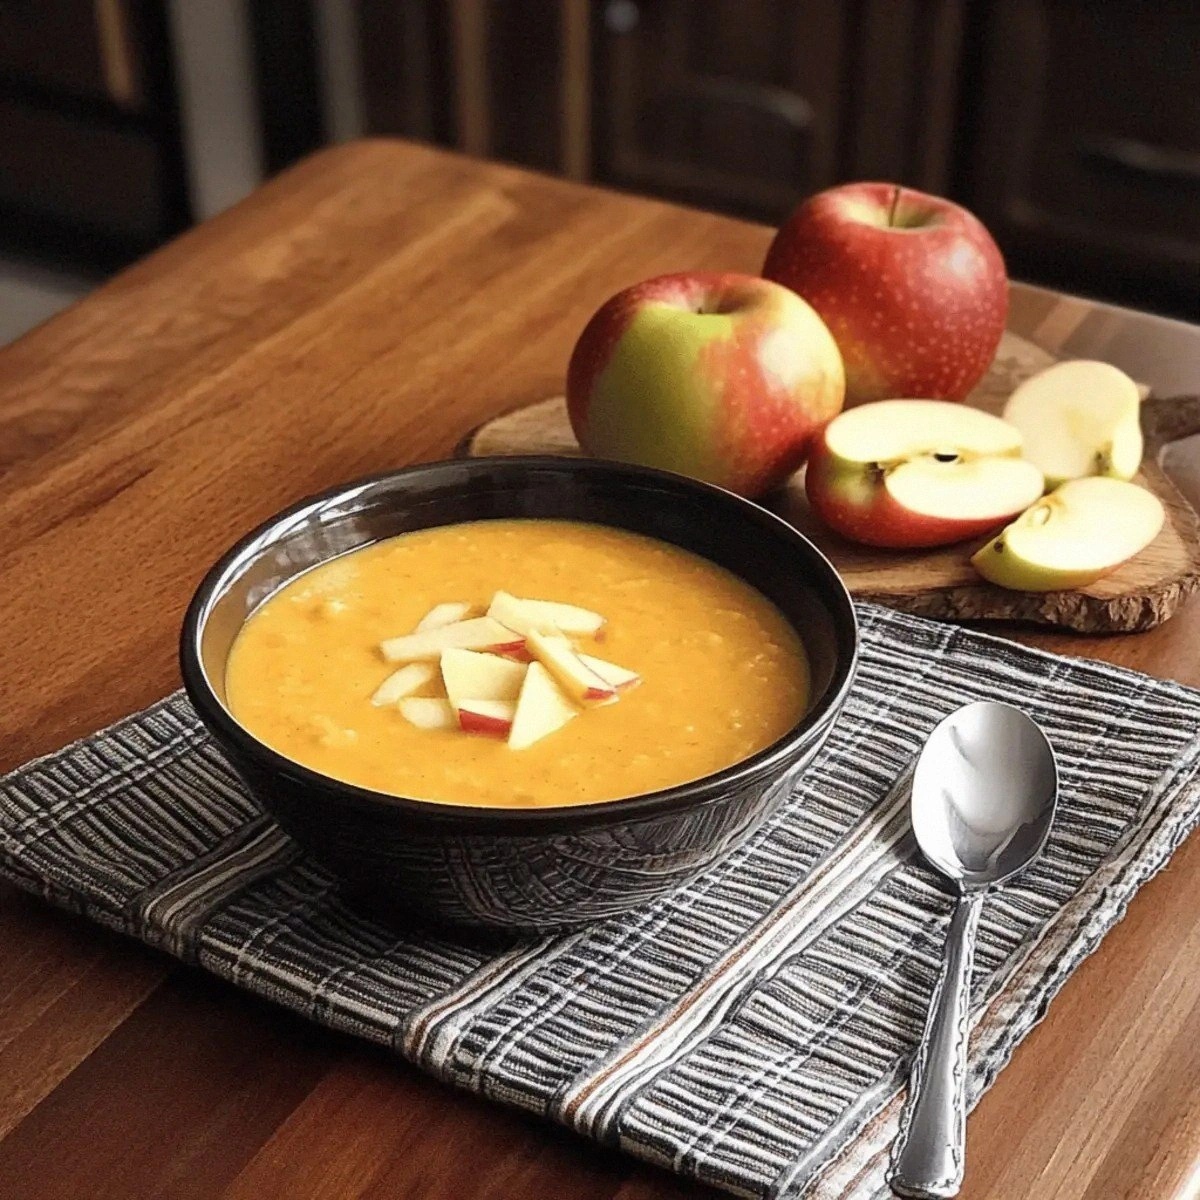
Pumpkin Puree (1 cup): This is the heart of the truffle, providing moisture, natural sweetness, and that unmistakable autumnal aroma. If you skip it, you’ll end up with a dry, crumbly mess that lacks the signature pumpkin punch. Look for a puree with no added sugars or spices for the purest flavor. Pro tip: Choose a pumpkin that’s been harvested at peak ripeness for the brightest orange hue and the richest taste.
The Texture Crew
Rolled Oats (½ cup): They act as the structural backbone, absorbing excess moisture while adding a subtle chew. Skipping them makes the truffles too soft to roll. For a gluten‑free version, swap with certified gluten‑free oats or finely ground almond meal. Buying tip: Buy oats in bulk and give them a quick pulse in a food processor if you prefer a finer texture.
Almond Flour (½ cup): This is the secret butter‑like element that gives the truffles a tender crumb without any dairy. It also adds a delicate nutty flavor that pairs beautifully with pumpkin. If you’re allergic, try sunflower seed flour, but expect a slightly different taste.
The Unexpected Star
Coconut Oil (¼ cup, melted): Provides the necessary fat to bind everything together and contributes a faint tropical note that lifts the spice blend. Using too much can make the truffles greasy, while too little leaves them crumbly. Opt for virgin coconut oil for a cleaner taste; refined oil can be used if you dislike coconut flavor.
Maple Syrup (2 tbsp): A natural sweetener that enhances the pumpkin’s sweetness without overpowering it. It also adds a subtle caramel depth. If you’re out of maple, agave nectar works, but the flavor will be milder.
The Final Flourish
Ground Cinnamon (1 tsp), Nutmeg (½ tsp), Ground Ginger (½ tsp), Salt (¼ tsp): This spice quartet is the classic pumpkin seasoning that turns a bland puree into a festive masterpiece. Adjust the ginger if you prefer a spicier kick. Salt is crucial; it amplifies all the flavors, making the truffles taste richer.
Vanilla Extract (1 tsp): Enhances the overall aroma and adds a layer of sweetness that ties the spices together. Use pure vanilla for the best results; imitation can taste flat.
Dark Vegan Chocolate Chips (½ cup): The coating that transforms the truffle into a glossy, indulgent bite. Choose at least 70 % cocoa for a robust flavor that doesn’t melt too quickly. If you like a sweeter coating, opt for 60 % cocoa, but be prepared for a softer shell.
Cocoa Powder (2 tbsp, for dusting): A light dusting adds a decorative finish and a hint of bitterness that balances the sweet interior. It’s optional but makes the truffles look bakery‑worthy.
Everything's prepped? Good. Let's get into the real action...
The Method — Step by Step
Start by gathering all your ingredients on the counter. This is the moment of truth: a clean workspace means fewer mistakes later. In a large mixing bowl, combine the pumpkin puree, melted coconut oil, maple syrup, and vanilla extract. Stir vigorously until the mixture is smooth and glossy—think of a silky pumpkin‑butter that glistens under the kitchen lights. Pro tip: Use a silicone spatula to scrape every last bit of the bowl; you don’t want any pumpkin left behind.
Now, add the toasted rolled oats, almond flour, and the spice quartet (cinnamon, nutmeg, ginger, and salt). This is where the texture really starts to form. The mixture will thicken dramatically, pulling away from the sides of the bowl. If it feels too dry, drizzle in a teaspoon of extra coconut oil; if it’s too wet, sprinkle a bit more almond flour.
Kitchen Hack: Use a hand mixer on low speed to ensure the oats are evenly distributed without over‑mixing, which can make the truffles too dense.Cover the bowl with plastic wrap and refrigerate the mixture for at least 30 minutes. This chilling step is crucial because it firms up the mixture, making it easier to roll into perfect spheres. While you wait, you can prep your chocolate coating: place the vegan chocolate chips in a microwave‑safe bowl and melt in 20‑second bursts, stirring in between until smooth. The chocolate should be glossy and fluid, not grainy. Watch Out: Overheating the chocolate can cause it to seize, turning it clumpy and unusable.
After the chilling period, remove the bowl from the fridge. With a small cookie scoop or a spoon, portion out the mixture and roll each piece between your palms to form a smooth ball about 1‑inch in diameter. This is the fun part—feel the pumpkin mixture yielding under your fingers, a little like playing with warm play‑dough. If the mixture sticks, lightly dampen your hands with a splash of water; it will glide more easily.
Place the rolled truffles onto a parchment‑lined tray. Once all are shaped, return the tray to the fridge for another 15 minutes. This second chill solidifies the interior, ensuring the truffles won’t fall apart when dipped in chocolate.
Watch Out: If you skip this second chill, the truffles will become mushy in the chocolate, resulting in a sloppy coating.While the truffles are chilling, prepare a small bowl of cocoa powder for dusting. This step is optional but adds a sophisticated finish. If you’re feeling adventurous, mix a pinch of sea salt into the cocoa for a salted chocolate twist that will make your guests gasp.
Now for the grand dip! Using a fork or a small dipping tool, submerge each chilled truffle into the melted chocolate, allowing excess to drip back into the bowl. The chocolate should coat the truffle in a thin, even layer that hardens quickly. Place the chocolate‑coated truffles back onto the parchment paper. If you want a double coating, let the first layer set for 2 minutes, then dip again.
Immediately after dipping, sprinkle a light dusting of cocoa powder over each truffle while the chocolate is still soft. This not only adds visual appeal but also introduces a subtle bitter contrast that balances the sweet pumpkin interior. Let the truffles sit at room temperature for about 10 minutes, then transfer the tray to the fridge for a final set of 20 minutes. The chocolate will firm up to a glossy shell that cracks cleanly when bitten.
Once fully set, transfer the truffles to an airtight container. Store them in the refrigerator for up to a week, or freeze for longer storage. When you’re ready to serve, let them sit at room temperature for 5 minutes so the chocolate softens just enough to melt in your mouth, but not so much that it loses its snap. And there you have it—no‑bake vegan pumpkin truffles that look as impressive as they taste.
That’s it — you did it. But hold on, I’ve got a few more tricks that’ll take this to another level. Stay with me here — this is worth it.
Insider Tricks for Flawless Results
The Temperature Rule Nobody Follows
Never dip truffles into chocolate that’s hotter than 115°F (46°C). A cooler melt ensures the coating sets with a firm snap rather than a soft, waxy finish. I once tried a rapid melt in the microwave, and the truffles turned into a sticky mess. Keep a candy thermometer handy; it’s a small investment for big payoff.
Why Your Nose Knows Best
The moment the pumpkin‑spice mixture starts to smell like a fall market, you know it’s ready. If the aroma is faint, give it another minute of stirring over low heat. Your nose is a better gauge than a timer for flavor development.
The 5‑Minute Rest That Changes Everything
After shaping the truffles, let them rest uncovered for exactly five minutes before the second chill. This short air‑dry period lets the surface dry just enough to prevent chocolate from sliding off, creating a cleaner coat.
Chocolate Tempering Shortcut
If you don’t have a tempering machine, use the “seed” method: melt two‑thirds of the chocolate, then stir in the remaining third to bring the temperature down. This trick gives you a glossy finish without a fancy tool.
Rolling the Perfect Sphere
Use a small cookie scoop (size #20) to portion the mixture. The uniform size ensures even coating and consistent bite size. I once tried eyeballing the portions, and the result was a batch of uneven, misshapen truffles that looked amateur.
Creative Twists and Variations
This recipe is a playground. Here are some of my favorite ways to switch things up:
Maple‑Pecan Crunch
Fold in ¼ cup finely chopped toasted pecans into the pumpkin mixture before chilling. The nuts add a buttery crunch that pairs beautifully with the sweet maple glaze.
Spicy Chili Chocolate
Stir a pinch of cayenne pepper into the melted chocolate for a subtle heat that awakens the palate. The heat contrasts the sweet pumpkin, creating a sophisticated flavor dance.
Coconut‑Lime Zing
Replace the vanilla extract with 1 tsp lime zest and add 2 tbsp shredded coconut to the interior mix. The citrus brightens the earthy pumpkin, making the truffles feel tropical.
White Chocolate Raspberry
Swap the dark chocolate coating for vegan white chocolate and drizzle each truffle with a raspberry coulis after the chocolate sets. The tartness of raspberry cuts through the richness, offering a fresh finish.
Mocha Madness
Mix 1 tsp instant espresso powder into the chocolate melt. The coffee notes deepen the chocolate flavor and give the truffles an adult‑only vibe.
Gluten‑Free Version
Use certified gluten‑free rolled oats and replace almond flour with oat flour. The texture stays just as luscious, and you won’t miss the gluten at all.
Storing and Bringing It Back to Life
Fridge Storage
Place the truffles in a single layer inside an airtight container. They’ll stay fresh for up to 7 days. If you stack them, separate layers with parchment paper to prevent sticking.
Freezer Friendly
Freeze the truffles on a parchment sheet, then transfer them to a zip‑top bag. They’ll keep for up to 3 months. Thaw in the fridge overnight before serving.
Best Reheating Method
When you’re ready to serve, let the truffles sit at room temperature for 5 minutes, then give them a quick 10‑second zap in the microwave on low power. Add a tiny splash of water to the bowl before microwaving; the steam revives the chocolate’s shine and the interior’s softness.