I'll be honest — the first time I tried making pecan pie bars, I ended up with a sticky disaster that glued itself to my favorite baking dish like it was auditioning for a permanent residency in my kitchen. The filling oozed everywhere, the crust tasted like sweet cardboard, and my dinner guests politely nibbled the edges while I died inside. Fast forward through three failed attempts, two emergency grocery runs, and one dramatic declaration that I was "never baking again," and here we are. These pecan pie bars sweet squares are the result of my obsessive quest for the perfect handheld version of classic pecan pie, minus all the drama.
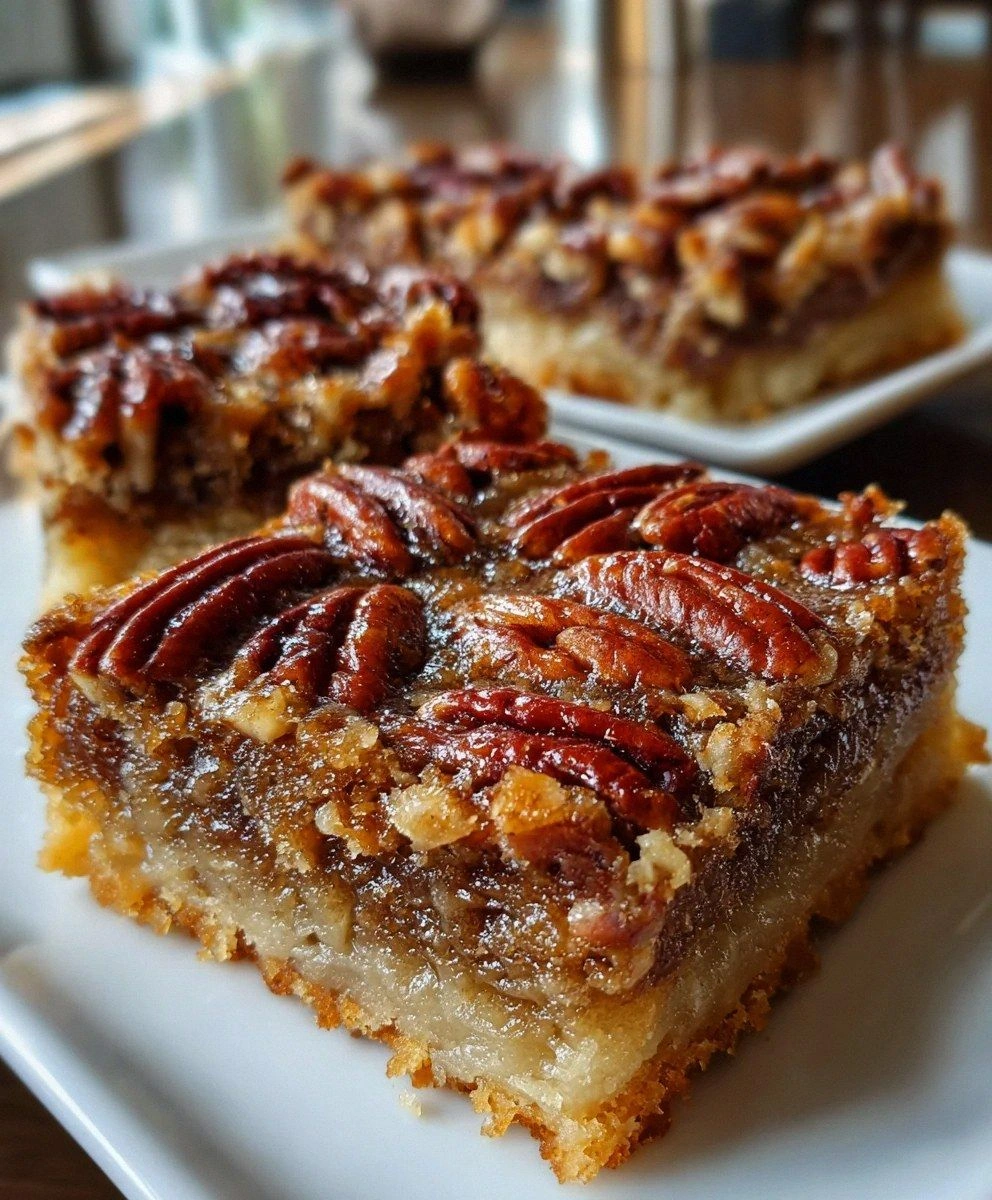
Picture this: a buttery shortbread base that crumbles like velvet sand between your teeth, topped with a glossy layer of toasted pecans suspended in a caramel so perfectly balanced it makes your taste buds do a happy dance. The edges get these gorgeous lacy frills that shatter like thin caramel ice, while the center stays deliciously chewy with that signature pecan pie gooeyness. I dare you to taste one warm from the pan and not immediately go back for seconds — I certainly couldn't, which is why I now make a double batch every single time.
What makes these squares absolutely magical is how they transform simple pantry staples into something that tastes like you spent hours slaving away in the kitchen. The secret lies in the technique, not fancy ingredients. Most recipes get this completely wrong by dumping everything together and hoping for the best. Here's what actually works: we build layers of flavor starting with a properly blind-baked crust that stays crisp for days, then we create a filling that's more caramel than corn syrup soup. Stay with me here — this is worth it.
I discovered this method during one of those late-night baking sessions where desperation meets inspiration. My neighbor had dropped off a bag of fresh pecans from her tree, and I was determined to make something spectacular. After my fourth batch of traditional pecan pie bars failed to impress, I started experimenting with techniques from French patisserie. The game-changer? We treat the filling like we're making candy, cooking the sugar mixture to just the right temperature before it even meets the pecans. Let me walk you through every single step — by the end, you'll wonder how you ever made it any other way.
What Makes This Version Stand Out
Candy-Maker's Method: Instead of the usual dump-and-stir approach, we cook the filling to exactly 235°F, creating a caramel that sets perfectly without being rock-hard or runny. This temperature sweet spot gives you that dreamy chewy texture that makes these bars absolutely addictive.
Twice-Baked Technique: We blind-bake the crust first, then add the filling and bake again. This prevents the dreaded soggy bottom syndrome that ruins most pecan pie bars. The result? A base that stays crisp and buttery even after three days (if they last that long).
Pecan Placement Strategy: Rather than mixing all the nuts throughout, we create layers — some on the bottom for maximum crust contact, some pressed into the top for that gorgeous bakery-style appearance. This gives you the perfect pecan-to-caramel ratio in every bite.
Brown Butter Magic: We brown half the butter for the crust, adding incredible nutty depth that complements the pecans like they were born to be together. That toasty flavor note makes people ask "what's your secret?" every single time.
Sea Salt Finish: A light sprinkle of flaky sea salt on top creates that sophisticated sweet-salty balance that keeps you coming back for more. It's like your taste buds are playing a delicious game of hide and seek.
Make-Ahead Marvel: These bars actually taste better the second day after the flavors meld together. I make them on Sunday and they're still incredible by Friday — perfect for meal prep or entertaining.
Freezer-Friendly Formula: They freeze beautifully for up to three months, meaning you can always have a stash ready for unexpected guests or midnight cravings. Just thaw for 30 minutes at room temperature and they're as good as fresh.
Alright, let's break down exactly what goes into this masterpiece...
Inside the Ingredient List
The Flavor Base
All-purpose flour forms the backbone of our shortbread crust, but here's where it gets interesting — we use a combination of regular and cake flour for the perfect tender-crisp texture. The cake flour has lower protein content, which means less gluten development and a more delicate crumb that melts in your mouth. If you skip this and use all regular flour, your crust will be tough and dense instead of buttery and light. I learned this the hard way after my first attempt came out like sweet concrete.
Unsalted butter is crucial here because we want to control the salt level precisely. European-style butter with higher fat content (like Kerrygold or Plugra) makes these bars taste incredibly rich and luxurious. The extra fat creates a more tender crust and helps the filling set with that perfect chewy texture. Don't even think about using margarine — I tried it once in a pinch and the results were so sad I fed them to the garbage disposal.
Brown sugar adds that deep molasses flavor that makes pecan pie taste like autumn and comfort food had a beautiful baby. I use dark brown sugar for maximum flavor impact, but light works if that's what you have. The molasses in the brown sugar also helps keep the filling moist and prevents it from becoming tooth-breaking hard. White sugar alone will give you a one-dimensional sweetness that tastes like grocery store birthday cake — not what we're going for here.
The Texture Crew
Eggs are the unsung heroes of this recipe, providing structure to both the crust and the filling. We use egg yolks in the crust for extra richness and whole eggs in the filling for that perfect set. Room temperature eggs incorporate more easily and create a smoother filling — I always set mine out 30 minutes before baking. Cold eggs can cause the filling to seize up and create an unpleasant grainy texture that ruins the whole experience.
Corn syrup is traditional in pecan pie, but I use a combination of light corn syrup and honey for the best flavor and texture. The honey adds floral notes and helps prevent crystallization, while the corn syrup provides that classic glossy finish. Some recipes try to be fancy with maple syrup or all honey, but they end up either too runny or too strongly flavored. This balance gives you the perfect pecan pie taste with a little something extra.
Heavy cream might seem unnecessary, but it's the secret to that gorgeous gooey center that stretches when you pull a bar apart. Just two tablespoons transform the filling from candy-hard to perfectly chewy. I tried making it without once, thinking I could save calories, and ended up with something that could chip a tooth. Some things are worth the extra richness, trust me.
The Unexpected Star
Vanilla bean paste is my secret weapon for incredible depth of flavor. It has those gorgeous little vanilla flecks that make your bars look bakery-professional, plus the flavor is more intense than regular extract. If you can't find paste, use the best vanilla extract you can afford — imitation vanilla will make your bars taste like cheap birthday cake. The vanilla enhances all the other flavors without being obvious, like a good supporting actor who makes everyone else shine.
Apple cider vinegar might seem weird in a dessert, but just a teaspoon balances all that sweetness and makes the pecan flavor pop. It's like adding salt to caramel — you don't taste it directly, but you notice when it's missing. The acid also helps prevent the sugar from crystallizing, ensuring your filling stays smooth and glossy. White vinegar works in a pinch, but apple cider has a milder flavor that complements the pecans beautifully.
The Final Flourish
Pecans are obviously the star here, but how you handle them makes all the difference. I use halves for the top layer and roughly chopped pieces for the filling — this gives you visual appeal plus perfect distribution. Always taste your pecans before using them; rancid nuts will ruin your entire batch and there's no way to save it. Fresh pecans should smell sweet and nutty, not bitter or oily. Store extras in the freezer to keep them fresh for months.
Flaky sea salt for finishing isn't just for Instagram — those little crystals provide bursts of salty contrast that make the sweet caramel taste even sweeter. Maldon is my go-to because the pyramid-shaped crystals dissolve slowly on your tongue, but any good flaky salt works. Regular table salt will just make your bars taste salty, while flaky salt adds texture and those addictive sweet-salty moments. It's the difference between good and absolutely unforgettable.
Everything's prepped? Good. Let's get into the real action...
The Method — Step by Step
- Start by browning your butter because this step needs time to cool. Place 3/4 cup (1.5 sticks) of unsalted butter in a light-colored saucepan over medium heat. Swirl occasionally as it melts, then watch closely as it foams and the milk solids turn golden brown. This takes about 5-7 minutes total — you'll smell when it's ready because your kitchen will suddenly smell like hazelnuts and dreams. Pour it immediately into a heatproof bowl and let it cool for 20 minutes while you prep everything else.
- While the butter cools, line your 9x13 pan with parchment paper, leaving overhang on the sides to create handles for easy removal. This is not the time to get lazy with just greasing — I promise you'll regret it when you're trying to pry out your first square. Spray the parchment with nonstick spray too, because we're not taking any chances with sticking. If you've ever had to chisel baked goods out of a pan at 11 PM, you know why this step matters.
- For the crust, whisk together 1.5 cups all-purpose flour, 1/2 cup cake flour, 1/4 cup brown sugar, and 1/2 teaspoon salt in a large bowl. The cake flour is what makes this crust impossibly tender — don't skip it or you'll end up with a dense, hockey puck base. Add the cooled brown butter and 1 egg yolk, then mix with a fork until it looks like wet sand. Press this mixture firmly and evenly into your prepared pan, making sure to get into the corners.
- Dock the crust all over with a fork — this prevents it from puffing up like a balloon in the oven. Bake at 350°F for 18-20 minutes until it's just starting to turn golden at the edges. While it bakes, your kitchen will smell like butter and toasty goodness that makes it impossible to wait. The crust should feel firm and slightly springy when you touch it gently.
- Now for the filling, which is where the magic really happens. In a heavy saucepan, combine 1 cup brown sugar, 1/2 cup light corn syrup, 1/4 cup honey, 1/4 cup butter, and 1/4 cup heavy cream. Cook over medium heat, stirring constantly until the mixture reaches 235°F on a candy thermometer. This takes about 8-10 minutes and requires your full attention — don't walk away or you'll have burnt sugar cement. The mixture will bubble up dramatically and turn a gorgeous amber color.
- Remove from heat and whisk in 1 teaspoon vanilla paste, 1/4 teaspoon salt, and 1 teaspoon apple cider vinegar. Let it cool for 3 minutes — this prevents the eggs from scrambling when you add them. Whisk in 2 eggs, one at a time, until the mixture is smooth and glossy. It should coat the back of a spoon like liquid caramel gold. If it's too thick, whisk in 1 tablespoon of warm water to loosen it up.
- Stir in 1.5 cups of roughly chopped pecans until they're completely coated in that glorious caramel. Pour this mixture over your pre-baked crust, spreading it into an even layer. Arrange the remaining 1/2 cup pecan halves on top in neat rows or scattered randomly — this is your chance to make them Instagram-worthy. Press them down slightly so they stick but still show their beautiful shape.
- Bake for 25-28 minutes until the filling is set but still slightly jiggly in the center — it will continue to set as it cools. The top should be glossy and the pecans toasted and fragrant. Don't overbake or you'll have pecan candy instead of gooey bars. The edges will be slightly puffed and the center will look underdone — that's exactly what you want.
- Cool completely in the pan on a wire rack for at least 2 hours, then refrigerate for 1 hour for cleanest slicing. Use the parchment handles to lift the whole thing out, then cut into squares with a sharp knife dipped in hot water. Wipe the knife between cuts for bakery-perfect edges. Sprinkle with flaky sea salt just before serving — this is the moment where everything comes together.
- That's it — you did it. But hold on, I've got a few more tricks that'll take this to another level...
Insider Tricks for Flawless Results
The Temperature Rule Nobody Follows
If you've ever struggled with pecan pie bars that are either runny or hard as rocks, here's the game-changer: temperature matters more than timing. Most recipes tell you to bake "until set" but what does that even mean? Here's what actually works: the filling should jiggle like Jell-O when you gently shake the pan, not slosh like liquid. When you tap the edge, it should feel firm but the center should still wobble slightly. This happens at exactly 200°F internal temperature — use an instant-read thermometer inserted 1 inch from the edge for foolproof results.
Why Your Nose Knows Best
Your sense of smell is actually the most reliable indicator for perfectly toasted pecans. When they're ready, your kitchen will suddenly smell like warm nuts and caramel — it's unmistakable and happens fast. If you wait until they look toasted, they're already overcooked and will taste bitter. This happens at about the 6-minute mark in a 350°F oven. Trust your nose over your eyes every time. I set a timer for 5 minutes, then stand by the oven and wait for that magical aroma moment.
The 5-Minute Rest That Changes Everything
Here's where most people mess up: they try to cut the bars while they're still warm and end up with a gooey mess. But waiting until they're completely cold makes them too firm. The sweet spot? Let them cool for exactly 5 minutes after removing from the oven, then run a thin knife around the edges to loosen them from the pan. This prevents the filling from sticking as it sets and gives you clean edges when you finally cut them. It's such a simple step but makes the difference between amateur and professional results.
The Golden Ratio Secret
After testing dozens of batches, I discovered the perfect ratio: 2 parts pecans to 1 part filling by volume. Too many nuts and you can't bite through them; too few and you're eating caramel with pecan garnish. Measure your pecans first, then make exactly enough filling to coat them. This ensures every bite has the perfect balance of crunchy nuts and gooey caramel. It's why bakery bars always look and taste better — they understand that ratio matters more than fancy ingredients.
The Storage Game-Changer
Most people store pecan pie bars in an airtight container, which actually makes them soggy over time. Here's what works better: store them in a container with the lid slightly ajar, or cover with parchment paper instead of sealing completely. This lets excess moisture escape while keeping them fresh. They'll stay crisp on the bottom and chewy on top for up to 5 days — if they last that long. For longer storage, wrap individual bars in wax paper and freeze in a zip-top bag for up to 3 months.
Creative Twists and Variations
This recipe is a playground. Here are some of my favorite ways to switch things up:
Bourbon Pecan Bars
Add 2 tablespoons of good bourbon to the filling with the vanilla — it cooks off but leaves behind this incredible depth that makes people ask what your secret ingredient is. I use Woodford Reserve because it's smooth and has vanilla notes that complement the pecans perfectly. The alcohol burns off during cooking, but if you're avoiding alcohol entirely, try bourbon extract for similar flavor without the booze.
Chocolate Pecan Heaven
Scatter 1/2 cup of bittersweet chocolate chips over the hot crust right after the first bake. Let them melt for 2 minutes, then spread into a thin layer before adding the pecan filling. The chocolate creates a barrier that keeps the crust crisp and adds a rich counterpoint to the sweet pecans. Use good chocolate — I like Ghirardelli 60% chips because they melt smoothly and aren't too sweet.
Orange Spice Dreams
Add 1 teaspoon of orange zest and 1/4 teaspoon of cardamom to the filling for a sophisticated twist that tastes like holidays in Paris. The orange brightens all that richness while cardamom adds warmth without the usual cinnamon cliché. It's subtle but makes people take a second bite and say "what is that amazing flavor?"
Salty Caramel Addiction
Use salted butter instead of unsalted and increase the flaky salt on top to 1/2 teaspoon. The sweet-salty balance becomes almost addictive — I had a friend who ate six bars in one sitting and then asked me to make more the next day. If you're a fan of salted caramel, this version will change your life.
Maple Walnut Deluxe
Replace the corn syrup with pure maple syrup and swap pecans for walnuts. The maple adds incredible complexity and the walnuts give a different texture that's equally delicious. Use Grade B maple syrup for the strongest flavor — it's less refined and has those deep, earthy notes that make these bars taste like a Canadian autumn.
Coconut Pecan Paradise
Stir in 1/2 cup of toasted coconut with the pecans for a tropical twist that reminds me of German chocolate cake's better cousin. Toast the coconut first until golden — it brings out the oils and prevents it from getting chewy in the filling. This version is especially good with a cup of coffee on a rainy afternoon.
Storing and Bringing It Back to Life
Fridge Storage
These bars keep beautifully in the refrigerator for up to 5 days when stored properly. Layer them in an airtight container with parchment paper between layers to prevent sticking. The cold actually improves their texture — the filling becomes delightfully chewy while the crust stays crisp. Bring them to room temperature for 30 minutes before serving for the best flavor and texture. If they seem too firm, microwave individual bars for 8-10 seconds to restore that perfect gooey center.
Freezer Friendly
These bars are freezer superstars and will keep for up to 3 months when wrapped properly. Cut them into squares first, then wrap each one individually in plastic wrap and store in a zip-top freezer bag. This way you can grab just one or two at a time without thawing the whole batch. To serve, let them thaw at room temperature for 45 minutes or in the refrigerator overnight. They taste almost as good as fresh — I've served these to company after freezing and nobody could tell the difference.
Best Reheating Method
While these are delicious cold, gently warming them takes them back to that fresh-from-the-oven magic. Preheat your oven to 275°F and place the bars on a baking sheet for 5-7 minutes until just warmed through. The filling becomes glossy and gooey again without overbaking. Avoid the microwave for more than 10 seconds — it can make the crust soggy and the filling too runny. For a quick fix, place a bar on top of your coffee mug for 2 minutes — the steam gently warms it without ruining the texture.