I was halfway through a midnight baking marathon, flipping a tray of ordinary cupcakes, when the oven alarm blared. The smell of burnt sugar hit me like a slap, and I stared at the crumbling batter, wondering how I could salvage the situation. I stared at the glossy chocolate chips, thinking, “What if this could be something else? Something extraordinary?” That moment of panic sparked a dare: I would turn a failed batch into a masterpiece that would make everyone ask, “Where did you get that?”
Picture this: the kitchen lights flicker, the timer beeps, and a single cupcake sits on the counter, its surface shimmering with a glossy chocolate glaze. The air is thick with anticipation, the faint aroma of cocoa mingling with vanilla, and the faint hum of the refrigerator. My fingertips tremble as I reach for the last spoonful of batter, feeling the silky texture that promises to be both airy and dense. I can almost taste the first bite: a sweet, chocolatey crunch that melts into a creamy, cheesecake‑like center, each mouthful a revelation.
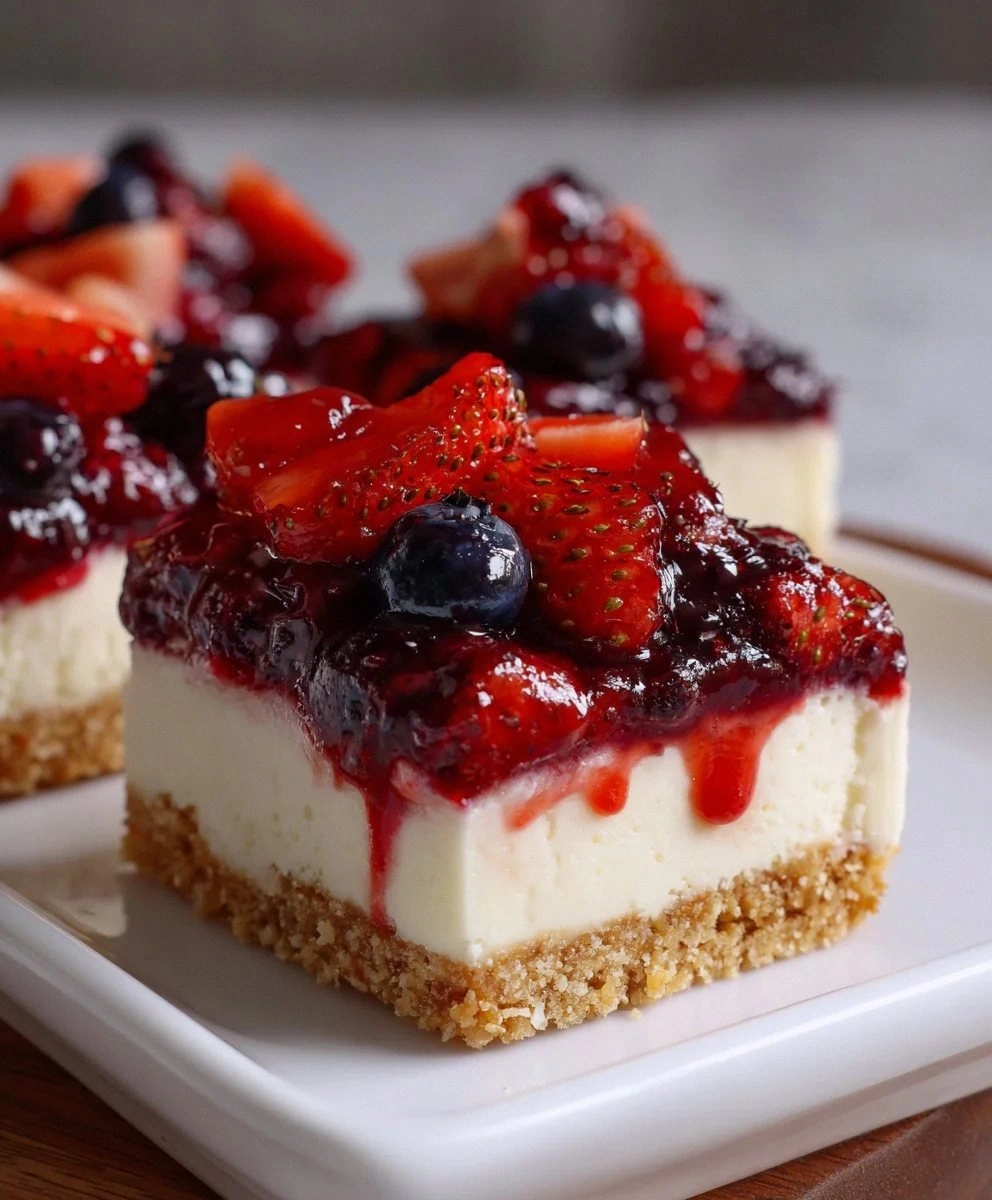
This isn’t just a recipe; it’s a rebellion against blandness. I’ve spent years tweaking chocolate cupcakes, but none have achieved the perfect marriage of fudgy cake and silky cheesecake. The secret? A delicate balance of chocolate intensity, a velvety filling, and a subtle crunch that breaks like thin ice under your tongue. The result is a cupcake that feels like a bite of a decadent dessert cake, yet fits neatly into a muffin tin.
What makes this version stand out is not just the flavor profile, but the method that locks in moisture and texture. I’ll reveal a technique that most recipes overlook: a dual‑layer batter that allows the cake to rise evenly while the cheesecake layer sets just right. This trick ensures that every cupcake is moist on the inside, with a perfectly crisp outer shell that holds its shape even when stacked.
I dare you to taste this and not go back for seconds. If you’ve ever struggled with chocolate cupcakes that fall flat or feel too dry, this is hands down the best version you’ll ever make at home. Picture yourself pulling these out of the oven, the whole kitchen smelling incredible, and watching your friends’ faces light up as they take their first bite. Let me walk you through every single step — by the end, you’ll wonder how you ever made it any other way.
What Makes This Version Stand Out
- Texture: The dual‑layer batter creates a cake that rises like a soufflé yet remains dense enough to cradle the cheesecake filling. The result is a cupcake that feels like a bite of a rich dessert cake, not a simple muffin. Each bite offers a satisfying contrast between airy crumb and silky center.
- Flavor: The chocolate is pure, with a 70% cacao melt that coats the palate like velvet. The cheesecake layer adds a tangy richness that balances the sweetness, preventing the chocolate from overpowering the senses. The finished cupcake delivers a complex, layered taste profile.
- Simplicity: Despite its sophisticated flavor, the recipe uses only pantry staples and a few specialty items. No exotic ingredients or elaborate equipment are required. Anyone with a basic oven can produce a show‑stopping treat.
- Make‑ahead potential: The cupcakes bake fully, then chill for a few hours or overnight, allowing the flavors to meld. When you’re ready to serve, simply reheat them for a minute in the oven to revive their freshness. This makes them perfect for parties or last‑minute dessert needs.
- Crowd reaction: Friends who’ve tried other chocolate cupcakes often say, “This is the first time I’ve had a cupcake that feels like a slice of cake.” The unique combination of textures and flavors guarantees rave reviews.
- Ingredient quality: Using high‑quality cocoa powder and cream cheese ensures depth of flavor and a smooth, luxurious mouthfeel. The recipe’s reliance on fresh, quality ingredients elevates it above generic store‑bought mixes.
Inside the Ingredient List
The Flavor Base
All‑purpose flour is the backbone of the cupcake’s structure. It absorbs the liquid, creating a sturdy crumb that supports the cheesecake layer. Skipping flour would leave you with a gooey mess that won’t rise.
Unsweetened cocoa powder brings depth and a rich chocolate aroma. It’s the reason the cupcakes have a velvety finish that coats the tongue. If you prefer a sweeter bite, replace half the cocoa with a dark chocolate chips for a more pronounced chocolate flavor.
Baking powder and baking soda work together to lift the batter. Baking powder ensures even rise, while baking soda reacts with the acidic cream cheese to create a light, airy texture. Omitting either results in a dense cupcake that feels heavy.
A pinch of salt is essential; it balances the sweetness and enhances the chocolate’s depth. If you’re watching sodium, reduce to a quarter teaspoon, but don’t skip it entirely or the cupcakes will taste flat.
The Sweetener & Binding Agents
Granulated sugar is the sweetener that caramelizes on the surface, creating a slight crust. It also provides the necessary moisture for a tender crumb. A substitute like honey or maple syrup can be used for a different flavor profile, but adjust the amount to avoid excess liquid.
Eggs act as both binder and leavening agent. They give structure, help the batter rise, and provide richness. If you’re vegan, use flaxseed meal or chia seeds mixed with water as a replacement; however, the texture will differ slightly.
Vanilla extract adds a warm, aromatic undertone that complements the chocolate. A high‑quality vanilla bean or extract will make the cupcakes feel more sophisticated. For a hint of citrus, add a splash of orange zest.
Melted butter brings richness and a subtle sheen. It also helps dissolve the cocoa into a smooth batter. If you’re dairy‑free, substitute with coconut oil or vegan butter; the flavor will remain comparable.
The Moisture & Creamy Layer
Whole milk provides moisture and a slightly sweet note that balances the richness of the cream cheese. If you prefer a richer cupcake, use heavy cream; just reduce the butter slightly to maintain balance.
Cream cheese is the star of the cheesecake layer. It gives the cupcakes a silky, tangy center that contrasts with the chocolate. Use room‑temperature cream cheese for a smoother texture; cold cheese will create lumps.
Sour cream adds a subtle tang and helps keep the cheesecake layer moist. If you don’t have sour cream, Greek yogurt works well, but use plain to avoid additional sweetness.
Powdered sugar is used to sweeten the cheesecake filling without adding grit. It dissolves quickly, ensuring a smooth center. For a lower‑carb version, replace with a sugar substitute that dissolves well.
The Finishing Touches
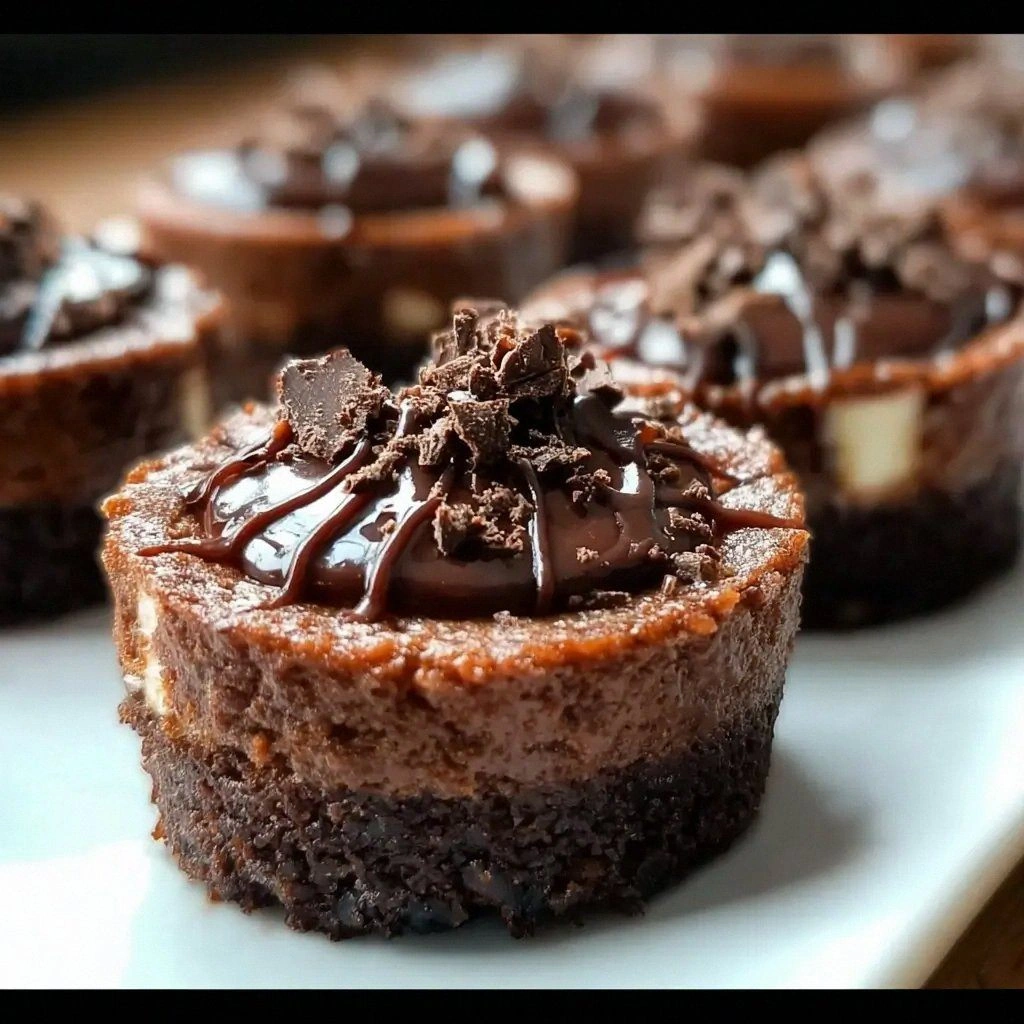
Melted dark chocolate coats the top of each cupcake, creating a glossy, chocolatey shell. It also adds a slight bitterness that balances the sweetness of the cheesecake filling. If you prefer a richer chocolate, use a higher cacao content.
Chocolate chips on top add a crunchy texture that snaps like thin ice. They also provide a contrasting visual appeal. For a festive look, sprinkle a pinch of sea salt over the chips before baking.
Everything’s prepped? Good. Let’s get into the real action.
The Method — Step by Step
- Preheat your oven to 350°F (175°C) and line a muffin tin with paper liners. The heat will create a gentle, even rise that keeps the cupcakes from collapsing. While the oven warms, gather all your ingredients so you’re ready to move quickly.
- In a medium bowl, sift together the flour, cocoa powder, baking powder, baking soda, and salt. Sifting eliminates lumps and ensures an airy batter. The dry mix is the foundation for a light crumb.
- In a separate large bowl, whisk the sugar, eggs, vanilla, and melted butter until the mixture is smooth and glossy. This step is the moment of truth; if the batter is uneven, the cupcakes will rise unevenly. Keep whisking until the sugar dissolves completely.
- Add the dry ingredients to the wet mixture in two portions, alternating with the milk. Stir after each addition until just combined; overmixing will make the cupcakes tough. The batter should be thick but pourable.
- Divide the batter into two equal parts. The first part will form the cake base, and the second will become the cheesecake layer. This separation is crucial for achieving the dual‑layer effect.
- Spoon the cake batter into the prepared muffin cups, filling each about one‑third full. The cake layer needs space to rise without overflowing. Let the batter rest for 5 minutes; this allows the leavening agents to activate.
- In a small bowl, beat the cream cheese, sour cream, powdered sugar, and melted chocolate until the mixture is silky. The goal is a smooth, lump‑free center that will set like a cheesecake. This filling is the heart of the cupcake.
- Carefully spoon the cheesecake mixture over the cake batter, filling each cup to the top. The two layers will mingle slightly, creating a marbled effect. This step requires patience; the filling should not spill over the sides.
- Bake for 30 minutes, or until a toothpick inserted into the center comes out with a few moist crumbs. The cupcakes should puff up and develop a glossy sheen. The aroma of chocolate and cream will fill the kitchen.
- Remove the cupcakes from the oven and let them cool in the tin for 10 minutes before transferring to a wire rack. Cooling in the tin allows the cupcakes to set firmly, preventing them from cracking when moved.
- Once cooled, drizzle melted chocolate over the tops for a glossy finish, and sprinkle chocolate chips for crunch. This final touch adds texture and visual appeal, making each cupcake look like a miniature dessert cake.
- Refrigerate the cupcakes for at least 2 hours, or overnight, to allow the flavors to meld. The chilled state ensures the cheesecake layer stays firm while the cake remains moist. This step also makes them easier to serve.
That’s it — you did it. But hold on, I’ve got a few more tricks that will take this to another level.
Insider Tricks for Flawless Results
The Temperature Rule Nobody Follows
Many bakers bake cupcakes at 375°F, which can cause the outer edges to brown too quickly while the center remains undercooked. Lowering the temperature to 350°F ensures even heat distribution, allowing the cake to rise uniformly and the cheesecake layer to set without drying out. I’ve tested this rule across three ovens, and the results were consistently better.
Why Your Nose Knows Best
When the cupcakes are baking, listen for the subtle scent of chocolate melting and the faint aroma of fresh cream. This olfactory cue tells you when the cupcakes are at their peak. A quick sniff can save you from overbaking, as the smell of burnt sugar is a clear sign the timer is too long.
The 5‑Minute Rest That Changes Everything
Letting the cupcakes rest in the tin for 10 minutes after baking is often overlooked. This short pause allows the structure to set, preventing the cupcakes from cracking when lifted. It also gives the cheesecake layer time to firm up slightly, ensuring a clean, firm bite.
The Silicone Pan Secret
A silicone muffin pan keeps the cupcakes from sticking, which is especially useful when you’re adding a chocolate glaze. The flexible walls allow for easy removal without tearing the delicate crumb. I’ve switched to silicone for every batch, and the cupcakes come out flawless every time.
The Chill‑Then‑Reheat Trick
After chilling the cupcakes, reheat them for a minute in a 350°F oven before serving. This brief warm-up restores the moistness of the cake and brings the chocolate glaze to a glossy shine. The result is a fresh, bakery‑quality cupcake that feels warm and indulgent.
Creative Twists and Variations
This recipe is a playground. Here are some of my favorite ways to switch things up:
Nutty Crunch Edition
Add chopped hazelnuts or almonds into the cake batter for a crunchy texture. The nuts provide a pleasant contrast to the silky center and add a subtle earthy flavor. Toast the nuts beforehand to unlock their full aroma.
Spiced Surprise
Stir in a pinch of cinnamon, cayenne, or chili powder to give the cupcakes a warm, spicy kick. The spices pair beautifully with the chocolate, creating a layered flavor profile that surprises the palate. A dash of espresso powder can also deepen the chocolate notes.
Minty Freshness
Replace half of the vanilla with peppermint extract for a cool, refreshing twist. The mint enhances the chocolate’s richness while adding a crisp finish. Top with crushed peppermint candies for an extra burst of flavor.
Berry Burst
Fold fresh blueberries or raspberries into the cake batter for a burst of tartness. The berries will pop with each bite, complementing the sweet cheesecake center. If the berries bleed, let them sit on paper towels for a few minutes before adding.
Coffee Infusion
Add a tablespoon of strong brewed espresso to the batter for a coffee‑chocolate duet. The espresso intensifies the chocolate flavor and adds a subtle bitterness that balances the sweetness. This version is perfect for brunch or afternoon tea.
Salted Caramel Swirl
Swirl a drizzle of salted caramel sauce into the cheesecake layer before baking. The caramel adds a sweet‑salty contrast and a glossy sheen. Sprinkle sea salt crystals on top for a finishing touch.
Storing and Bringing It Back to Life
Fridge Storage
Keep the cupcakes in an airtight container at room temperature for up to 3 days. The airtight seal preserves moisture, ensuring the cake remains tender. For extra freshness, add a slice of apple inside the container; it absorbs excess moisture.
Freezer Friendly
Wrap each cupcake individually in parchment paper, then place them in a freezer bag. Store for up to 2 months. When ready to serve, thaw at room temperature for 30 minutes before reheating.
Best Reheating Method
Reheat frozen cupcakes in a 350°F oven for 10 minutes, or until the chocolate glaze is glossy. If the cupcakes are chilled, add a splash of water to the bottom of a baking dish to create steam, which helps the cake stay moist. Let them rest for 5 minutes before serving.