Picture this: it’s a rainy Saturday, the kind that makes you want to crawl under a blanket with a steaming mug and something sweet that feels like a hug from the inside. I was halfway through a marathon of “just one more episode” when a sudden craving for something that tasted like a caramel‑kissed childhood memory hit me like a bolt of lightning. I raided the pantry, found a lonely stick of butter, a bag of brown sugar, and a half‑empty jar of vanilla, and thought, “What if I turned those into the ultimate pop‑tart‑inspired cookie?” That moment of reckless inspiration turned into the most addictive batch I’ve ever made, and I’m still hearing the faint echo of the timer in my mind.
The kitchen instantly transformed into a symphony of senses. The butter softened on the counter, glistening like melted gold, while the brown sugar released a deep, molasses‑rich perfume that made my nose do a little dance. As I whisked the flour and cinnamon together, the air filled with a warm, spicy note that reminded me of fresh‑baked cinnamon rolls on a lazy Sunday morning. When the dough finally came together, it felt buttery and soft, almost like play‑dough, but with a promise of crisp edges and a chewy heart. And when the cookies baked, the kitchen filled with a toasty, caramel‑kissed aroma that made the whole house feel like a bakery on a Saturday morning.
Most pop‑tart copycat recipes get the texture wrong—either they’re too cakey or they crumble into dust the second you try to lift them. This version, however, nails the perfect balance: a crisp, buttery edge that snaps like thin ice, a chewy, caramel‑laden center that melts in your mouth, and a glossy powdered‑sugar glaze that adds just the right amount of sparkle. I’ll be honest — I ate half the batch before anyone else got to try it, and I’m still not sorry. The secret? A tiny dash of cinnamon that elevates the brown sugar to a whole new level, and a technique that locks in moisture without making the cookies soggy.
Okay, ready for the game‑changer? I’m about to walk you through every single step — from choosing the right butter to mastering the glaze finish. By the end, you’ll wonder how you ever made anything else that could possibly compare. I dare you to taste this and not go back for seconds.
What Makes This Version Stand Out
- Flavor Explosion: The combination of brown sugar and cinnamon creates a deep, caramel‑spiced profile that feels both nostalgic and sophisticated, making each bite unforgettable.
- Texture Harmony: A buttery, crisp edge gives way to a soft, chewy center, delivering the perfect contrast that keeps you reaching for more.
- Simplicity: With just eight pantry staples you can whip up these cookies in under an hour, no fancy equipment required.
- Unique Glaze: A light dusting of powdered‑sugar icing adds a glossy finish and a subtle sweetness that doesn’t overpower the caramel notes.
- Crowd‑Pleaser: Whether it’s a family brunch, a coffee‑break treat, or a party snack, these cookies disappear fast—trust me, they’re the star of any spread.
- Ingredient Quality: Using real butter and packed brown sugar ensures a rich, authentic flavor you won’t get from margarine or light sugars.
- Cooking Method: Baking at a moderate temperature locks in moisture while developing that coveted golden‑brown edge.
- Make‑Ahead Potential: The cookies store beautifully, and the glaze can be prepared ahead of time, so you can pull them out whenever the craving strikes.
Inside the Ingredient List
The Flavor Base
Butter: Softened butter is the foundation of any good cookie, delivering richness and a tender crumb. It coats the flour particles, creating that melt‑in‑your‑mouth texture we all crave. If you skip the butter or use a low‑fat alternative, the cookies will feel dry and lack that buttery snap. Pro tip: Use unsalted, high‑quality butter and let it sit at room temperature for 30 minutes for optimal softness.
Brown Sugar: This is the star ingredient that adds moisture, depth, and that caramel‑like flavor that makes these cookies irresistible. The molasses in brown sugar keeps the dough moist and contributes to the chewy interior. Swapping it for white sugar will give you a crisper, less complex cookie—good for some recipes, but not for this one. When measuring, pack the brown sugar tightly to ensure you get the full flavor punch.
The Texture Crew
All‑Purpose Flour: Flour provides the structure that holds the cookie together. Too much flour, and you’ll end up with a dense, cakey result; too little, and the cookies spread into thin wafers. I recommend sifting the flour before adding it to the butter‑sugar mixture to avoid lumps and to keep the texture light. If you’re gluten‑sensitive, a 1‑to‑1 gluten‑free flour blend works well, but expect a slightly different crumb.
Egg: The egg acts as a binder, adding richness and helping the dough hold its shape during baking. One large egg is enough for this batch; adding more would make the cookies too cakey, while omitting it would cause them to crumble apart. For a vegan twist, replace the egg with a “flax egg” (1 tbsp ground flaxseed + 3 tbsp water, let sit 5 minutes).
The Unexpected Star
Cinnamon: Just a teaspoon of ground cinnamon transforms the brown sugar into a warm, aromatic wonderland. It adds a cozy, almost nostalgic note that pairs perfectly with the caramel flavors. If you love spice, consider a pinch of nutmeg or a dash of cardamom for an exotic twist. Skipping cinnamon will make the cookies taste flat—trust me, you don’t want that.
Vanilla Extract: A splash of pure vanilla adds depth and rounds out the sweetness, preventing any single flavor from dominating. It’s the subtle background singer that makes the lead vocal shine. If you’re out of vanilla, a teaspoon of almond extract works, but it will shift the flavor profile toward a nutty finish.
The Final Flourish
Salt: A pinch of salt (about half a teaspoon) enhances every other flavor, balancing the sweetness and preventing the cookies from tasting one‑dimensional. Salt also strengthens the gluten network, giving the cookies a better structure. Using flaky sea salt on top just before baking adds a delightful crunch and a burst of flavor.
Powdered Sugar: The powdered sugar glaze is the finishing touch that adds a delicate sweetness and a glossy sheen. Mix it with a splash of milk or water and a drop of vanilla for a smooth icing that sets quickly. If you prefer a thicker glaze, use less liquid; for a thinner drizzle, add a bit more liquid. This glaze is what turns a good cookie into an Instagram‑worthy masterpiece.
Everything's prepped? Good. Let’s get into the real action…
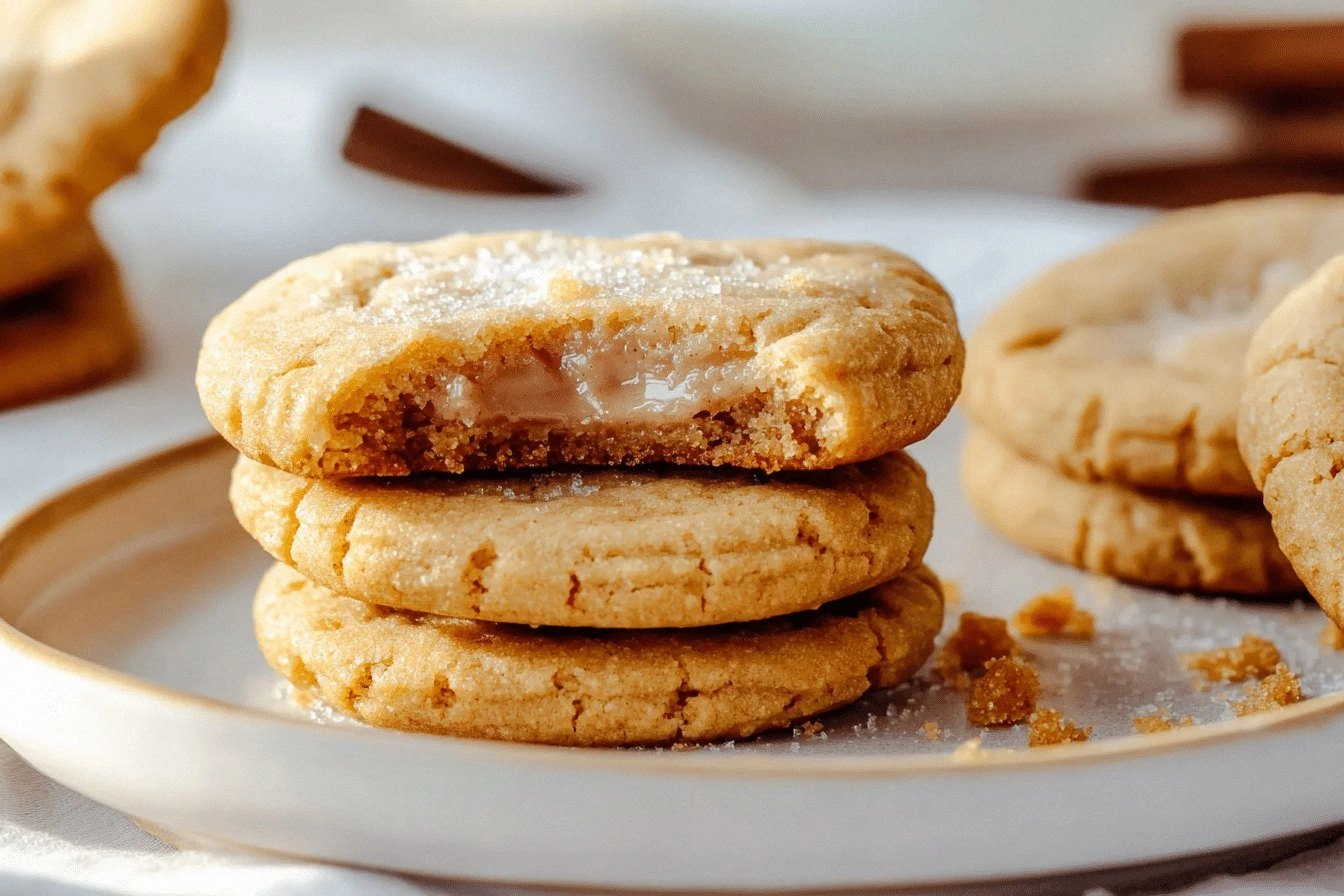
The Method — Step by Step
Preheat your oven to 350°F (175°C) and line two baking sheets with parchment paper. The moment the oven clicks on, you’ll hear that comforting hum that signals something delicious is about to happen. Make sure the racks are positioned in the middle so the heat circulates evenly.
In a large mixing bowl, cream together 1 cup of softened butter and 1 cup of packed brown sugar until the mixture is light, fluffy, and a shade lighter than caramel. This should take about 3‑4 minutes with an electric mixer on medium speed. Power transition: The mixture should look like a glossy, golden cloud—if it’s still gritty, keep mixing; the sugar needs to dissolve.
Kitchen Hack: Scrape the sides of the bowl with a rubber spatula halfway through creaming to ensure every bit of butter is incorporated.Add 1 large egg, 1 tsp of vanilla extract, 1 tsp of ground cinnamon, and ½ tsp of salt to the butter‑sugar mixture. Beat on low speed until just combined; you’ll hear a gentle “whoosh” as the egg emulsifies the fat. This is the moment of truth—if the mixture looks curdled, keep mixing for another 30 seconds; it will smooth out.
Gradually add 2 cups of all‑purpose flour, mixing on low speed just until the dough comes together. Over‑mixing will develop too much gluten, leading to a tougher cookie. Stop as soon as you no longer see streaks of flour. Watch Out: If the dough feels overly sticky, it’s because the butter was too warm; chill for 5 minutes before proceeding.
Watch Out: Adding flour too quickly can create pockets of dry dough; sprinkle it in a thin stream and let the mixer incorporate it gently.Cover the dough with plastic wrap and chill in the refrigerator for 15‑20 minutes. This rest period lets the butter firm up again, preventing excessive spread during baking. While you wait, you can whisk together the glaze: 1 cup powdered sugar, 2‑3 tbsp milk, and a dash of vanilla until smooth. The glaze should be thick enough to drizzle but fluid enough to spread with a spoon.
Using a cookie scoop (or a tablespoon), portion out dough onto the prepared sheets, spacing them about 2 inches apart. Gently flatten each mound with the back of a spoon or the palm of your hand—don’t over‑press; you want a slight dome that will flatten into a perfect circle.
Slide the trays into the preheated oven and bake for 12‑15 minutes, or until the edges turn a light golden brown and the centers look set but still soft. You’ll know they’re ready when the scent of caramelized brown sugar fills the kitchen, and the tops begin to crack just a tiny bit.
Kitchen Hack: Rotate the baking sheets halfway through the bake to ensure even browning on all sides.Remove the cookies from the oven and let them cool on the sheet for 3 minutes before transferring to a wire rack. While they’re still warm, drizzle the powdered‑sugar glaze over each cookie using a spoon or a small piping bag. The glaze will set quickly, creating a glossy finish that catches the light.
Allow the glazed cookies to cool completely—about 10‑15 minutes—so the icing hardens just enough to give a satisfying snap when you bite. Store them in an airtight container, and they’ll stay fresh for up to a week. That’s it — you did it. But hold on, I’ve got a few more tricks that'll take this to another level…
Insider Tricks for Flawless Results
The Temperature Rule Nobody Follows
Most home bakers bake cookies at 375°F, assuming higher heat = faster results. In reality, 350°F is the sweet spot for these brown‑sugar beauties. It allows the butter to melt slowly, giving the edges a gentle crisp while the center stays chewy. I once cranked the oven to 400°F and ended up with burnt edges and a gummy middle—lesson learned.
Why Your Nose Knows Best
Don’t rely solely on a timer; trust your sense of smell. When the cookies start to emit a toasty, caramel scent, that’s the signal they’re nearing perfection. If the aroma turns bitter, pull them out immediately. This sensory checkpoint prevents over‑baking and guarantees that perfect golden‑brown hue.
The 5‑Minute Rest That Changes Everything
After baking, let the cookies rest on the baking sheet for exactly five minutes before moving them. This short pause lets the steam finish cooking the interior, preventing cracks in the glaze and ensuring a uniform texture. Skipping this step results in a glaze that slides off and a cookie that feels uneven.
Glaze Consistency is Key
For a glaze that sets with a subtle sheen, aim for a consistency similar to heavy cream. Too thin, and it will run off; too thick, and it will sit in clumps. If you’re in a rush, microwave the glaze for 10 seconds to thin it slightly—just be careful not to overheat.
Freezer‑Friendly Baking
Want to prep ahead? Scoop the dough onto a parchment‑lined tray, flash‑freeze for 30 minutes, then transfer the frozen balls to a zip‑top bag. When you’re ready, bake them straight from the freezer, adding an extra 2‑3 minutes to the bake time. The result? Fresh‑out‑the‑oven cookies any day of the week.
Creative Twists and Variations
This recipe is a playground. Here are some of my favorite ways to switch things up:
Maple‑Brown Sugar Fusion
Replace half of the brown sugar with pure maple syrup. The result is a deeper, wood‑syrupped flavor that pairs beautifully with the cinnamon. Use a tablespoon less butter to balance the extra liquid.
Nutty Crunch
Stir in ½ cup of chopped toasted pecans or walnuts into the dough before baking. The nuts add a satisfying crunch and a buttery undertone that elevates the caramel notes.
Spiced Chai
Swap the cinnamon for a chai spice blend (cardamom, ginger, cloves, and a pinch of black pepper). This gives the cookies an exotic, warm kick that’s perfect for chilly evenings.
Chocolate Drizzle
After the glaze sets, drizzle melted dark chocolate over the top. The bitterness of the chocolate contrasts the sweet caramel, creating a sophisticated flavor duet.
Mini Pop‑Tart Shapes
Roll the dough out thin, cut into small rectangles, and fill the center with a dollop of jam before folding and sealing. Bake as usual for bite‑size pop‑tart treats that are perfect for parties.
Storing and Bringing It Back to Life
Fridge Storage
Place the cooled cookies in an airtight container with a parchment paper layer between each layer. They’ll stay fresh for up to five days in the refrigerator. If you notice the glaze losing its shine, a quick brush with a tiny amount of melted butter will revive the gloss.
Freezer Friendly
Arrange the cookies in a single layer on a baking sheet and freeze for an hour. Then transfer them to a zip‑top freezer bag, separating layers with parchment. They’ll keep for up to three months. When you’re ready to enjoy, let them thaw at room temperature for 15 minutes, then pop them in a 300°F oven for 5 minutes to refresh the texture.
Best Reheating Method
To bring a cookie back to life, preheat your oven to 325°F, place the cookie on a parchment‑lined tray, and bake for 3‑4 minutes. Add a tiny splash (about a teaspoon) of water to the tray—this creates a gentle steam that revives the chewy interior while keeping the edges crisp.