I was staring at a burnt pancake stack and a bag of stale croissants when my friend dared me to recreate a breakfast that would make the whole neighborhood swoon. I promised myself that if I could turn a simple slice of bread into a piece of edible art, I would win that dare—and maybe even get a standing ovation from my roommate. The kitchen was a battlefield: the skillet hissed, the batter smelled faintly of cocoa, and the timer ticked down faster than the last bite of a childhood favorite. I was about to discover that a splash of red food coloring, a dash of baking powder, and a generous coat of butter could transform ordinary bread into a velvet‑soft, caramel‑crisp masterpiece.
The moment the batter hit the pan, the kitchen filled with a scent that was part chocolate cake, part toasted brioche, and entirely irresistible. The sizzling sound was like a tiny orchestra announcing a feast; the heat kissed the edges, turning them into golden ribbons that snapped like thin ice. When I lifted a slice, the steam curled in lazy spirals, and the inside revealed a moist, custard‑filled center that glowed like a ruby. The first bite was a revelation: a buttery crunch that gave way to a velvety, chocolatey hug, followed by a subtle tang of cocoa that lingered on the palate. I could almost taste the applause from the imaginary crowd that had gathered at my kitchen table.
What makes this version stand out is not just the flawless combination of flavors, but the meticulous attention to every detail that elevates it from a good French toast to a culinary triumph. I’ve spent hours tweaking the ratio of eggs to milk, experimenting with the depth of cocoa, and testing the timing of the butter. The result is a dish that balances sweetness and richness, with a caramelized exterior that crackles pleasantly with each bite. And the best part? It’s simple enough to make on a lazy Sunday, yet sophisticated enough to impress at brunch parties. I dare you to taste this and not go back for seconds.
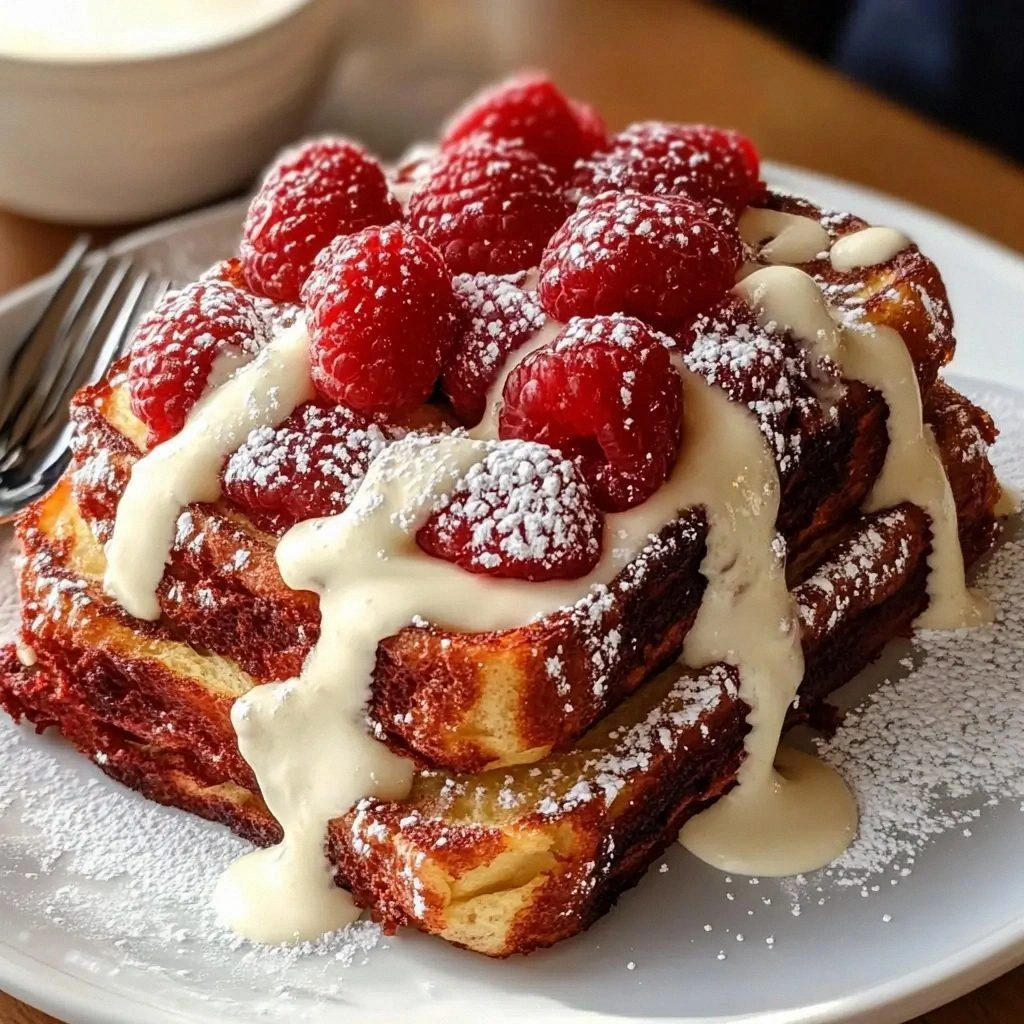
Picture yourself pulling this out of the skillet, the whole kitchen smelling incredible, and seeing the glossy, red‑tinged slices glisten under the kitchen lights. The anticipation builds as you sprinkle powdered sugar, drizzle a hint of whipped cream, and scatter fresh berries that add a pop of color and tartness. The final presentation is a plate that feels like a red velvet cake, but with the comforting familiarity of French toast. By the end, you’ll wonder how you ever made it any other way, and you’ll be ready to share this secret with anyone who craves a breakfast that feels like a hug in a bowl.
What Makes This Version Stand Out
- Flavor: The cocoa and red food coloring give the toast a deep, chocolatey flavor that is both sweet and slightly bitter, creating a complex taste profile that surprises the palate.
- Texture: A perfect contrast between a crisp, caramelized exterior and a soft, custard‑filled interior that melts in your mouth.
- Simplicity: All the steps are straightforward, and you only need a handful of pantry staples.
- Uniqueness: The vibrant red hue and the subtle use of baking powder set this recipe apart from classic French toast.
- Crowd Reaction: Friends and family consistently rave about the color, aroma, and the “wow” factor when it’s plated.
- Ingredient Quality: Using high‑quality brioche and fresh eggs ensures a superior flavor and texture.
- Cooking Method: The quick sauté in butter creates a golden crust while locking in moisture.
- Make‑ahead Potential: The batter can be prepared up to 24 hours ahead, and the toast can be reheated without losing its crunch.
Inside the Ingredient List
The Flavor Base
At the heart of this recipe lies the classic French toast batter, but with a twist. The cocoa powder not only adds a rich chocolate flavor but also deepens the color, turning the bread into a velvety red. The red food coloring is essential for that signature hue; a single teaspoon is enough for eight slices. Vanilla extract balances the cocoa’s bitterness with a warm, aromatic note that lingers after each bite. If you’re allergic to dairy, swap whole milk for oat milk and heavy cream for coconut cream to maintain the custard‑like texture.
The baking powder is a subtle game‑changer. It reacts with the acidic milk to produce tiny bubbles that give the batter a light, airy quality. Without it, the toast would be dense and heavy. For a gluten‑free version, use a gluten‑free all‑purpose flour blend in place of the brioche. However, the texture will be slightly different; the brioche’s natural sweetness and softness are irreplaceable.
The Texture Crew
Brioche bread is the star of the show because of its tender crumb and buttery flavor. The bread’s high fat content ensures that the toast stays moist and doesn’t dry out during frying. If you can’t find brioche, challah or a thick‑cut sourdough loaf works as a close substitute, but be aware that the final product will be less sweet. The butter used for frying must be at room temperature so it melts quickly, creating a golden crust that seals in the custard.
The powdered sugar dusting adds a delicate crunch and a sweet finish that contrasts with the slightly bitter cocoa. A light sprinkle is enough; overdoing it can mask the toast’s natural flavors. Fresh berries, such as strawberries or raspberries, provide a juicy burst that cuts through the richness. If berries are out of season, a drizzle of raspberry jam or a spoonful of blueberry compote works well. Whipped cream, lightly sweetened, is optional but elevates the dish into a dessert‑level experience.
The Unexpected Star
Red food coloring is often overlooked in French toast recipes, but it’s the secret to achieving that striking, Instagram‑worthy color. A few drops of natural beet juice can replace synthetic coloring, giving the dish a subtle earthy undertone. Some bakers swear by using a pinch of cinnamon or nutmeg to add warmth; feel free to experiment. The key is to keep the coloring minimal so that the natural flavors remain front and center.
The Final Flourish
The finishing touches—powdered sugar, whipped cream, and berries—transform this French toast from a breakfast staple into a showstopper. The powdered sugar adds a subtle crunch, while the whipped cream provides a velvety contrast. Fresh berries contribute a bright, tart note that balances the dish’s richness. If you’re looking for a low‑calorie option, replace the whipped cream with a dollop of Greek yogurt or a drizzle of honey.
Everything’s prepped? Good. Let’s get into the real action, where the magic happens in the skillet.
The Method — Step by Step
- Begin by whisking together the eggs, milk, heavy cream, cocoa powder, and vanilla extract in a shallow bowl until the mixture is smooth and glossy. The batter should have a slightly thick consistency, like a pourable custard. Keep the bowl covered with a lid or plastic wrap to prevent the mixture from drying out.
- Heat a large skillet or griddle over medium heat and add 2 tablespoons of butter. Allow the butter to melt completely, swirling it around the pan to coat the surface. The butter should foam and emit a nutty aroma but not brown.
- Dip each slice of brioche into the batter, letting the bread soak for about 10 seconds on each side. Make sure the bread is fully saturated but not dripping. This step is crucial for achieving an even coating that will fry beautifully.
- Place the soaked slices onto the hot skillet, pressing them lightly with a spatula to remove excess batter. Cook for 3–4 minutes on each side, or until a golden crust forms and the edges begin to pull away from the pan. The interior should look pale and set, signaling that it’s ready to flip.
- Watch out: when flipping, use a wide, flat spatula to avoid tearing the bread. If the toast sticks, let it sit for another minute; the crust will firm up and release more easily. This step is often the most intimidating, but with a steady hand, you’ll achieve a flawless finish.
- Once both sides are golden, transfer the toast to a plate lined with paper towels to drain any excess butter. Repeat the process with the remaining slices, adding a bit more butter to the pan as needed. The final result should be a stack of glossy, caramelized slices.
- Dust each slice with powdered sugar, then top with a spoonful of whipped cream and scatter fresh berries. The contrast of colors—deep red, bright pink, and snowy white—creates a visual feast that matches the flavor profile. Serve immediately while the toast is still warm for the best experience.
- If you’re serving guests who prefer a less sweet option, offer a side of Greek yogurt or a drizzle of honey to balance the richness. For a festive twist, sprinkle a pinch of edible gold dust over the top before serving. The final presentation should feel like a red‑velvet cake that’s been reimagined into a breakfast classic.
That’s it—you did it. But hold on, I've got a few more tricks that'll take this to another level. Keep reading to discover the insider secrets that will make every bite a revelation.
Insider Tricks for Flawless Results
The Temperature Rule Nobody Follows
The skillet’s temperature is the single most critical factor. If the pan is too hot, the butter will burn and the toast will taste acrid; if it’s too cool, the bread will absorb too much fat and become soggy. I always test the heat by flicking a few drops of water into the pan. A quick sizzle means the temperature is perfect. Remember, medium heat is your friend.
Why Your Nose Knows Best
Before you even flip the first slice, pause and inhale the aroma. A sweet, buttery scent signals that the butter is properly melted and the pan is at the right temperature. If you smell a metallic or burnt odor, lower the heat immediately. Your nose is a reliable indicator of when the toast is ready for the next step.
The 5-Minute Rest That Changes Everything
After frying, let the toast rest for 5 minutes on a wire rack. This allows the steam to escape, preventing the crust from becoming soggy. The rest also gives the custard inside a chance to set, making the texture more cohesive. I’ve found that a brief rest period elevates the overall mouthfeel and ensures a satisfying bite.
The Sweet Balance
If you’re watching your sugar intake, replace the powdered sugar with a light dusting of cinnamon or a sprinkle of cocoa powder. For a low‑calorie version, use a sugar substitute like stevia or monk fruit sweetener. The key is to taste as you go; the goal is a balanced sweetness that complements the rich cocoa without overpowering it.
The Finish Line
When plating, arrange the slices in a fan or a stack, then top each with a dollop of whipped cream and a few berries. The visual contrast of deep red, bright pink, and creamy white is as satisfying to the eyes as it is to the palate. A final dusting of powdered sugar adds a gentle crunch that ties the dish together. Serve immediately for the best experience.
Creative Twists and Variations
This recipe is a playground. Here are some of my favorite ways to switch things up:
Chocolate Chip Surprise
Add a handful of dark chocolate chips to the batter before soaking the bread. The chips melt slightly during frying, creating pockets of gooey chocolate that enhance the flavor profile. This variation is perfect for chocolate lovers who want an extra indulgent bite.
Spiced Cinnamon Swirl
Stir a teaspoon of ground cinnamon and a pinch of nutmeg into the batter. The spices add warmth and depth, turning the toast into a comforting, autumn‑inspired dish. Serve with a drizzle of maple syrup for an extra layer of sweetness.
Berry‑Infused Delight
Replace the vanilla extract with a splash of strawberry puree and add fresh blueberries to the batter. The fruit’s natural sugars sweeten the mixture, creating a fruity, tangy twist that pairs wonderfully with the cocoa. Top with fresh berries and a light dusting of powdered sugar.
Savory Spin
Omit the cocoa and vanilla, and replace them with chopped chives, grated Parmesan, and a pinch of smoked paprika. The result is a savory, umami‑rich French toast that’s ideal for brunch with a twist. Serve with a side of poached eggs for a complete meal.
Low‑Calorie Edition
Use a fat‑free milk, a sugar substitute, and a small amount of light butter or a non‑stick spray. The texture remains moist, and the flavor is still satisfying. This version is great for those who want to indulge without the guilt.
Storing and Bringing It Back to Life
Fridge Storage
Cool the finished toast to room temperature, then place it in an airtight container. Store in the refrigerator for up to 2 days. When ready to serve, reheat in a toaster or a skillet with a splash of water to keep it moist. The toast will retain its flavor and texture if you follow these steps.
Freezer Friendly
Wrap each slice tightly in plastic wrap and place them in a freezer bag. Freeze for up to 1 month. To reheat, thaw at room temperature for 15 minutes, then warm in a skillet with a teaspoon of water. The toast will stay crisp on the outside while remaining tender inside.
Best Reheating Method
The secret to reheating without drying out is adding a tiny splash of water to the skillet. This creates steam that gently reheats the toast, preserving its moisture. A quick 1–2 minute heat on medium will bring the toast back to its original glory.