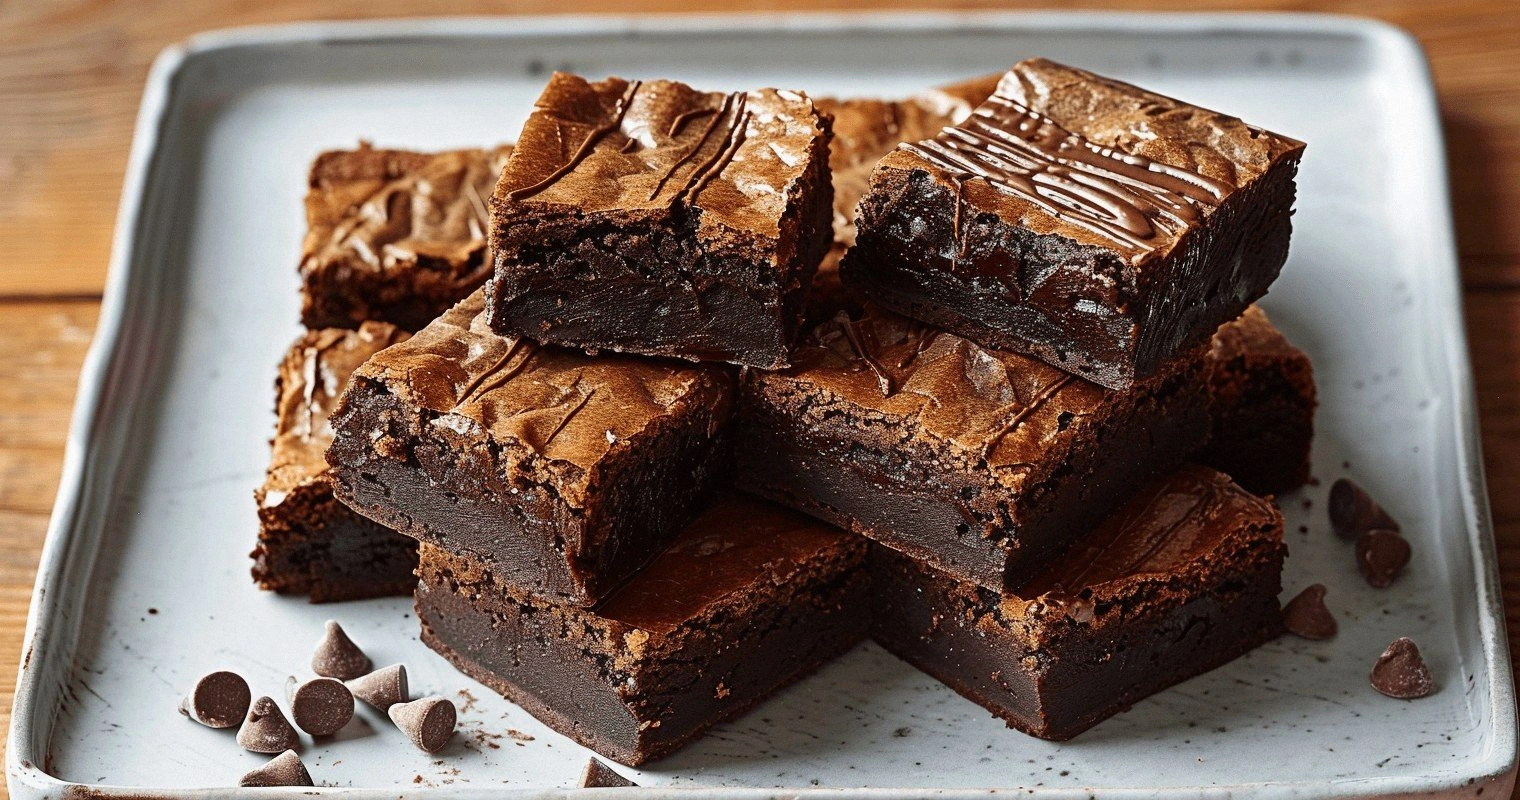
I'll be honest — I ate half the batch before anyone else got to try it. It was supposed to be a casual Friday night, a little Netflix, a little wine, and a little something sweet to cap off the week. Instead, I found myself standing in my kitchen at 11:47 pm, still in my socks, holding a spatula like a microphone and singing off-key to Lizzo while demolishing a pan of what my best friend calls "the reason I believe in love again." The name is scandalous, the layers are outrageous, and the flavor? Let's just say if calories were currency, these brownies would be the kind of splurge you'd brag about on social media. Picture yourself pulling this out of the oven, the whole kitchen smelling like Willy Wonka's secret lair, the chocolate still molten, the cookie dough layer whispering your name like a guilty secret.
Most recipes get this completely wrong. They'll tell you to just throw cookie dough on top of brownie batter and call it a day. But here's what actually works: three distinct layers that each bring their own personality to the party, baked in perfect harmony so the edges shatter like thin ice while the center stays gooey enough to make you close your eyes and sigh. That sizzle when the butter hits the sugar? Absolute perfection. The way the Oreos soften just enough to give you that nostalgic crunch without turning into mush? Pure magic. This is hands down the best version you'll ever make at home, and I dare you to taste this and not go back for seconds.
I discovered this recipe after a spectacular kitchen disaster involving a failed soufflé, a fire alarm, and a very judgmental cat. My original plan was to impress a date with my culinary prowess. Instead, I ended up with a collapsed chocolate tower and a smoke-filled apartment. In desperation, I started layering whatever I had on hand — some leftover cookie dough from brunch prep, a sleeve of Oreos I bought for "emotional support," and a quick box brownie mix I normally wouldn't admit to owning. Twenty-five minutes later, something magical happened. The smell wafting from my oven was so intoxicating that my neighbor knocked on my door asking if I was running an underground bakery. If you've ever struggled with layer desserts that slide apart or brownie edges that could chip a tooth, you're not alone — and I've got the fix.
Okay, ready for the game-changer? We're going to build this from the bottom up with military precision, but don't worry — I'll be right here with you, step by step, like that friend who holds your hair back but also makes sure you get home safe. By the end, you'll wonder how you ever made it any other way. Let me walk you through every single step — we're about to create something so gloriously over-the-top that you'll need to sit down just to process what your taste buds are experiencing.
What Makes This Version Stand Out
Layer Logic: Each tier bakes at its own perfect rate because we stagger the temperatures. The cookie base gets a head start at 375°F, then we drop to 350°F when we add the brownie blanket. This prevents the dreaded raw-middle-burnt-edge syndrome that's plagued home bakers since the invention of parchment paper.
Oreo Placement Protocol: Instead of just chucking whole cookies in there like some amateur hour operation, we create a mosaic pattern that ensures every single square inch gets that cookies-and-cream punch. Think of it as edible architecture where every bite has the perfect cookie-to-cream ratio.
Texture Tango: The bottom layer stays chewy like a fresh-baked cookie from your childhood, the middle transforms into this almost truffle-like situation, and the top develops that paper-thin crust that crackles under your fork like a crème brûlée halo. Most recipes deliver one texture. We're delivering a symphony.
Chocolate Strategy: We use three different chocolates — dark cocoa powder for depth, milk chocolate chips for sweetness, and bittersweet chunks for complexity. It's like a chocolate committee where everyone gets a vote and the result is unanimous deliciousness.
Make-Ahead Magic: These actually improve after a night in the fridge. The flavors meld like old friends catching up, and the cold sets the layers so they slice like a dream. I make these on Sunday and ration them through the week, though "ration" is a generous term for what actually happens.
Crowd Psychology: Bring these to any gathering and watch adults turn into competitive vultures. I've seen polite dinner parties devolve into fork wars. I've witnessed meditation teachers break their vows of sharing. This dessert has powers that should probably be regulated.
Ingredient Integrity: We're using real butter, not margarine. Real vanilla, not imitation. Real love, not apathy. These details matter more than your zodiac sign, and yes, I'm willing to fight about it.
Inside the Ingredient List
The Flavor Foundation
Butter is the backbone here, and not just any butter — we're talking the good stuff, European-style with 82% fat content. It makes the cookie layer taste like it came from a French bakery where the baker judges your life choices but still gives you a free sample. Cold butter gets creamed with brown sugar for that caramel note that makes people ask "what's your secret?" like you're some kind of dessert wizard. The eggs need to be room temperature because cold eggs make butter seize up like a scared turtle, and nobody wants chunky cookie dough. Pure vanilla extract is non-negotiable; imitation vanilla is like bringing a kazoo to a symphony — technically music, but deeply disappointing.
The Texture Crew
All-purpose flour gets a protein boost from the eggs, creating that perfect chew that makes your jaw work just enough to feel satisfied. We're using a mix of granulated and brown sugar because white sugar makes crisp edges while brown sugar brings moisture and that butterscotch note that makes grown adults weak in the knees. Baking soda and baking powder work together like a buddy cop movie — one provides immediate lift, the other hangs around for the long game. Salt isn't just a seasoning here; it's a flavor amplifier that makes the chocolate taste more chocolatey and the sweet taste more complex, like adding a plot twist to a familiar story.
The Unexpected Star
The Oreos aren't just filler — they're the wildcard that makes this whole operation feel slightly dangerous. Use the classic kind, not the double-stuff, because the original has the perfect cookie-to-cream ratio that softens just right during baking. The cream filling melts slightly, creating these little pockets of vanilla heaven that surprise you in the best way. Some people try to get fancy with flavored Oreos, but that's like putting lipstick on the Mona Lisa — unnecessary and slightly disturbing.
The Final Flourish
Dutch-processed cocoa powder gives the brownie layer its deep, sophisticated chocolate flavor that tastes expensive. We're using both cocoa powder and melted chocolate because cocoa provides the structure while melted chocolate gives that fudgy texture that makes people close their eyes when they eat it. A touch of espresso powder doesn't make it taste like coffee — it just makes the chocolate taste more like chocolate, like turning up the contrast on a beautiful photo.
The Method — Step by Step
- Start with the cookie base because it needs the longest bake time and sets the foundation for everything else. In your stand mixer (or with a hand mixer and a prayer), beat 12 tablespoons of cold butter with 3/4 cup each of granulated and brown sugar until it looks like fluffy clouds that might taste like heaven. This takes about 3-4 minutes on medium speed, during which your kitchen will start smelling like a bakery and your neighbors will start showing up with coffee cups. Add 2 eggs, one at a time, beating well after each addition like you're trying to convince them to become friends. Mix in 2 teaspoons of vanilla extract and watch the batter transform from gritty to silky like it's been to finishing school.
- In a separate bowl, whisk together 2 1/4 cups flour, 1 teaspoon baking soda, and 1/2 teaspoon salt. This isn't just dumping dry ingredients — you're creating the scaffolding that will hold up under the weight of all that chocolatey ambition. Add the dry ingredients to the butter mixture in three additions, mixing just until combined after each. Overmixing develops gluten and makes tough cookies, and tough cookies are the reason some people think they don't like dessert. The dough should be soft but not sticky, like Play-Doh that's been warmed in your hands.
- Press this dough into a parchment-lined 9x13 pan with the back of a spoon or your impeccably clean hands. This is therapeutic work — press and smooth until it looks like a golden canvas waiting for its masterpiece. The dough should be about 1/4 inch thick and reach all the way to the corners. If it fights back, let it rest for 5 minutes; cookie dough has feelings too. Slide this into a preheated 375°F oven for exactly 12 minutes — no more, no less, like you're defusing a bomb made of deliciousness.
- While the cookie base is doing its initial bake, it's Oreo time. Arrange 24 Oreos in a perfect grid, 6 across and 4 down, like you're playing the world's most delicious game of Tetris. Press them down slightly so they nestle into the partially-baked cookie but don't submerge — they should look like they're sunbathing on a cookie beach. This is the moment where people walking past your kitchen will stop and stare through the window like you're performing some kind of edible magic trick. The heat from the cookie base will start softening the Oreos, releasing vanilla aroma that makes you understand why people write poetry about dessert.
- Now for the brownie layer, and this is where things get serious. In a heatproof bowl set over simmering water (or in the microwave if you're feeling rebellious), melt 1 cup of bittersweet chocolate chips with 1/2 cup of butter until it's smoother than a jazz saxophone solo. Remove from heat and whisk in 1 cup of granulated sugar — the mixture will go from glossy to slightly gritty, like sand at the bottom of a chocolate river. Let this cool for exactly 5 minutes; too hot and you'll scramble the eggs, too cool and the sugar won't dissolve properly. Whisk in 3 eggs, one at a time, beating until each is fully incorporated before adding the next.
- Add 1 teaspoon of vanilla extract and 1/2 teaspoon of espresso powder, whisking until combined. The espresso won't make it taste like coffee — it's like adding a bass note to a song, you feel it more than taste it. Sift in 3/4 cup of Dutch-processed cocoa powder, 1/2 cup flour, and 1/4 teaspoon salt. Sifting prevents those little cocoa bombs that taste like bitter disappointment when you bite into them. Fold everything together with a spatula until just combined; the batter should be thick and glossy like melted chocolate ice cream.
- Pour the brownie batter over the Oreo layer, using your spatula to spread it gently to the edges. This requires the patience of a saint and the precision of a surgeon — you want to cover every cookie without disturbing their perfect alignment. Tap the pan on the counter a few times to release any air bubbles that might create craters in your chocolate landscape. Reduce the oven temperature to 350°F and slide the pan in for 25-28 minutes. The edges should look set but the center should still jiggle slightly when you shake the pan — think Jell-O, not earthquake.
- The final bake is where intuition trumps timers. Start checking at 22 minutes — insert a toothpick 2 inches from the edge. It should come out with a few moist crumbs, not wet batter. The center will continue cooking from residual heat, so pulling it out slightly underdone is the difference between legendary brownies and "why did I bother" brownies. Let them cool in the pan for at least 30 minutes, during which time your willpower will be tested like never before. The smell will fill your house with what I can only describe as "happiness in vapor form."
That's it — you did it. But hold on, I've got a few more tricks that'll take this to another level...
Insider Tricks for Flawless Results
The Temperature Rule Nobody Follows
Room temperature ingredients aren't just a suggestion — they're the difference between a smooth batter and a curdled mess that looks like it lost a fight. Take your eggs and butter out 2 hours before baking, or use the "warm water bath" trick for eggs and the "grate cold butter" hack for immediate results. Cold eggs make butter seize up, creating little butter pebbles that never quite incorporate, leaving you with greasy pockets that ruin the texture. A friend tried skipping this step once — let's just say it didn't end well, and her Instagram story was a cautionary tale in real-time.
Why Your Nose Knows Best
Don't just rely on timers — your nose is a sophisticated chemical detector that knows when the Maillard reaction is happening. When you smell that perfect balance of toasted sugar and chocolate, start checking for doneness. The aroma should be rich and complex, not sharp or burnt. If your smoke detector is going off, you've gone too far and the edges will taste like disappointment. This next part? Pure magic — the smell will actually intensify right before they're perfectly done, like the dessert is announcing itself to the world.
The 5-Minute Rest That Changes Everything
After pulling them from the oven, let the pan rest on a wire rack for exactly 5 minutes, then run a knife around the edges. This prevents the dreaded "stuck brownie syndrome" that has reduced grown adults to tears. The edges will pull away slightly, creating a natural release that makes cutting and serving a dream instead of a crumbly disaster. And now the fun part — if you want clean cuts, chill them for 30 minutes after they've cooled completely. Use a plastic knife or one dipped in hot water, wiping between cuts. Your squares will look like they came from a professional bakery instead of a crime scene.
The Salt Finish That Elevates Everything
Immediately after pulling them from the oven, sprinkle the top with flaky sea salt. Not table salt, not kosher salt — we're talking those gorgeous pyramid-shaped crystals that look like tiny diamonds. The heat makes them adhere just enough, and when you bite through the sweet chocolate to hit that salt crystal, it's like finding buried treasure. Use about 1/2 teaspoon total, scattered from 8 inches above so it distributes evenly like chocolate snow.
Creative Twists and Variations
This recipe is a playground. Here are some of my favorite ways to switch things up:
The Peanut Butter Palace
Replace half the butter in the cookie layer with creamy peanut butter, and use peanut butter Oreos instead of regular. Swirl 1/4 cup of melted peanut butter into the brownie batter before baking. The result tastes like a Reese's cup went to finishing school and came back with a PhD in deliciousness. Peanut butter lovers will propose marriage; accept graciously.
The Mint Chocolate Mansion
Use mint Oreos and add 1/2 teaspoon of peppermint extract to the brownie batter. Top with crushed candy canes for a festive touch that works year-round because mint chocolate is a lifestyle, not a season. The cooling sensation against the warm chocolate creates a temperature illusion that's weirdly addictive.
The Salted Caramel Castle
Drizzle 1/2 cup of caramel sauce over the Oreo layer before adding the brownie batter. Use caramel-filled chocolates in the brownie layer and finish with that flaky salt we talked about. It's like a Twix bar and a brownie had a baby, and that baby grew up to be the most popular kid in school.
The Gluten-Free Galaxy
Substitute the flour in both layers with a 1:1 gluten-free blend (I swear by King Arthur's), and use gluten-free chocolate sandwich cookies. The texture is so close to the original that gluten-eaters won't know the difference unless you tell them. I've served these at parties and watched people argue about whether I was lying about them being gluten-free.
The S'mores Sanctuary
Use graham cracker-flavored Oreos, add 1 cup of mini marshmallows to the brownie layer, and top with crushed graham crackers in the last 5 minutes of baking. Use a kitchen torch to toast the marshmallows for that campfire vibe that makes everyone want to sing Kumbaya and share secrets.
The Espresso Escape
Add 2 tablespoons of espresso powder to the brownie batter and use coffee-flavored Oreos. The result tastes like your favorite coffee shop decided to make dessert, and it's the perfect pick-me-up for those 3 pm crashes when you need both sugar and caffeine to survive the rest of your workday.
Storing and Bringing It Back to Life
Fridge Storage
These keep beautifully in the fridge for up to 5 days, though they've never lasted that long in my house. Store them in an airtight container with parchment paper between layers to prevent them from becoming a single, amorphous dessert blob. The cold actually improves the texture — the layers firm up and the flavors meld into something even more incredible than when they were fresh. Pro tip: they're amazing cold with a glass of milk, like a sophisticated version of dunking cookies that makes you feel 8 years old again but with better taste.
Freezer Friendly
Cut them into individual squares and wrap each one in plastic wrap, then aluminum foil. They'll keep for up to 3 months in the freezer, though I recommend labeling them because "mystery frozen dessert" doesn't sound as appealing as "emergency slutty brownies." Thaw overnight in the fridge or for 30 minutes at room temperature. Or be like me and microwave them for 20 seconds for that fresh-from-the-oven experience without the work. The Oreos might lose a bit of their crunch, but the flavor intensifies like it's been aging in a chocolate cellar.
Best Reheating Method
If you must reheat (and sometimes you must), wrap individual squares in foil and warm them in a 300°F oven for 10 minutes. The microwave works in a pinch — 15 seconds on high — but it can make the Oreos rubbery if you overdo it. Add a tiny splash of water before reheating — it steams back to perfection and prevents the edges from becoming hockey pucks. Serve with a scoop of vanilla ice cream that melts into all the nooks and crannies, creating a sauce that coats your spoon like velvet.