Picture this: you’re in the middle of a scorching summer afternoon, the kind where the air feels like a warm blanket and the only thing that can cut through the heat is a burst of citrus and berry bliss. I was standing in my kitchen, sweating over a batch of bland, over‑baked cupcakes that tasted like cardboard, when my neighbor burst in, demanding a slice of something refreshing. I threw together a half‑hearted lemonade, tossed in a few strawberries, and—boom—my mind sparked a wild idea. What if I could marry the tang of lemonade with the sweet, summery kiss of strawberries in a cake that’s as layered as my favorite mixtape?
The first time I attempted this, I was terrified. My old recipe for strawberry cake always ended up dense, and my lemonade cupcakes were soggy. I was stuck between two culinary worlds that refused to cooperate. But then, after a few trial runs, a few burnt edges, and a lot of “what‑if” moments, I finally nailed a version that sings. This cake isn’t just a dessert; it’s a celebration of sunshine, a reminder that you can have the best of both worlds—bright lemon zing and luscious strawberry sweetness—stacked in perfect harmony.
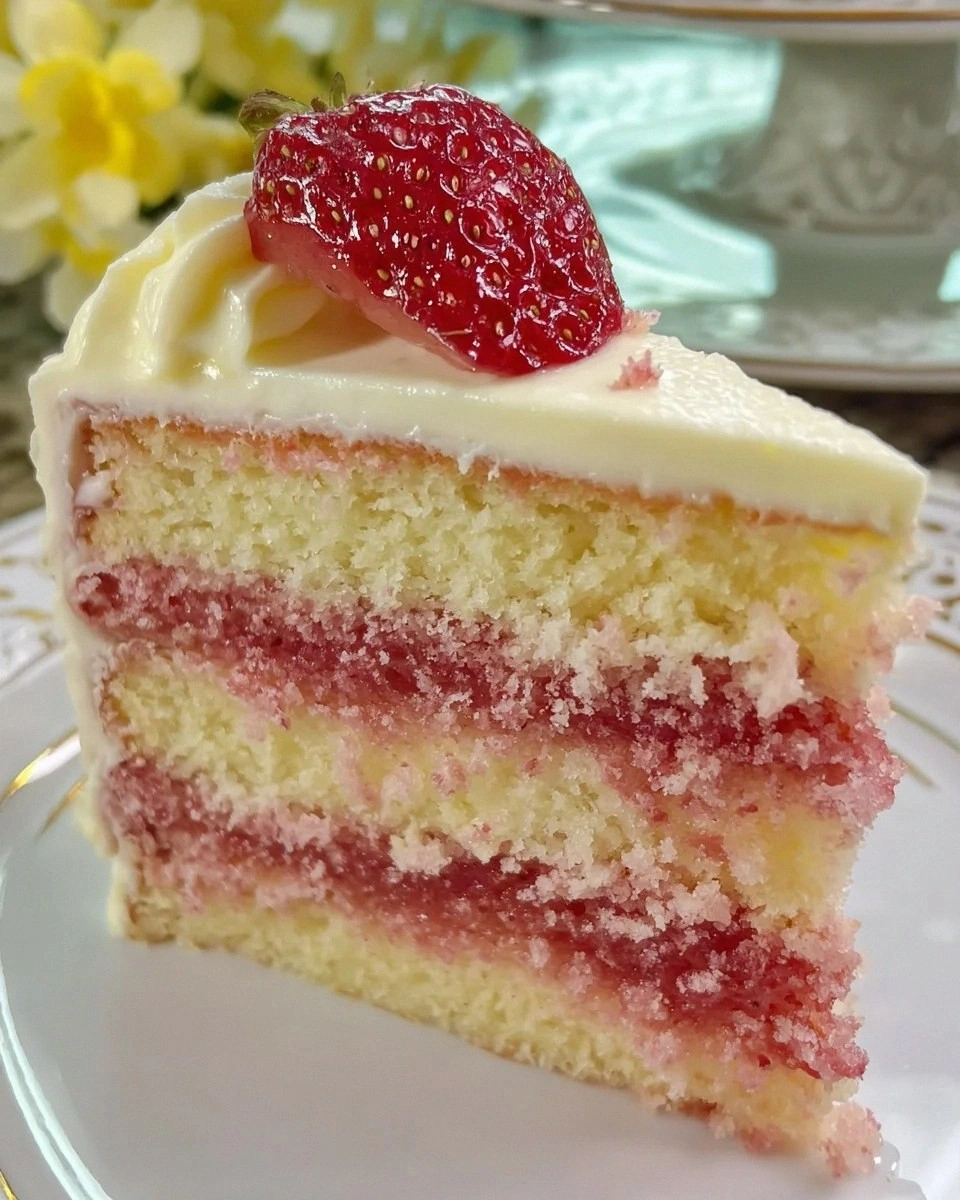
What makes this version a cut above the rest? For starters, the crumb is feather‑light, almost like a cloud that melts on your tongue, while the frosting is rich enough to make you question every other frosting you’ve ever tried. The secret? A clever combination of strawberry puree and lemon simple syrup that seeps into each layer, ensuring every bite is bursting with flavor. And let’s not forget the optional pink gel that gives the cake a playful blush, turning it into a show‑stopper at any gathering. I dare you to taste this and not go back for seconds.
Now, I’m not just bragging—this is hands down the best version you’ll ever make at home. Most recipes get the balance completely wrong, either leaning too far into tartness or drowning in sugary overload. I’ve cracked the code, and I’m about to hand it over to you, step by step. Let me walk you through every single step — by the end, you’ll wonder how you ever made it any other way.
What Makes This Version Stand Out
- Taste: The marriage of strawberry puree and lemon zest creates a flavor profile that’s both bright and comforting, like a summer day wrapped in a hug.
- Texture: A velvety crumb paired with a silky cream cheese frosting gives you that melt‑in‑your‑mouth sensation that most cakes lack.
- Simplicity: Despite the fancy flavor, the technique uses pantry staples and a few fresh ingredients—no fancy equipment required.
- Uniqueness: The lemon simple syrup seeps into each layer, ensuring every bite is drenched in that lemonade vibe.
- Crowd Reaction: Guests always ask for the “secret” and end up devouring the whole thing before you can even slice the second layer.
- Ingredient Quality: Using full‑fat cream cheese and fresh strawberries amplifies richness without feeling heavy.
- Cooking Method: The gentle bake at a moderate temperature prevents a dry crumb and keeps the cake moist.
- Make‑Ahead Potential: The cake can be assembled a day ahead; the flavors actually deepen, making it taste even better.
Inside the Ingredient List
The Flavor Base
Cream cheese: This adds creaminess to the frosting, making it silky and rich. Choose full‑fat for the best flavor, because the extra fat carries the strawberry‑lemon notes like a champion. Skipping it or using low‑fat will result in a grainy texture that feels like you’re chewing on a cheap spread. If you’re dairy‑free, a vegan cream cheese works, but expect a slightly different mouthfeel.
Unsalted butter: Softened butter helps create that perfect airy texture. Unsalted allows you to control the saltiness in your cake, which is crucial for balancing the sweet and tart components. Melted butter would make the crumb dense, so keep it at room temperature. A quick tip: cut the butter into small cubes and let it sit for 15 minutes to soften evenly.
Sugar: Provides sweetness and helps the cake rise; a vital ingredient that really brings it all together. Granulated sugar also contributes to the tender crumb by creating tiny pockets of air when creamed. If you substitute with brown sugar, you’ll get a deeper caramel note, but the texture will be slightly heavier.
The Texture Crew
Large eggs: They bind the ingredients and create structure. Room temperature eggs whisk in better for a fluffier cake, and they also help emulsify the butter and oil. If you use cold eggs, you’ll notice a lumpy batter that won’t rise evenly. For a vegan twist, try a flax egg, but expect a denser crumb.
Cake flour: A lighter flour ideal for cakes, ensuring our layers are soft and delicate. It has a lower protein content than all‑purpose flour, which means less gluten formation and a tender crumb. Don’t be tempted to swap it with whole‑wheat flour unless you want a heartier, more rustic texture.
Baking powder and baking soda: These leavening agents help the cake rise and create softness, giving it that melt‑in‑your‑mouth quality. The combination of both ensures a balanced lift—baking powder for a steady rise, baking soda to neutralize the acidity from the lemon. Too much soda can give a metallic aftertaste, so measure carefully.
Salt: Just a pinch enhances the flavor of the cake by balancing sweetness. It also strengthens the gluten network just enough to hold the layers together without making them tough. If you’re on a low‑sodium diet, you can reduce it, but don’t skip it entirely.
The Unexpected Star
Strawberry puree: This lends a burst of juicy strawberry flavor to the cake. You can make your own by blending fresh strawberries and straining out the seeds for a silky texture. Store‑bought puree works too, but look for one without added sugars. If you skip the puree, the cake will miss that deep strawberry undertone.
Strawberry extract: A concentrated version of strawberry flavor. A little goes a long way—just a teaspoon can elevate the fruitiness without making the batter wet. If you can’t find it, vanilla extract works too, but you’ll lose that authentic berry punch.
Vegetable oil: Keeps the cake moist and adds a lovely texture, making it easy to cut and serve. Unlike butter, oil stays liquid at room temperature, preventing the cake from firming up too quickly. Using olive oil would add a grassy note—stick to a neutral oil for the clean flavor.
Pink coloring gel: This is optional but fun! It gives an extra pop of color. A tiny dab is enough; over‑coloring can taste bitter. If you’re avoiding artificial dyes, beet juice powder works as a natural alternative.
The Final Flourish
Sugar and water (for lemon simple syrup): They create a sweet, citrusy glaze that soaks into the cake layers for added zing. The syrup is the secret weapon that keeps the cake moist for days. Boil until the sugar dissolves, then let it cool before brushing onto the layers.
Lemon juice and zest: Freshness and tartness are exactly what we need, bringing the lemonade vibe to our cake. Zest contains essential oils that give an aromatic punch, while juice adds the bright acidity. If you use bottled lemon juice, you’ll miss the aromatic zest.
Confectioners’ sugar: Essential for the frosting, creating a smooth, sweet topping that’s easy to spread. Sift it to avoid lumps, especially if you’re making a silky cream cheese frosting. Too much can make the frosting gritty, so measure precisely.
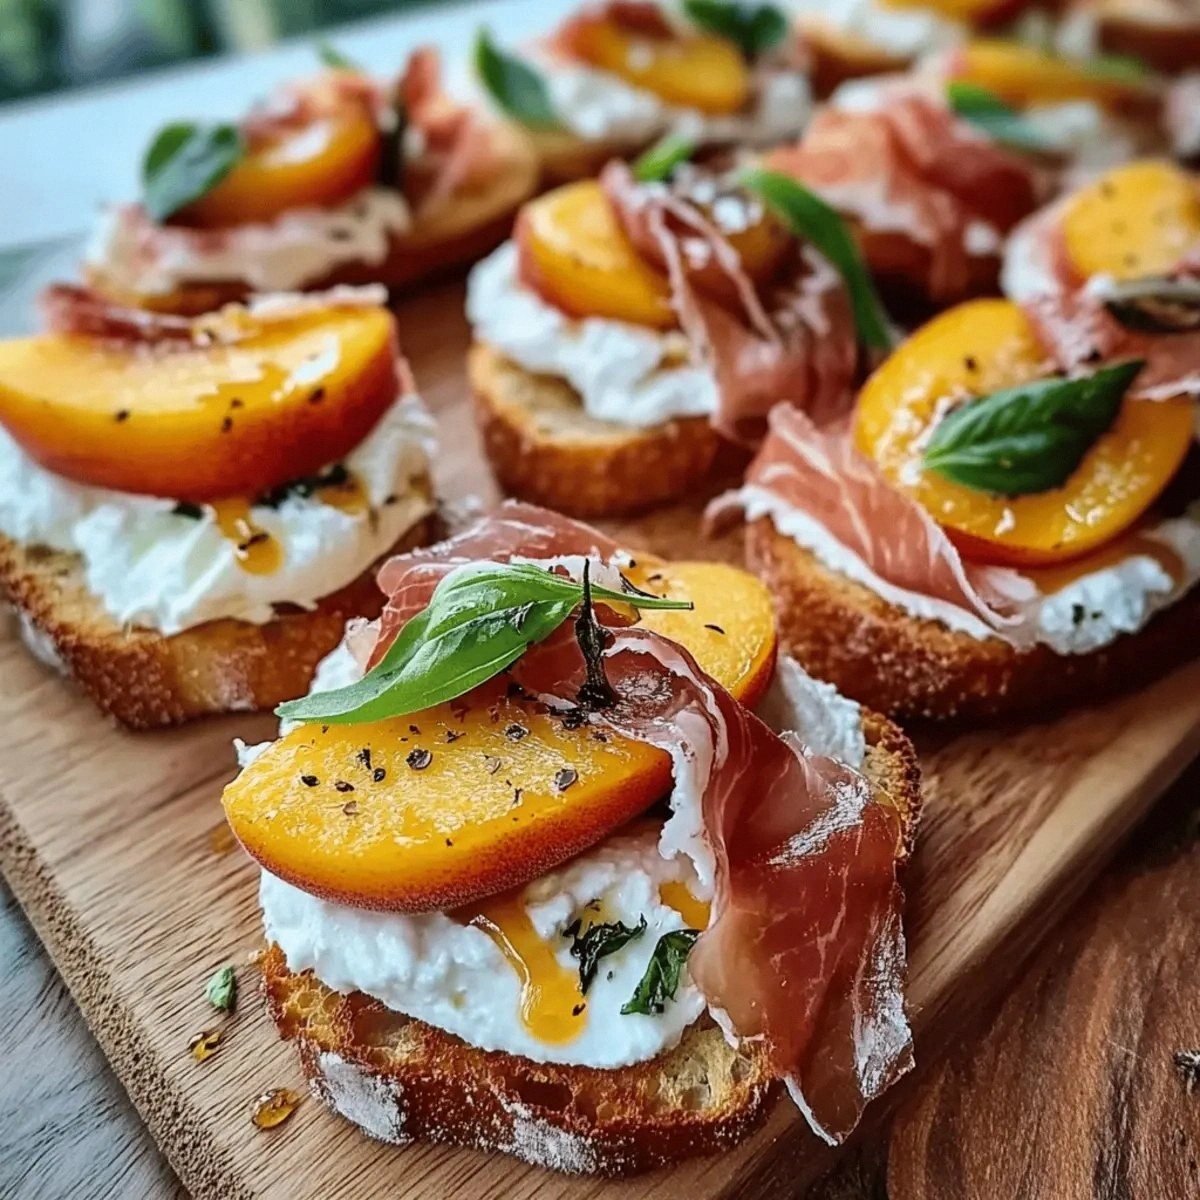
Fresh strawberries and lemon wedges: These are the show‑stoppers, perfect for garnishing and elevating the visual appeal. Slice strawberries thinly for a delicate look, and use lemon wedges for a pop of color and an extra burst of aroma. If you’re allergic to strawberries, raspberries make a beautiful substitute.
Everything’s prepped? Good. Let’s get into the real action…
The Method — Step by Step
Preheat your oven to 350°F (175°C) and grease three 8‑inch round cake pans, then line the bottoms with parchment paper. This double‑layer of protection ensures the cakes release cleanly, avoiding that dreaded “stuck‑to‑the‑pan” drama. While the pans are heating, whisk together the cake flour, baking powder, baking soda, and salt in a medium bowl; set aside. The aroma of the dry ingredients will already start teasing your senses, hinting at the fluffy texture to come.
Kitchen Hack: Place the parchment paper circles on a sheet of foil before laying them in the pans. This makes removal a breeze and keeps the edges perfectly smooth.In a large mixing bowl, cream together the softened unsalted butter and sugar on medium speed until the mixture is pale, fluffy, and smells faintly of caramel—about 3‑4 minutes. This step is crucial; the air you incorporate now will be the backbone of the cake’s lightness. Add the cream cheese and continue beating until the blend is silky and uniform. If the mixture looks curdled, keep mixing—eventually it will smooth out.
One at a time, add the large eggs, beating well after each addition. The batter should become glossy and slightly thickened, a sign that the emulsification is on point. Then pour in the vegetable oil and mix until just combined; you’ll notice the batter loosening a bit, which is exactly what we want.
Stir in the strawberry puree, strawberry extract, and a few drops of pink coloring gel. The batter will turn a soft blush, and the scent of fresh strawberries will fill the kitchen, making it impossible not to smile. If you’re using beet powder instead of gel, whisk it in with the puree to avoid streaks.
Gradually add the dry ingredient mixture to the wet ingredients, folding gently with a spatula. Stop mixing as soon as you see no streaks of flour; over‑mixing at this stage can develop gluten and make the cake tough. The batter should be smooth, slightly thick, and have a beautiful pink hue.
Divide the batter evenly among the three prepared pans, smoothing the tops with a spatula. Tap the pans lightly on the counter to release any large air bubbles. While the batter settles, whisk together the sugar and water for the lemon simple syrup in a small saucepan; bring to a boil, then remove from heat and let cool.
Place the pans in the oven and bake for 22‑25 minutes, or until a toothpick inserted into the center comes out clean with just a few moist crumbs. The edges should start pulling away from the pan, and the tops will have a delicate golden crust that gives off a faint, buttery perfume. Resist the urge to open the oven door too early; the heat loss can cause the cake to sink.
Watch Out: If the cake browns too quickly, loosely cover the tops with aluminum foil halfway through baking to prevent over‑coloring.While the cakes are still warm, brush each layer generously with the cooled lemon simple syrup. This step is pure magic; the syrup seeps into the crumb, creating a moist, tangy interior that balances the sweet strawberry base. Let the layers cool completely on a wire rack before moving on—patience now prevents a soggy frosting later.
For the frosting, beat the softened unsalted butter and cream cheese together until light and airy, about 2 minutes. Slowly add the confectioners’ sugar, a cup at a time, mixing on low to avoid a sugar cloud explosion. Finish with a splash of lemon juice and a pinch of lemon zest to keep the frosting bright. The frosting should be spreadable but firm enough to hold the layers without sliding.
Kitchen Hack: Chill the bowl for 5 minutes before the final beat; this helps the frosting set faster, giving you a smoother finish.Assemble the cake: place the first layer on a serving plate, spread a thick dollop of frosting, then sprinkle a handful of fresh strawberry slices and a few lemon zest curls. Add the second layer, repeat the frosting and garnish, then top with the final layer. Finish by frosting the entire cake, smoothing the sides with an offset spatula, and creating a rustic “swirl” pattern on the top for visual drama.
Finally, decorate with whole strawberries, lemon wedges, and a dusting of powdered sugar if you like an extra sparkle. Let the cake sit for at least 30 minutes at room temperature so the flavors meld; this is the moment of truth where the lemon‑strawberry symphony truly sings. Slice with a hot, wet knife for clean cuts, and serve with a smile. That sizzle when the knife hits the frosting? Absolute perfection.
That's it — you did it. But hold on, I've got a few more tricks that'll take this to another level…
Insider Tricks for Flawless Results
The Temperature Rule Nobody Follows
Never, ever bake a cake with cold ingredients. Bring everything—eggs, butter, cream cheese—to room temperature at least 30 minutes before you start. The even temperature ensures the batter emulsifies properly, leading to a uniform crumb. I once tried to rush this step, and the cake turned out with a dense, gummy center that no amount of frosting could fix.
Why Your Nose Knows Best
During the bake, trust your senses. When the cake reaches a golden‑brown hue and you catch a faint buttery aroma, it’s a good sign the interior is set. If you rely solely on the timer, you might over‑bake and lose that moist texture. A quick visual cue: the edges will start pulling away from the pan—this is the moment to start checking with a toothpick.
The 5‑Minute Rest That Changes Everything
After you pull the layers out of the oven, let them rest for exactly five minutes before inverting them onto a cooling rack. This short pause lets the steam escape, preventing soggy bottoms. Skipping this step can cause the layers to stick to the parchment, leading to a ragged edge that ruins the presentation.
Butter vs. Oil – The Great Debate
While butter adds flavor, oil guarantees moisture. In this recipe, we use both: butter for the crumb’s structure and oil for that melt‑in‑your‑mouth softness. If you replace oil with more butter, the cake will be richer but may dry out faster. I tried a butter‑only version once; the result was a cake that crumbled like dry toast.
Layer Alignment – The Visual Win
When stacking, use a ruler or a cake leveler to trim any uneven tops. Even layers not only look professional but also ensure each bite has a balanced amount of frosting and syrup. A crooked stack can cause the frosting to slide down the sides, creating a mess.
Creative Twists and Variations
This recipe is a playground. Here are some of my favorite ways to switch things up:
Berry‑Burst Medley
Swap half of the strawberry puree for raspberry or blueberry puree. The tangier berries amplify the lemonade zing, creating a more complex flavor profile. Perfect for a brunch where you want a bit of extra color.
Lemon‑Lavender Dream
Infuse the simple syrup with dried culinary lavender buds for a floral twist. The lavender’s subtle perfume pairs beautifully with the citrus, turning the cake into an elegant dessert for spring weddings.
Chocolate‑Covered Delight
Fold in ¼ cup of melted white chocolate into the batter for a creamy sweetness that complements the fruit. Drizzle dark chocolate ganache over the top for a sophisticated contrast. This version is a hit at holiday parties.
Vegan Velvet
Replace cream cheese with a vegan cream cheese alternative, use coconut oil instead of butter, and swap eggs for flax “eggs.” The texture changes slightly, but the lemon‑strawberry vibe remains. Great for guests with dietary restrictions.
Spiked Celebration
Add a tablespoon of vodka or rum to the lemon simple syrup for an adult‑only version. The alcohol enhances the lemon’s brightness without making the cake taste boozy. Ideal for a summer cocktail party.
Storing and Bringing It Back to Life
Fridge Storage
Cover the assembled cake loosely with plastic wrap and store it in the refrigerator for up to three days. The frosting will stay firm, and the syrup will keep the layers moist. Before serving, let it sit at room temperature for 20‑30 minutes to soften the frosting.
Freezer Friendly
Wrap the cake tightly in a double layer of foil, then place it in a freezer‑safe bag. It will keep for up to two months. When you’re ready to enjoy, thaw it overnight in the fridge, then bring to room temperature and give it a quick brush of fresh lemon syrup to revive the zing.
Best Reheating Method
If you need to warm a slice, place it on a microwave‑safe plate, sprinkle a tiny splash of water around the edges, and heat for 10‑15 seconds. The steam generated will bring back the cake’s softness, and the frosting will melt just enough to become silky again.