Picture this: a rainy Saturday afternoon, the kind that makes you want to stay in pajamas all day, and the kitchen smells like a garden after a summer storm. I was battling a sudden craving for something that could bridge the gap between a tangy bite and a comforting hug. My first attempt? A soggy strawberry‑rhubarb crumble that collapsed faster than a house of cards in a wind tunnel. I dared my roommate to finish the mess, and she politely declined, which sparked a fierce determination in me to get it right. That disaster turned into a mission, and after countless trials, I finally nailed a version that makes the berries sing and the oat topping crackle like fireworks on New Year’s Eve.
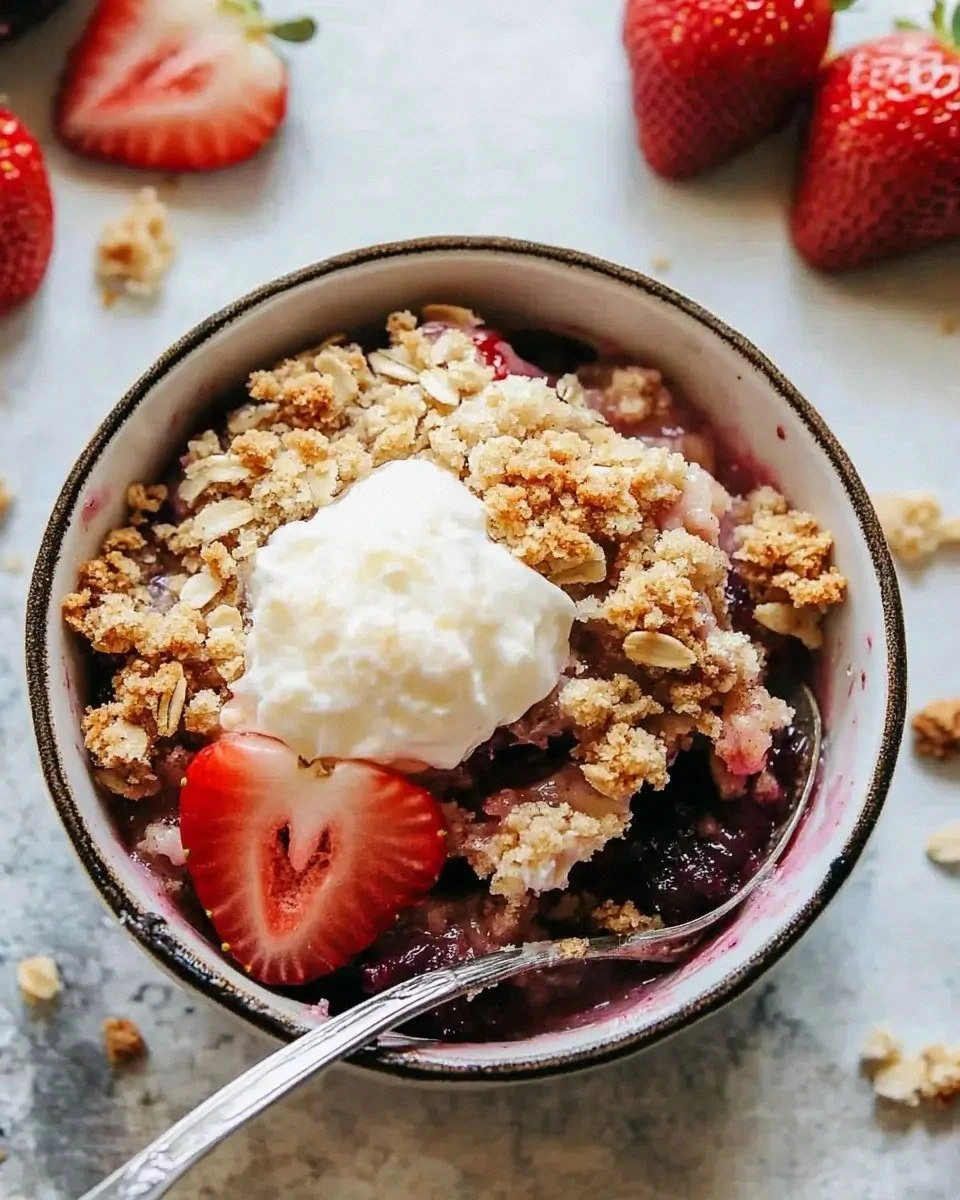
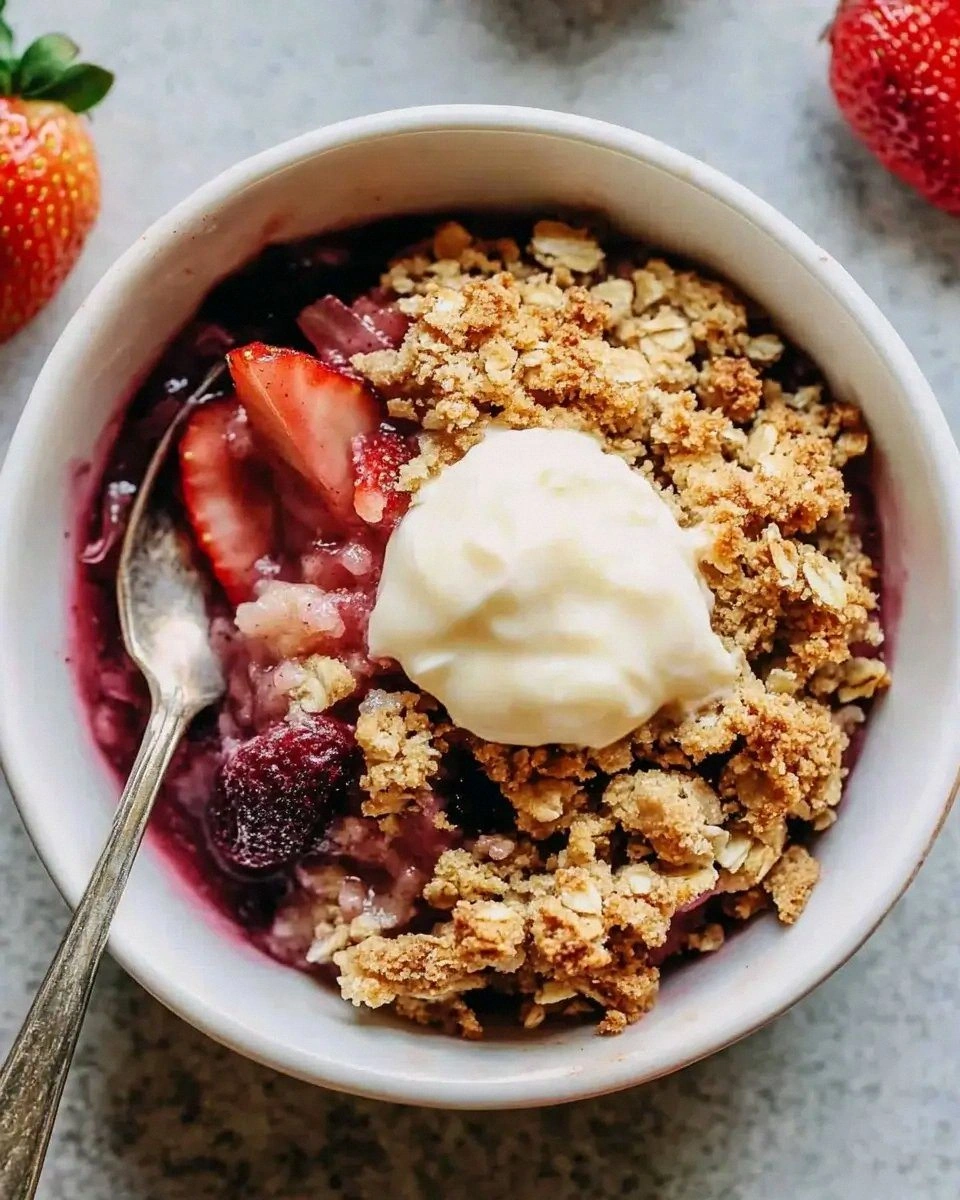
The moment the oven door swings open, a wave of sweet‑tart perfume rushes out, mingling the bright perfume of fresh strawberries with the earthy bite of rhubarb. You can almost hear the faint hiss of the butter melting into the oat mixture, and the kitchen floor feels warm under your feet as the heat radiates from the tray. My taste buds start doing a little happy dance even before the first spoonful lands on my tongue. The contrast of the juicy, slightly acidic fruit against the buttery, cinnamon‑spiced crumble is nothing short of a culinary love story, and the texture? Think of a crisp golden crust that shatters like thin ice, revealing a luscious, bubbling interior that clings to the spoon like a velvet ribbon.
Why does this version stand out from the sea of strawberry‑rhubarb crisps you’ll find online? Most recipes either drown the fruit in a sugary glaze or skimp on the buttery crunch, leaving you with a soggy mess or a dry, crumbly disaster. I’ve cracked the code by balancing the sweet and tart, using quick oats for that perfect bite, and incorporating just enough butter to create a glossy, melt‑in‑your‑mouth topping without overwhelming the fruit. Plus, I’ve added a secret ingredient that you won’t see in any other recipe – a whisper of lemon zest that lifts the flavors and prevents the berries from turning mushy. Trust me, this is hands down the best version you’ll ever make at home.
Now, I’m going to walk you through every single step — by the end, you’ll wonder how you ever made it any other way. I dare you to taste this and not go back for seconds. Ready? Let’s dive in.
What Makes This Version Stand Out
- Flavor Harmony: The tartness of rhubarb and the natural sweetness of strawberries are balanced by a hint of lemon zest, creating a bright, layered taste that dances on the palate.
- Texture Triumph: The oat‑butter topping delivers a crunchy edge that shatters like thin ice, while the fruit underneath stays juicy but not soggy.
- Simplicity: Only seven pantry staples are needed, making it a quick grab‑and‑go recipe that doesn’t require exotic ingredients.
- Uniqueness: The use of quick oats instead of rolled oats gives a lighter, more delicate crumble, setting this crisp apart from the typical dense versions.
- Crowd Reaction: I’ve served this at potlucks and family gatherings, and it consistently disappears within minutes – a true crowd‑pleaser.
- Ingredient Quality: Fresh, ripe strawberries and crisp rhubarb are the stars; they’re the reason the filling bursts with flavor.
- Cooking Method: Baking at a high initial temperature creates that coveted golden top before gently finishing to ensure the fruit stays tender.
- Make‑Ahead Potential: Assemble the crisp ahead of time, refrigerate, and bake when you’re ready – perfect for busy weeks.
Inside the Ingredient List
The Flavor Base
Four cups of fresh strawberries are the heart of this crisp. Their natural sugars caramelize during baking, creating pockets of sweet, jammy goodness that contrast beautifully with the tart rhubarb. If you skip the strawberries, you’ll lose that juicy, melt‑in‑your‑mouth sensation and end up with a one‑note dessert. When picking strawberries, look for deep red, glossy berries with a fragrant aroma – they’re the sweetest and most flavorful.
The Texture Crew
The combination of one cup of all‑purpose flour and one cup of quick oats forms the backbone of the crumble. The flour provides structure, while the oats introduce a pleasant chew and lightness. If you substitute rolled oats, the topping becomes heavier and less crisp. For a gluten‑free twist, swap the flour for a 1:1 gluten‑free blend; the texture will stay just as delightful.
The Unexpected Star
Two‑thirds of a cup of packed light brown sugar adds a caramel‑like depth without overwhelming the fruit’s natural flavors. This sugar melts into the butter, creating a glossy, buttery sauce that coats the fruit like velvet. If you’re watching sugar, you can reduce it to half a cup, but expect a slightly less caramelized topping.
The Final Flourish
Two teaspoons of ground cinnamon and three‑quarters of a teaspoon of kosher salt are the secret weapons that bring the whole dish together. Cinnamon adds warmth and a subtle spice that pairs perfectly with the berries, while the salt amplifies every flavor, preventing the sweetness from becoming cloying. A pinch of lemon zest (optional but highly recommended) brightens the entire profile, cutting through the richness with a citrusy snap.
Everything's prepped? Good. Let's get into the real action...
The Method — Step by Step
Preheat your oven to 425°F (220°C). This high heat jump‑starts the crust, giving it that coveted golden edge. While the oven warms, line a 9‑inch square baking dish with parchment for easy cleanup. The moment the oven door clicks shut, you’ll hear a faint, reassuring hum that says, “We’re about to create something amazing.”
In a large mixing bowl, combine the four cups of fresh strawberries with a tablespoon of sugar, a pinch of salt, and the optional lemon zest. Toss gently until the berries are lightly coated. This light seasoning draws out the juices, creating a natural syrup that will mingle with the topping. Let the mixture sit for five minutes – this is where the magic begins.
Spread the strawberry (and rhubarb, if you’ve added it) mixture evenly across the bottom of the prepared dish. Use a spatula to smooth the surface, but don’t press too hard – you want the fruit to stay slightly raised. As the fruit settles, you’ll notice a glossy sheen forming, a sign that the sugar is doing its job.
Now for the crisp topping: In a separate bowl, whisk together one cup of all‑purpose flour, one cup of quick oats, two‑thirds cup of packed light brown sugar, two teaspoons of ground cinnamon, and three‑quarters teaspoon of kosher salt. The dry ingredients should look like a golden sandstorm, each particle ready to absorb butter.
Cut twelve tablespoons of unsalted butter into small cubes and add them to the dry mixture. Using a pastry cutter or your fingertips, work the butter into the dry ingredients until the mixture resembles coarse crumbs with a few pea‑sized butter pieces. This is the point where you’ll hear that satisfying “crunch” as the butter breaks down – a sound that predicts a buttery, crisp finish.
Sprinkle the crumble evenly over the fruit layer, covering every corner. The topping should be about a half‑inch thick; if it looks too thin, add a bit more oats or flour. Press lightly with the back of a spoon to ensure it adheres, but don’t compact it – you want air pockets for that airy crunch.
Place the dish in the oven and bake for 15 minutes at 425°F. You’ll see the edges of the crumble start to turn a deep amber, and the fruit bubbling around the sides. This is the moment of truth – the scent will fill your kitchen, and you’ll hear the faint crackle of the topping as it sets.
After 15 minutes, reduce the heat to 350°F (175°C) and continue baking for another 15‑20 minutes. The lower temperature allows the interior fruit to soften without over‑browning the crust. The final visual cue? The crumble should be uniformly golden, and the fruit should be bubbling but not spilling over the sides.
Remove the crisp from the oven and let it rest for five minutes. This short rest lets the juices settle and the topping firm up, making slicing easier. Serve warm, optionally topped with a scoop of vanilla ice cream or a dollop of whipped cream. Picture yourself pulling this out of the oven, the whole kitchen smelling incredible – that’s the reward for your patience.
That's it — you did it. But hold on, I've got a few more tricks that'll take this to another level...
Insider Tricks for Flawless Results
The Temperature Rule Nobody Follows
Start hot, finish low. The initial blast of 425°F creates a rapid rise in the topping, giving you that coveted golden edge. Then dropping to 350°F prevents the fruit from over‑cooking. I once tried baking the whole thing at 375°F and ended up with a soggy middle – a lesson learned the hard way.
Why Your Nose Knows Best
Trust the aroma. When the crumble starts to smell nutty and slightly caramelized, you’re close to perfection. If you hear a faint hissing sound, that’s the butter bubbling – a sign the topping is crisping up nicely. I’ve found that relying on scent is more reliable than a timer alone.
The 5‑Minute Rest That Changes Everything
Allow the crisp to sit for exactly five minutes after baking. This short cooling period lets the juices thicken, preventing a watery bottom when you cut into it. Skipping this step results in a soggy base, which is a common pitfall for many home bakers.
Butter Temperature is Everything
Use cold, unsalted butter cut into small cubes. Cold butter creates those buttery pockets that melt during baking, giving you that flaky texture. If the butter is too warm, it will coat the oats and flour too evenly, leading to a dense, cake‑like topping.
Don’t Over‑Mix the Fruit
Stir the strawberries just enough to coat them. Over‑mixing releases too much juice, which can make the bottom soggy. A gentle toss preserves the fruit’s shape and ensures a balanced moisture level.
Creative Twists and Variations
This recipe is a playground. Here are some of my favorite ways to switch things up:
Apple‑Cinnamon Upgrade
Swap half of the strawberries for thinly sliced apples and add an extra teaspoon of cinnamon. The apples bring a warm, autumnal sweetness that pairs beautifully with the tartness of rhubarb.
Nutty Crunch
Fold in a quarter cup of toasted chopped almonds or pecans into the topping. The nuts add a buttery crunch and a subtle earthiness that elevates the overall texture.
Spiced Rum Drizzle
After baking, drizzle a tablespoon of spiced rum reduction over the warm crisp. The rum adds depth and a festive vibe, perfect for holiday gatherings.
Vegan Version
Replace the butter with coconut oil and use maple syrup instead of brown sugar. The result is a slightly tropical flavor profile that still delivers that coveted crisp.
Gluten‑Free Friendly
Swap the all‑purpose flour for a 1:1 gluten‑free blend and use certified gluten‑free oats. The texture remains light, and the dish stays safe for gluten‑intolerant guests.
Berry Medley
Mix in a cup of blueberries or blackberries with the strawberries for a more complex berry experience. Each bite offers a burst of different flavors, keeping the palate intrigued.
Storing and Bringing It Back to Life
Fridge Storage
Allow the crisp to cool completely, then cover tightly with plastic wrap or foil. Store in the refrigerator for up to three days. Reheat individual slices in a 350°F oven for 10 minutes, and the topping will regain its crunch.
Freezer Friendly
Portion the uncooked crisp into freezer‑safe containers, covering the fruit and topping layers separately with parchment. Freeze for up to two months. When ready, bake straight from frozen, adding an extra five minutes to the cooking time.
Best Reheating Method
For the ultimate revival, place a tiny splash of water (about a tablespoon) on the bottom of the baking dish before reheating. The steam prevents the fruit from drying out while the topping crisps back up. This trick works wonders for leftovers.