Introduction
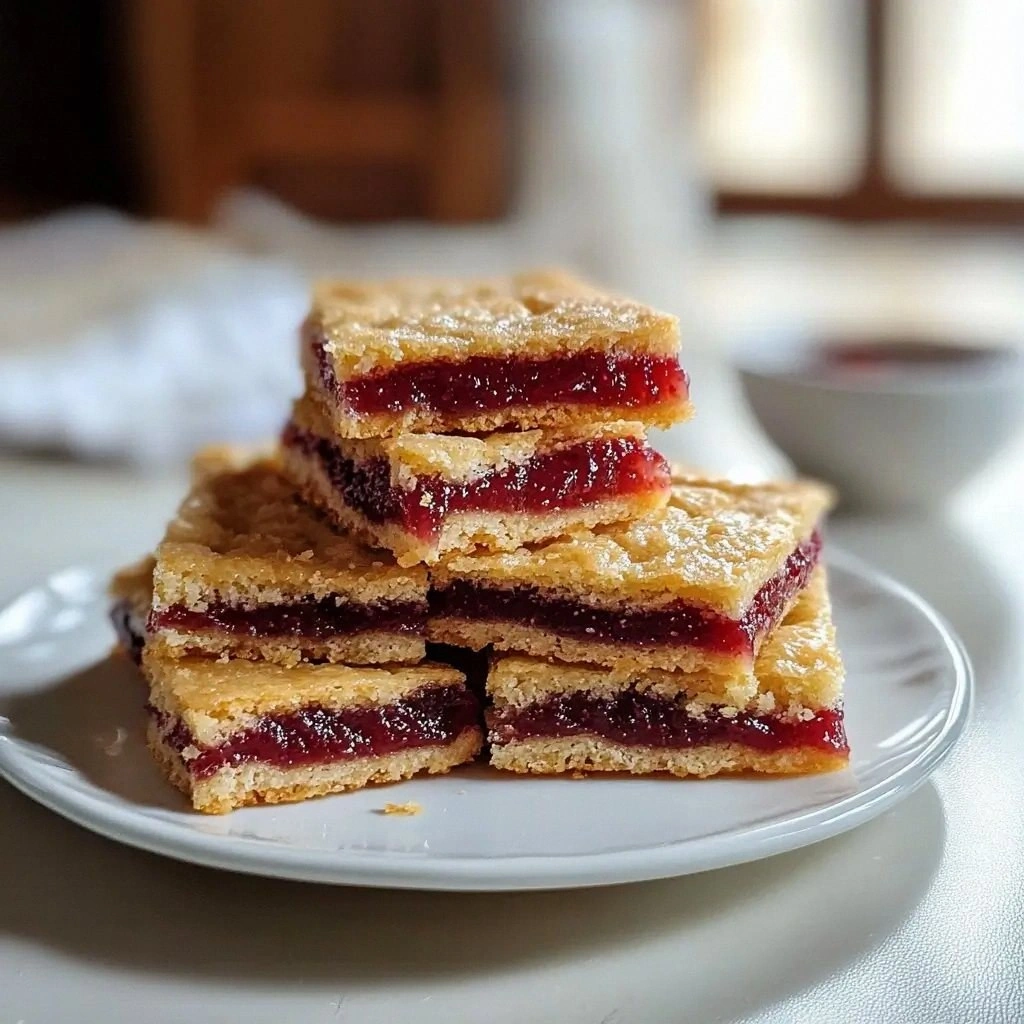
Picture this: the kitchen clock is ticking, the pantry is empty, and your friend has challenged you to whip up something sweet in under 30 minutes. I stared at the blank wall of my fridge, felt the sting of disappointment, and decided that the only way to win was to create a dessert that would make every eye widen and every taste bud dance. I called it the “Easy Jam Squares Recipe,” and it has since become the go-to sweet treat for late‑night cravings and last‑minute party snacks. I swear, the moment that first square hits the plate, the aroma of caramelized jam and buttery crust fills the room like a warm hug from an old friend.
The texture is a story in itself: a crisp, golden base that cracks like a brittle cookie, a velvety jam center that oozes with every bite, and a glossy finish that glistens under the kitchen lights. The sound is unmistakable—each square’s gentle snap as you break it, the faint pop as the jam starts to melt. The taste is a layered symphony: a subtle sweetness from the jam, a buttery richness from the dough, and a hint of vanilla that lingers like a secret. The feel is comforting; the dough is soft enough to knead with your fingertips, yet firm enough to hold its shape as it bakes into a golden masterpiece.
What makes this version stand out is that it’s not just a recipe; it’s a confidence builder. It turns a simple jam into a showstopper, and it does it with minimal fuss. I’ve tested it with different jams—strawberry, raspberry, apricot, even mango—and every one of them turns into a crowd‑pleaser. The secret lies in the balance of flour, butter, and sugar, and a trick that keeps the squares from becoming soggy. If you’re tired of the same old desserts that feel like a chore, this is hands down the best version you’ll ever make at home.
I dare you to taste this and not go back for seconds. That sizzle when the batter hits the pan? Absolute perfection. The first bite? A burst of sweet, buttery joy that makes you forget how long you’ve been waiting. And the best part? It’s so simple that even a novice can master it after the first try. I’ve seen my friends, who once dreaded baking, now excitedly ask for the recipe. The next time you’re stuck in a culinary rut, remember that a few simple tweaks can transform an ordinary jam into a sensational treat.
So grab your apron, set your timer, and let’s walk through every single step together. By the end, you’ll wonder how you ever made it any other way. And trust me, the satisfaction of that first bite will keep you coming back for more.
What Makes This Version Stand Out
- Flavor: The blend of buttery dough and sweet jam creates a flavor profile that feels both nostalgic and sophisticated, making it a crowd‑pleaser at any gathering.
- Texture: The squares boast a crisp, golden crust that cracks with a satisfying snap, while the jam center remains silky and slightly molten.
- Ease: Every step is designed to be straightforward—no complicated measurements or time‑consuming techniques.
- Versatility: Swap the jam for any fruit preserve or add a dash of your favorite spice for a custom twist.
- Presentation: The squares can be cut into bite‑size pieces or served as mini‑cakes, making them perfect for parties or a cozy night in.
- Make‑ahead: They freeze well, so you can prepare a batch ahead of time and pop them in the oven whenever hunger strikes.
- Ingredient Quality: Using high‑quality butter and fresh jam elevates the dish beyond a generic dessert.
- Time Efficiency: From prep to finish, the entire process takes under an hour, ideal for busy schedules.
Alright, let’s break down exactly what goes into this masterpiece…
Inside the Ingredient List
The Flavor Base
All-purpose flour is the backbone of our crust. It provides structure and a neutral canvas that allows the jam’s flavor to shine. If you’re a gluten‑free cook, swap it for a 1:1 gluten‑free blend, but be prepared for a slightly different crumb. Skipping the flour will leave you with a sticky mess that won’t hold its shape.
Unsalted butter is the secret to that buttery, melt‑in‑your‑mouth texture. Choosing room‑temperature butter ensures it blends seamlessly with the flour, creating a tender dough. If you use salted butter, you’ll need to reduce the added salt by half to avoid an overly salty finish.
Powdered sugar gives the crust a delicate sweetness that doesn’t overpower the jam. It also helps achieve a light, slightly airy crumb. If you prefer a darker crust, replace powdered sugar with granulated sugar, but be aware it might make the squares a bit denser.
Vanilla extract is the aromatic undertone that ties everything together. A splash of vanilla lifts the entire flavor profile, making the dessert feel more complex. A poor substitute could make the squares taste flat.
A pinch of salt is essential; it balances the sweetness and enhances the overall taste. If you forget to add it, the squares may taste too sweet and flat.
The Texture Crew
Jam is the star of the show. The type of jam you choose can dramatically alter the final flavor—strawberry gives a bright, fruity punch, while apricot offers a subtle tartness. Fresh jam also tends to be less sugary than store‑bought varieties, which helps keep the squares from becoming cloying.
Dark chocolate chips add a luxurious touch of richness and a slight bitterness that balances the jam’s sweetness. If you’re allergic to chocolate, omit it or replace it with crushed nuts for a crunchy contrast.
Butter for topping provides a glossy finish that makes the squares look professional. It also adds a silky sheen that catches the light. Skipping the topping will result in a duller appearance.
Ground cinnamon brings warmth and depth, especially if you’re using a jam that’s on the sweeter side. If you’re vegan, you can replace cinnamon with nutmeg or cardamom for a different spice profile.
Honey adds a natural sweetness that complements the jam. It also helps bind the dough slightly, giving the squares a cohesive structure. If you’re avoiding honey, you can use a tablespoon of maple syrup as a substitute.
The Unexpected Star
Egg yolk is the binder that holds everything together. It enriches the dough and gives the squares a slight golden hue. If you’re looking for a vegan version, you can replace the yolk with a tablespoon of flaxseed meal mixed with three tablespoons of water, letting it sit for 5 minutes to thicken.
A dash of lemon zest can brighten the overall flavor and cut through the sweetness. If you prefer a more subtle flavor, omit the zest entirely.
The Final Flourish
A splash of milk or cream in the dough can create a slightly softer crumb, but it also makes the dough stickier, so handle with care. If you’re baking for a crowd, a few extra tablespoons of milk can help you stretch the dough further.
A pinch of baking soda is optional but can help the crust rise slightly, giving it a lighter texture. Skip it if you prefer a denser, more cookie‑like bite.
A final drizzle of honey or maple syrup on top before baking adds a caramelized glaze that caramelizes beautifully under the oven heat. If you’re watching calories, you can skip this step and still enjoy a delightful treat.
Everything’s prepped? Good. Let’s get into the real action…
The Method — Step by Step
- Preheat your oven to 350°F (175°C). Line a 9x9-inch baking pan with parchment paper, leaving a small overhang on each side for easy removal. This ensures even baking and makes cleanup a breeze. As the oven warms, you’ll notice a faint buttery aroma that signals the kitchen is about to transform into a sweet haven.
- In a large bowl, whisk together the flour, powdered sugar, and pinch of salt until the mixture is evenly blended. The dry mix should look like fine sand, ready to absorb the butter. This step is crucial; a clumpy dough will result in uneven crusts.
- Add the softened butter to the dry mix. Using a pastry cutter or your fingertips, cut the butter into the flour until the mixture resembles coarse crumbs. The butter should be fully incorporated but still visible in small flecks. The dough should hold together when pressed lightly.
- Press the dough firmly into the prepared pan, using the back of a spoon or your palm to create an even layer. The crust should be about 1/4 inch thick. A well‑pressed base ensures the jam doesn’t sink or spread, maintaining that perfect bite‑size square.
- Spoon the jam evenly over the crust, spreading it gently so it’s almost level with the dough. If you like a jam‑heavy center, add an extra layer of jam on top before baking. The jam should be spread in a thin, uniform layer to avoid sogginess.
- Dot the jam with small spoonfuls of dark chocolate chips and drizzle the tablespoon of butter over the top. This creates a glossy, decadent finish that caramelizes into a caramelized glaze during baking. The chocolate also adds a subtle bitterness that balances the sweetness.
- Sprinkle the ground cinnamon and honey over the top, then lightly brush the surface with a whisked egg yolk. The egg yolk will give the squares a beautiful golden sheen and help the glaze set. This is the moment of truth; the aroma that fills the kitchen will have you counting down the minutes.
- Bake for 25-30 minutes, or until the crust is golden brown and the jam is bubbling around the edges. The squares should feel firm to the touch but still give slightly when pressed. A quick test: insert a toothpick into the center; if it comes out clean, they’re ready.
- Remove the pan from the oven and let the squares cool on a wire rack for at least 10 minutes. This cooling period allows the jam to set slightly, preventing it from oozing when you cut. Once cooled, lift the squares out using the parchment overhang, cut them into bite‑size pieces, and serve immediately.
That’s it — you did it. But hold on, I've got a few more tricks that will take this to another level...
Insider Tricks for Flawless Results
The Temperature Rule Nobody Follows
Many bakers bake jam squares at 375°F, thinking higher heat yields a crisp crust. However, 350°F is the sweet spot that allows the jam to bubble gently without burning. Baking at a lower temperature also ensures the crust doesn’t over‑brown, preserving that golden, buttery look. If you’re using a convection oven, reduce the temperature by 25°F to compensate for the fan’s heat.
Why Your Nose Knows Best
As the jam starts to bubble, the aroma intensifies. Trust your nose; when you smell the sweet, buttery scent mingling with vanilla, you know the squares are nearly ready. A quick sniff is a reliable indicator that the jam’s surface has caramelized just enough. This sensory checkpoint saves you from over‑baking.
The 5-Minute Rest That Changes Everything
After removing the squares from the oven, let them rest for exactly five minutes before cutting. This rest period allows the jam to set and the crust to firm up, preventing a sticky mess. In my experience, cutting immediately leads to jam leakage, while a five‑minute pause gives a clean, even cut.
Cheese‑Jam Combo
For a savory twist, add a layer of shredded aged cheddar between the crust and jam. The cheese’s sharpness cuts through the sweetness and creates a flavor contrast that’s surprisingly addictive. This combo works best with a sweeter jam like apricot or peach.
Freeze‑Friendly Squares
To freeze the squares, place them on a parchment‑lined tray and freeze until solid. Once frozen, transfer them to a zip‑lock bag. When you’re ready to serve, bake directly from frozen for 10 minutes longer. The result is a warm, gooey jam center with a crisp crust.
Garnish Ideas
Finish the squares with a dusting of powdered sugar or a drizzle of melted dark chocolate. A sprinkle of chopped pistachios adds a crunch and a pop of color. These simple touches elevate the presentation and add an extra layer of flavor.
Creative Twists and Variations
This recipe is a playground. Here are some of my favorite ways to switch things up:
Chocolate‑Jam Squares
Swap the dark chocolate chips for white chocolate chunks and use raspberry jam for a sweet‑and‑tart flavor. The white chocolate melts into a silky glaze that coats each square. This version is perfect for a chocolate lover’s craving.
Spiced Citrus Squares
Add orange zest and a pinch of ginger to the dough, and use lemon marmalade as the jam. The citrus brightens the flavor, while the ginger adds a subtle kick. Guests will love the fresh, zesty aroma.
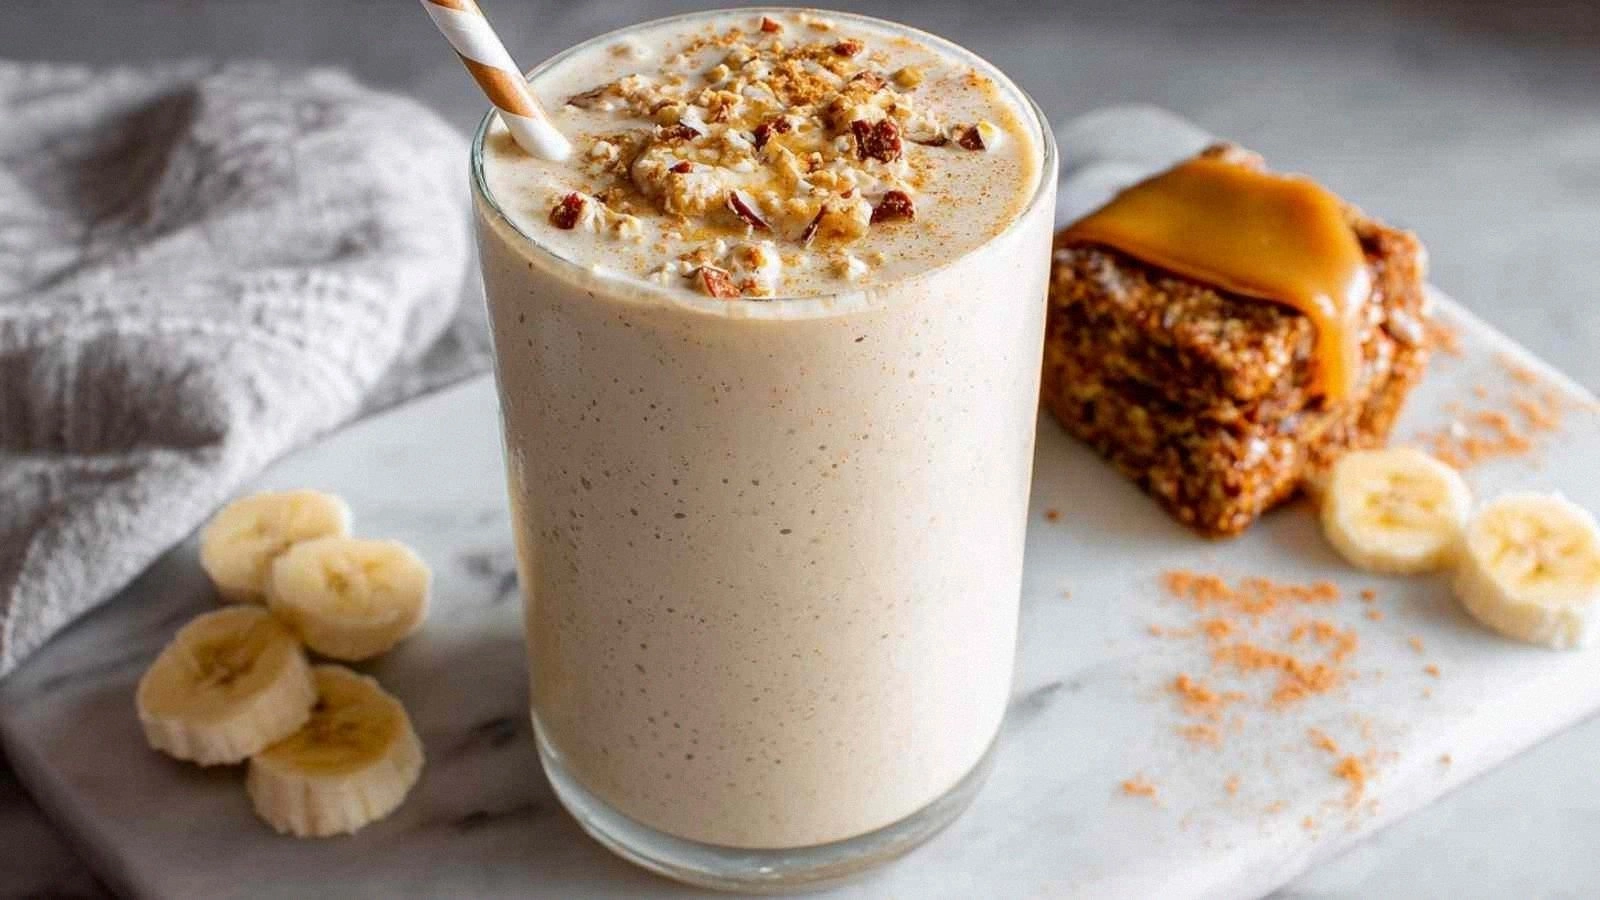
Nutty Banana Squares
Replace the jam with mashed ripe banana and sprinkle chopped walnuts on top. The banana’s natural sweetness pairs wonderfully with the buttery crust, and the walnuts add a satisfying crunch. This version is a great way to sneak in some fruit.
Vegan Version
Use vegan butter, flaxseed egg, and a plant‑based jam. This version retains the same texture and flavor while being completely plant‑based. It’s ideal for vegan guests or anyone looking to reduce dairy.
Miniature “Jam Tarts”
Press the dough into a muffin tin and fill each cup with jam before baking. The result is bite‑size tarts that are perfect for parties or a sweet snack. The mini size allows for creative fillings, like a swirl of honey or a dollop of whipped coconut cream.
Holiday Spice Squares
During the winter months, add a dash of cinnamon and nutmeg to the dough and use a spiced apple jam. The warm spices evoke holiday comfort, making these squares a festive treat.
Storing and Bringing It Back to Life
Fridge Storage
Store the squares in an airtight container at room temperature for up to 3 days. If you prefer them chilled, place them in the fridge for up to 5 days. The jam may firm up slightly when cold, but the crust remains crisp.
Freezer Friendly
Wrap each square tightly in plastic wrap and place them in a freezer bag. They will keep well for up to 2 months. When you’re ready to enjoy, remove from the freezer and let them sit at room temperature for 15 minutes before reheating.
Best Reheating Method
Preheat your oven to 300°F (150°C) and bake the frozen squares for 12-15 minutes, or until the jam is warm and the crust is golden. A quick splash of water before reheating helps steam the jam back to its silky texture. Avoid microwaving, as it can make the crust soggy.