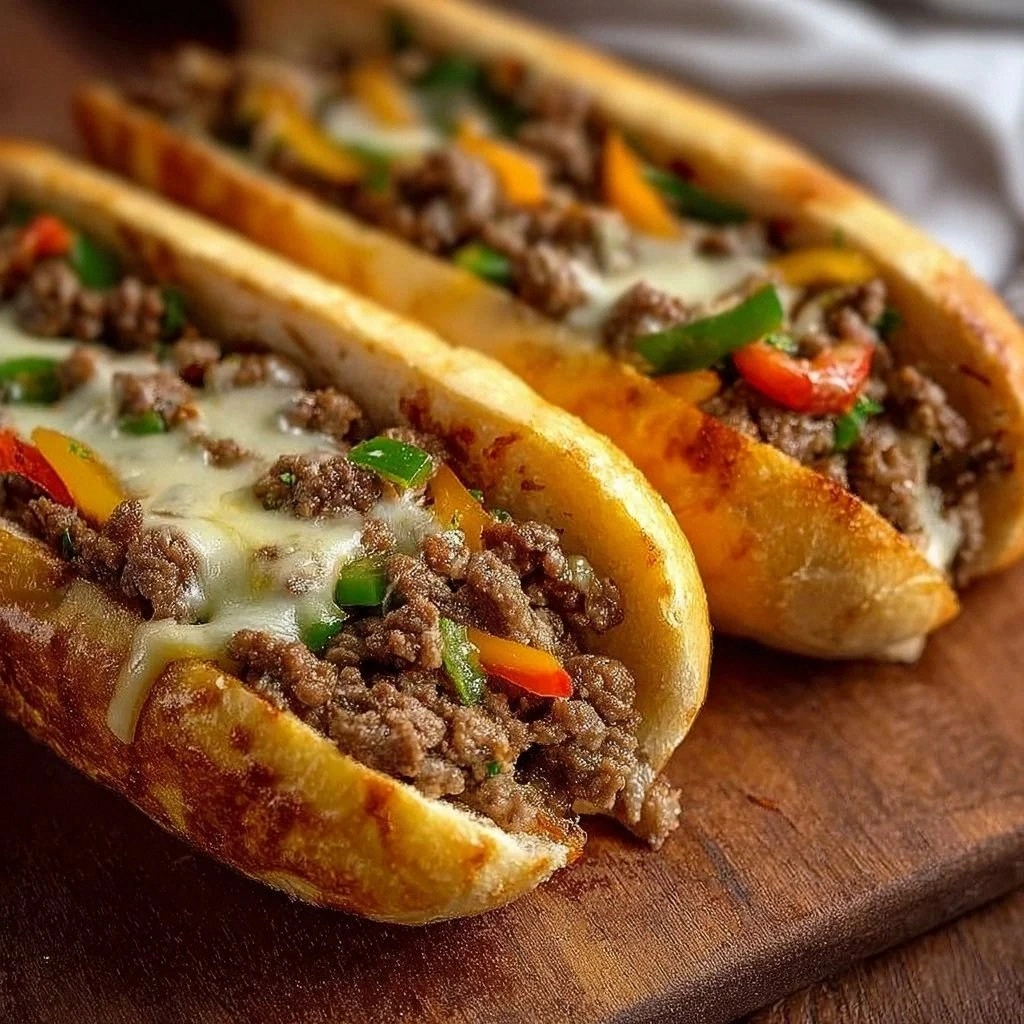
Picture this: a midnight kitchen, a sizzling skillet, and the unmistakable aroma of onions meeting ground beef. I was halfway through a burnt pizza when a craving for something hearty crashed over me, and I decided to turn the kitchen into a Philly cheesesteak playground. The result was a savory, melt‑in‑your‑mouth sandwich that felt like a hug in a roll. The crunch of caramelized onions, the melt of provolone, and the juicy beef made my taste buds dance. I dare you to taste this and not go back for seconds.
The sound of the skillet was a low, rhythmic drumbeat, the scent of onions caramelizing was a sweet, buttery perfume that filled the room, and the sight of the beef turning from pink to a deep mahogany was a visual promise of flavor. When you bite, the first thing you feel is a burst of savory meat, followed by the silky melt of cheese that coats your tongue like velvet. The crunch of the toasted roll gives a satisfying counterpoint, and the sweet tang of sautéed peppers adds a subtle brightness. Every bite is a harmonious chorus of textures and tastes that play together like a well‑tuned orchestra. It’s the kind of dish that makes you want to keep reaching for another bite.
What sets this version apart from the countless other cheesesteak recipes floating around is the focus on balance and simplicity. The beef is browned to a deep mahogany, then simmered with onions and bell pepper for a caramelized finish that hits the palate like a warm hug. The recipe keeps the process straightforward, yet every step is crafted to maximize flavor without extra fuss. The use of provolone provides a classic, creamy melt, while the optional bell pepper adds a subtle sweetness that elevates the overall profile. The end result feels like a restaurant‑style sandwich that you can make in your own kitchen.
And here's a little secret I discovered: a splash of Worcestershire sauce during the browning stage adds a depth of umami that makes the beef sing. I also learned that toasting the rolls just before assembly preserves their crunch while keeping the interior soft. Picture yourself pulling the sandwich out of the oven, the kitchen smelling incredible, the cheese bubbling, and the rolls golden. That’s the moment you’ll remember forever. Let me walk you through every single step — by the end, you'll wonder how you ever made it any other way.
What Makes This Version Stand Out
- Flavor: The beef is browned to a deep mahogany, then simmered with onions and bell pepper for a caramelized finish that hits the palate like a warm hug. The combination of savory beef, sweet onions, and pepper creates a layered taste that feels both familiar and fresh. This is the core of what makes the sandwich memorable.
- Texture: Each bite delivers a contrast between the crisp edges of sautéed veggies and the silky, melted cheese that oozes across the roll. The beef remains juicy, the onions stay tender, and the roll stays crisp. The result is a satisfying bite that never feels cloying.
- Speed: In just 45 minutes you can have a restaurant‑style cheesesteak on the table, making it perfect for a weekday dinner or a casual gathering. The recipe is designed for efficiency without sacrificing quality. You’ll be able to serve a crowd in record time.
- Versatility: The recipe works with ground turkey, chicken, or even a plant‑based mince, so you can tailor it to your dietary preferences without sacrificing flavor. The beef mixture adapts well to any protein, and the cheese can be swapped for a vegan alternative if needed. This flexibility makes it a go‑to for any kitchen.
- Make‑ahead: The beef mixture can be pre‑cooked and stored, then reheated in the pan before adding the cheese, saving you a step on busy nights. This prep trick means you can have the sandwich ready to serve in minutes. It’s a lifesaver for last‑minute dinner plans.
- Ingredient Quality: Using an 80/20 blend of ground beef ensures the right balance of fat for juiciness without excess greasiness. The beef’s fat content keeps the sandwich moist and flavorful. Choosing the right cut is the first step toward culinary greatness.
- Presentation: The hoagie rolls are toasted until golden, giving the sandwich a satisfying crunch that contrasts with the soft interior. A well‑presented sandwich invites you to dig in immediately. The visual appeal is a bonus that makes the dish even more enticing.
- Crowd Reaction: Friends who have tried it rave about the melt‑in‑your‑mouth texture and the perfect balance of savory and sweet. The sandwich has become a staple at gatherings, and people often ask for the recipe. It’s a guaranteed crowd‑pleaser.
Inside the Ingredient List
The Flavor Base
Ground beef is the heart of this dish; it provides the rich, savory foundation that carries the rest of the flavors. The 80/20 blend gives enough fat to keep the meat juicy while still allowing the spices to shine through. If you prefer a leaner option, ground turkey or chicken can substitute, but watch for moisture loss. The onions and bell pepper add sweetness and depth; without them the sandwich would feel flat. They also contribute a pleasant aroma that signals everything is cooking just right.
The Texture Crew
Hoagie rolls are the vessel that holds everything together; their soft interior and crisp crust create a satisfying bite. Toasting them before assembly locks in moisture and adds a nutty flavor that complements the beef. Provolone cheese melts into the meat, creating a gooey blanket that ties the sandwich together. The cheese’s mild, buttery taste balances the savory beef, while its meltiness adds a luxurious mouthfeel. If you’re adventurous, a blend of mozzarella and cheddar can offer a sharper bite.
The Unexpected Star
Olive oil is the unsung hero that keeps the skillet slick and prevents sticking. It also helps the onions caramelize evenly, bringing out their natural sweetness. A light brush of oil on the roll halves before toasting adds a subtle shine and crispness. Some cooks swear by butter for extra flavor, but oil keeps the crust dry and the sandwich from getting soggy. A good quality oil will make a noticeable difference.
The Final Flourish
Salt and pepper are essential for seasoning, but they’re also the final touch that brings everything together. Seasoning the beef as it cooks ensures the flavors are evenly distributed. Pepper adds a gentle heat that cuts through the richness of the meat and cheese. The optional bell pepper adds a pop of color and a mild sweetness that balances the savory profile. Together, these seasonings elevate the sandwich to a new level of flavor.
The Method — Step by Step
- Preheat your oven to 375°F (190°C). Warm a large skillet over medium heat and add a splash of olive oil to coat the bottom. Sauté the sliced onion until translucent, about five minutes, letting the natural sugars caramelize. The kitchen should fill with a sweet, buttery aroma that signals the dish is coming together. This first step sets the flavor foundation.
- Add the sliced bell pepper to the skillet and stir. Let it soften for about three minutes, allowing the pepper to release its subtle sweetness. Keep the heat medium so the veggies don’t burn. The pepper adds a pop of color and a gentle crunch. This layer deepens the sandwich’s flavor profile.
- Increase the heat to medium‑high and add the ground beef. Break it apart with a spatula, ensuring even browning. Cook until the beef is no longer pink, about eight minutes, watching for a golden crust. The beef should develop a savory, caramelized exterior that locks in juices. This step gives the sandwich its meat backbone.
- Season the meat with salt and pepper, stirring to distribute the seasoning evenly. The seasoning should coat the beef like a fine dusting. This is the moment the flavors start to marry. Keep the heat on medium‑high for a minute to let the salt draw out moisture. The beef will become richer in flavor.
- Reduce heat to medium and let the beef cook for an additional two minutes, allowing the juices to mingle. The pan should emit a gentle sizzle. This step ensures the beef stays moist. Keep an eye on the liquid level; if it dries out, add a splash of water. The beef will remain tender.
- While the beef rests, toast the hoagie rolls. Slice them lengthwise, leaving the bottom intact. Spread a thin layer of butter or oil on the cut sides. Place them on a baking sheet and bake for three to four minutes until golden. The rolls should be crisp on the outside and soft inside. This creates a sturdy vessel for the filling.
- Carefully transfer the beef mixture onto a sheet of parchment. Spread it evenly, forming a rectangle. This step is crucial for even cheese melt. The beef should be pliable and easy to handle. This sets the stage for assembly.
- Sprinkle the provolone cheese over the beef. Cover the pan with a lid or foil to trap heat. Let it melt for three minutes. The cheese should ooze into the meat, creating a gooey blanket. This is the moment of pure magic.
- Once the cheese has melted, remove the pan from heat. Use a spatula to lift the cheesy beef onto a cutting board. Slice it into portions that fit inside the rolls. The beef should be pliable and easy to handle. This step prepares the filling for assembly.
- Place the sliced beef onto the toasted roll halves. If desired, add extra toppings such as sautéed mushrooms or hot sauce. The combination should look appetizing and vibrant. This is where your sandwich becomes a masterpiece.
- Slide the assembled sandwiches onto a baking sheet. Return to the oven for five minutes to warm the cheese and melt any remaining edges. The aroma will intensify, making the kitchen smell like a Philly diner. This step ensures every bite is hot and flavorful.
- Remove the sandwiches from the oven. Let them rest for a minute before cutting. Serve immediately with a side of pickles or a crisp salad. The sandwich should feel substantial yet satisfying. Enjoy the culmination of your culinary adventure.
Insider Tricks for Flawless Results
The Temperature Rule Nobody Follows
Keep the skillet at medium‑high for browning, then reduce to medium. This prevents the beef from drying out and ensures a caramelized crust. A friend once left it on high and ended up with a rubbery mess. I learned the hard way that controlled heat is key.
Why Your Nose Knows Best
Before seasoning, let the onions and peppers cook until they smell sweet. The aroma is a real indicator of caramelization. If the smell is sharp, they need more time. This step guarantees depth of flavor.
The 5‑Minute Rest That Changes Everything
Let the cooked beef rest off the heat for five minutes. This allows the juices to redistribute, keeping the meat moist. Skipping this step leaves the sandwich dry. I always set a timer to avoid rushing.
Butter vs. Oil for Toasting
Using butter on the roll halves adds a rich flavor, but oil keeps the crust crisp. Some like a buttery crunch; others prefer a dry golden edge. Experiment to find your preference. I find a light brush of oil works best for a neutral base.
Cheese Swap Secrets
While provolone is classic, a blend of mozzarella and cheddar can give a sharper bite. If you crave heat, pepper jack adds a kick. The key is to use a cheese that melts evenly. My favorite is a mix of provolone and mozzarella for creaminess.
Quick Assembly Hack
Use a small spatula to press the beef into the roll. This helps the cheese melt into the bread and keeps the sandwich from falling apart. It also creates a neat presentation. I always do this for a clean look.
Creative Twists and Variations
Smoky Chipotle
Add chipotle powder to the beef for a smoky heat. Pair with pepper jack cheese for extra kick. Serve on a toasted roll for a breakfast‑style bite. This version is perfect for brunch.
Mediterranean Melt
Replace provolone with feta and add sun‑dried tomatoes. Toss in a handful of spinach before adding cheese. The tangy feta balances the sweet onions. Great for a lighter take.
Veggie‑Rich
Omit the beef and use a mix of sautéed mushrooms, zucchini, and bell pepper. Top with mozzarella and bake until bubbly. The veggie medley offers a hearty, plant‑based option. Ideal for a meatless night.
Tex‑Mex Twist
Stir in cumin and oregano into the beef mixture. Add a splash of salsa before the cheese. Use a flour tortilla instead of a hoagie roll. The result is a handheld taco with cheesesteak flair.
Breakfast Edition
Replace the beef with scrambled eggs and crumbled bacon. Add a slice of cheddar cheese. Toast the roll and fill with the egg mixture. This breakfast sandwich is a protein‑packed start.
Sweet & Savory
Drizzle a little honey over the beef before adding cheese. Combine with caramelized onions for a sweet undertone. The honey caramelizes further in the oven. This version is a surprising crowd‑pleaser.
Storing and Bringing It Back to Life
Fridge Storage
Store assembled sandwiches in airtight containers for up to two days. Keep the rolls separate until ready to serve. This prevents sogginess. Reheat in the oven for a crisp finish.
Freezer Friendly
Wrap the beef mixture in foil and freeze for up to three months. When ready, thaw in the fridge overnight. Add cheese and heat for ten minutes. The texture remains close to fresh.
Best Reheating Method
Use a toaster oven at 350°F for five minutes to revive the cheese. Alternatively, microwave on medium for 30 seconds, then finish in the oven for two minutes. Add a splash of water to keep the bread from drying. The result is a hot, gooey sandwich.