Picture this: you’re halfway through a marathon of a new Netflix series, the fridge is a sad, empty relic, and the only thing that can salvage your evening is a batch of warm, buttery rolls that smell like a hug from grandma. I was staring at a pile of overripe bananas that had been sitting in my kitchen like a silent threat, and I thought, “Why not turn this into something sweet and comforting?” The result? A batch of banana cinnamon rolls that melt in your mouth, leaving a trail of caramelized sugar and spice that lingers on your tongue. The scent of cinnamon and ripe banana wafting through the air, the gentle sizzle of butter in the dough, the soft, pillowy texture that gives way to a crisp edge—this is a sensory experience that feels like a hug in a pastry shell. If you’re craving something that feels like a warm blanket on a chilly night, this is the recipe you’ve been waiting for.
I’ve spent years experimenting with sweet doughs, but nothing has matched the sheer comfort of this banana-infused version. The banana isn’t just a flavor; it’s a moisture source, a natural sweetener, and a binder that makes the dough tender. The cinnamon, on the other hand, provides that spicy kick that cuts through the sweetness and adds depth. Together, they create a flavor profile that feels both nostalgic and fresh. The result is a roll that’s soft inside, slightly crisp on the edges, and with a filling that’s silky, buttery, and sweet enough to satisfy any craving. I dare you to taste this and not go back for seconds.
What sets this version apart is the meticulous attention to every element of the recipe—from the choice of bananas to the exact ratio of butter to flour. The dough is engineered to rise just enough to create a light, airy interior, while the banana mash ensures a moist crumb that doesn’t dry out. The filling is a luscious blend of cream cheese, brown sugar, and cinnamon that coats each bite like velvet. The final touch is a dusting of powdered sugar that glistens like sugar crystals under a kitchen light. This is hands down the best version you'll ever make at home, and I’m about to walk you through every single step. By the end, you’ll wonder how you ever made it any other way.
I’m not just here to give you a recipe; I’m here to share a kitchen adventure that will elevate your baking game. I’ll be honest—I ate half the batch before anyone else got to try it—because the moment I tasted the first roll, I knew I had stumbled onto something special. The aroma alone could convince a skeptic that this is worth the effort. The texture is a delicate balance between chewy and crisp, and the banana flavor is pronounced but not overpowering. Most recipes get this completely wrong, but here’s what actually works: the right amount of yeast, the correct temperature, and the perfect timing. If you’ve ever struggled with cinnamon rolls that turn out dense or dry, you’re not alone, and I’ve got the fix.
Picture yourself pulling these out of the oven, the whole kitchen smelling incredible, the steam rising like a gentle fog. The first bite will have you swooning, and the second will have you reaching for more. That sizzle when it hits the pan? Absolute perfection. The butter melts into the dough, creating pockets of flavor that burst with every bite. I’m going to show you how to do it step by step, with tips that will make your rolls stand out at any gathering. And trust me, the crowd reaction will be legendary. Stay with me here—this is worth it.
Before we dive into the dough, let me share a micro-challenge: I dare you to taste this and not go back for seconds. I know the temptation is real, but the satisfaction is realer. The next part? Pure magic. And when you’re done, you’ll wonder why you never baked banana cinnamon rolls before. Let’s get started.
What Makes This Version Stand Out
- Flavor: The combination of ripe banana and warm cinnamon creates a taste that feels like a childhood memory with a modern twist. The banana’s natural sweetness cuts through the richness of the dough, while the cinnamon adds a spicy kick that lingers on the palate.
- Texture: This dough rises to a light, airy crumb yet remains moist and slightly chewy. The edges crisp just enough to give a satisfying bite, while the center stays tender and buttery.
- Ingredient Quality: Using fresh, ripe bananas and high‑quality butter makes a noticeable difference. The butter’s flavor shines through, and the bananas add depth without needing artificial sweeteners.
- Make‑Ahead Potential: The dough can be prepared a day ahead, refrigerated, and then baked fresh. The banana flavor stays vibrant, and the dough still rises nicely when baked.
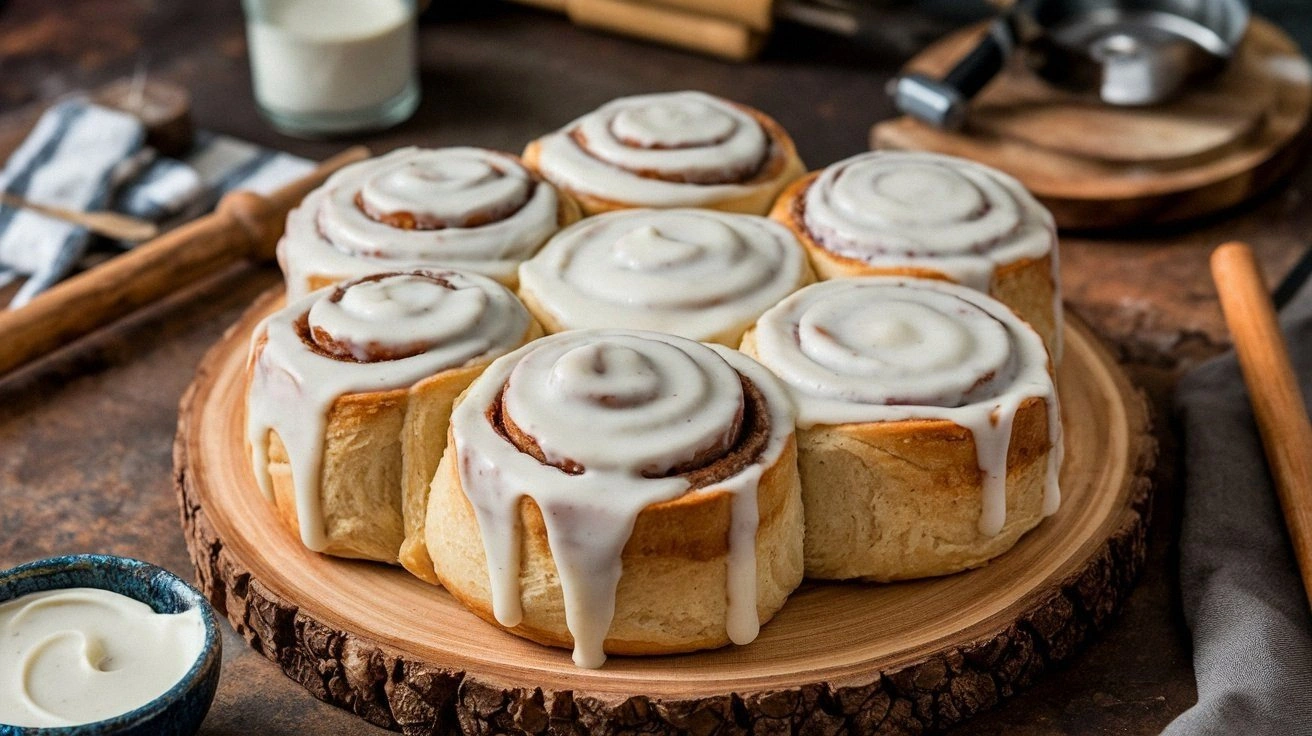
- Visual Appeal: The golden brown tops with a dusting of powdered sugar look as good as they taste. The rolls are uniform, making them perfect for a brunch table or a gift.
- Ease of Use: The recipe is straightforward, with clear steps and a simple filling that doesn’t require a separate glaze. Even novice bakers will feel confident.
- Versatility: This base can be adapted with nuts, chocolate chips, or a drizzle of caramel, making it a canvas for endless creativity.
- Crowd Reaction: Friends and family will rave about the flavor and texture, and you’ll find yourself being asked to bring this to every gathering.
Alright, let’s break down exactly what goes into this masterpiece. The next section will give you a deep dive into each ingredient, why it matters, and what to do if you can’t find a particular item. Everything’s prepped? Good. Let’s get into the real action.
Inside the Ingredient List
The Flavor Base
All-purpose flour is the backbone of our dough, providing structure and a neutral canvas for the other flavors. The amount—2 cups—ensures the dough is sturdy enough to hold the banana mash without becoming too dense. If you’re looking for a gluten-free option, try a 1:1 blend of rice flour and potato starch, but be prepared to adjust the liquid slightly.
Warm milk, about 1 cup, is crucial for activating the yeast and creating a tender crumb. The temperature should be around 110°F (43°C); if it’s too hot, it can kill the yeast, and if it’s too cool, the yeast won’t activate properly. A simple test is to add a pinch of sugar; if it starts to bubble, you’re good to go.
Active dry yeast, 2 teaspoons, is the leavening agent that gives the rolls their lightness. Yeast prefers a warm, slightly sweet environment, so the warm milk and a touch of sugar help it thrive. If you’re using instant yeast, you can reduce the quantity by half and skip the proofing step.
The Texture Crew
Butter, softened to room temperature, is the secret to a rich, buttery flavor that permeates each bite. Using 1/2 cup ensures the dough has enough fat to stay tender, but not so much that it becomes greasy. If you prefer a healthier version, substitute half of the butter with Greek yogurt for extra protein.
Eggs, 2 large, act as both a binder and a leavening agent. They help the dough rise and give it a glossy finish. If you’re vegan, use 2 flaxseed meals mixed with 5 tablespoons water as a substitute; let it sit for 5 minutes until it thickens.
Ripe bananas, 3 medium, bring natural sweetness and moisture to the dough. Mash them until smooth, leaving a few small chunks for texture. If you can’t find ripe bananas, you can use banana puree or even unsweetened applesauce as a substitute, though the flavor will shift.
The Unexpected Star
Ground cinnamon, 2 teaspoons, is the spice that defines the flavor profile. It’s not just about the aroma; cinnamon has natural anti-inflammatory properties and can help regulate blood sugar levels. If you’re looking for a different spice, try nutmeg or allspice for a subtle variation.
Brown sugar, 1/2 cup, adds a caramel-like sweetness and a hint of molasses that complements the banana. It also helps keep the rolls moist. For a lighter version, use light brown sugar or a sugar substitute that behaves similarly.
Cream cheese, 4 ounces, is the key to a silky filling that coats each roll. It’s softened to room temperature before being mixed with the brown sugar and cinnamon. If you’re lactose intolerant, use a dairy-free cream cheese for a similar texture.
The Final Flourish
Powdered sugar, 1 cup, is the finishing touch that gives the rolls a sweet glaze and a sparkling finish. It also adds a light, airy texture to the dusting. If you’re looking for a healthier option, consider a sugar substitute or a light dusting of coconut sugar.
Vanilla extract, 1 teaspoon, rounds out the flavor profile with its warm, sweet undertone. It balances the richness of the butter and the sweetness of the bananas. A drop of almond or maple extract can add a subtle twist.
Optional: chopped walnuts, 1/4 cup, add crunch and a nutty flavor that pairs wonderfully with the banana. If you’re allergic or simply don’t like nuts, you can skip them or replace them with sunflower seeds.
Everything’s prepped? Good. Let’s get into the real action.
The Method — Step by Step
- Step 1: Activate the Yeast - In a small bowl, combine warm milk, a tablespoon of sugar, and the yeast. Let it sit for 5–10 minutes until the mixture becomes frothy. The froth indicates active yeast ready to leaven the dough. If the mixture doesn’t froth, discard and try a fresh batch. This is the moment of truth.
- Step 2: Mix Dry Ingredients - In a large mixing bowl, whisk together flour, salt, and brown sugar. This ensures even distribution of the leavening agents. The dry mix should look slightly grainy before adding wet ingredients. Keep the bowl at room temperature for easy mixing.
- Step 3: Combine Wet Ingredients - In a separate bowl, beat the eggs, softened butter, and vanilla extract until smooth. Then fold in the mashed bananas until fully incorporated. The mixture should have a creamy consistency, with no lumps. This is where the banana’s sweet aroma begins to mingle with the butter.
- Step 4: Form the Dough - Pour the wet mixture into the dry mixture and stir until a shaggy dough forms. Add the activated yeast mixture and knead for 8–10 minutes until the dough is smooth and elastic. If the dough is too sticky, sprinkle a little more flour; if too dry, add a splash of milk. The dough should feel slightly tacky but not sticky.
- Step 5: First Rise - Place the dough in a lightly oiled bowl, cover with plastic wrap or a damp towel, and let it rise in a warm place for 1–1.5 hours, or until doubled in size. During this time, the yeast will produce carbon dioxide, giving the dough its airy structure. Watch the dough; it should expand like a balloon. This step is crucial for a light crumb.
- Step 6: Prepare the Filling - In a bowl, combine softened cream cheese, brown sugar, ground cinnamon, and a pinch of salt. Beat until smooth and fluffy. This filling will be spread between the layers of dough. The cream cheese should be at room temperature for easy mixing. If it’s too thick, add a teaspoon of milk.
- Step 7: Roll Out the Dough - Turn the risen dough onto a floured surface and roll it into a rectangle about 12x18 inches. The dough should be thin enough to see a faint outline of your hand. This step creates the base for the rolls. The edges should be even to ensure uniform baking.
- Step 8: Spread the Filling - Spread the cream cheese filling evenly over the dough, leaving a 1/2-inch border around the edges. Then, sprinkle chopped walnuts if using, and drizzle a little extra banana mash for extra sweetness. Press gently to ensure the filling adheres. The filling should be thick enough to stay inside the roll.
- Step 9: Form the Rolls - Starting from the long edge, roll the dough tightly into a log. Pinch the seam to seal. Cut the log into 12 equal slices using a sharp knife or a pizza cutter. Each slice should have a neat seam on the top.
- Step 10: Final Proof - Place the sliced rolls in a greased baking dish, leaving space between each. Cover with a towel and let them rise for 30 minutes. The dough should rise to just below the top of the dish. This second rise ensures a fluffy interior. The rolls should look slightly puffy before baking.
- Step 11: Bake - Bake the rolls for 20–25 minutes, or until golden brown. The tops should have a beautiful caramelized color. Use a toothpick; if it comes out clean, the rolls are done. The aroma should be irresistible. The rolls will puff up slightly during baking.
- Step 12: Cool and Dust - Remove the rolls from the oven and let them cool in the pan for 5 minutes. Then transfer them to a wire rack to cool completely. While still warm, dust with powdered sugar. The sugar will cling to the surface, giving a sweet finish. This final touch is essential for presentation.
That’s it—you did it! But hold on, I’ve got a few more tricks that’ll take this to another level. From the perfect proofing to the ideal dusting, these insider tips will ensure your rolls are always bakery‑quality.
Insider Tricks for Flawless Results
The Temperature Rule Nobody Follows
Temperature is everything in baking. If the milk is too hot, the yeast dies; if it’s too cold, it won’t activate. Aim for 110°F (43°C). Use a thermometer for precision. A simple test is to add a pinch of sugar; if it starts to bubble within 5 minutes, you’re good.
Why Your Nose Knows Best
Smell is a reliable indicator of progress. When the dough is proofed, it should have a pleasant yeasty scent, like warm bread. If it smells sour, it may have over-proofed. Trust your nose; it will guide you to the perfect rise.
The 5-Minute Rest That Changes Everything
After you cut the rolls, let them rest for 5 minutes before baking. This brief pause allows the dough to relax, preventing shrinkage during baking. It also lets the filling settle, ensuring it stays inside each roll.
Keep the Pan Warm
Place the baking dish in a preheated oven before you put the rolls in. The warm pan helps the bottom rise evenly, preventing a flat base. If you’re using a glass pan, preheat it on a stovetop before baking.
Use a Pizza Stone
A pizza stone distributes heat evenly, giving the rolls a crisp bottom. Place the stone in the oven during preheat. If you don’t have a stone, a heavy baking sheet works as a substitute.
Dusting Trick for Extra Sweetness
Mix powdered sugar with a splash of milk to create a glaze. Drizzle over the warm rolls for a glossy finish. The glaze adds a sweet coating that melts into the dough, enhancing flavor.
Creative Twists and Variations
This recipe is a playground. Here are some of my favorite ways to switch things up:
Nutty Banana Crunch
Add a handful of chopped pecans or almonds to the filling. The crunch adds texture and a nutty flavor that pairs well with the banana. Sprinkle extra walnuts on top before baking for an extra crunch.
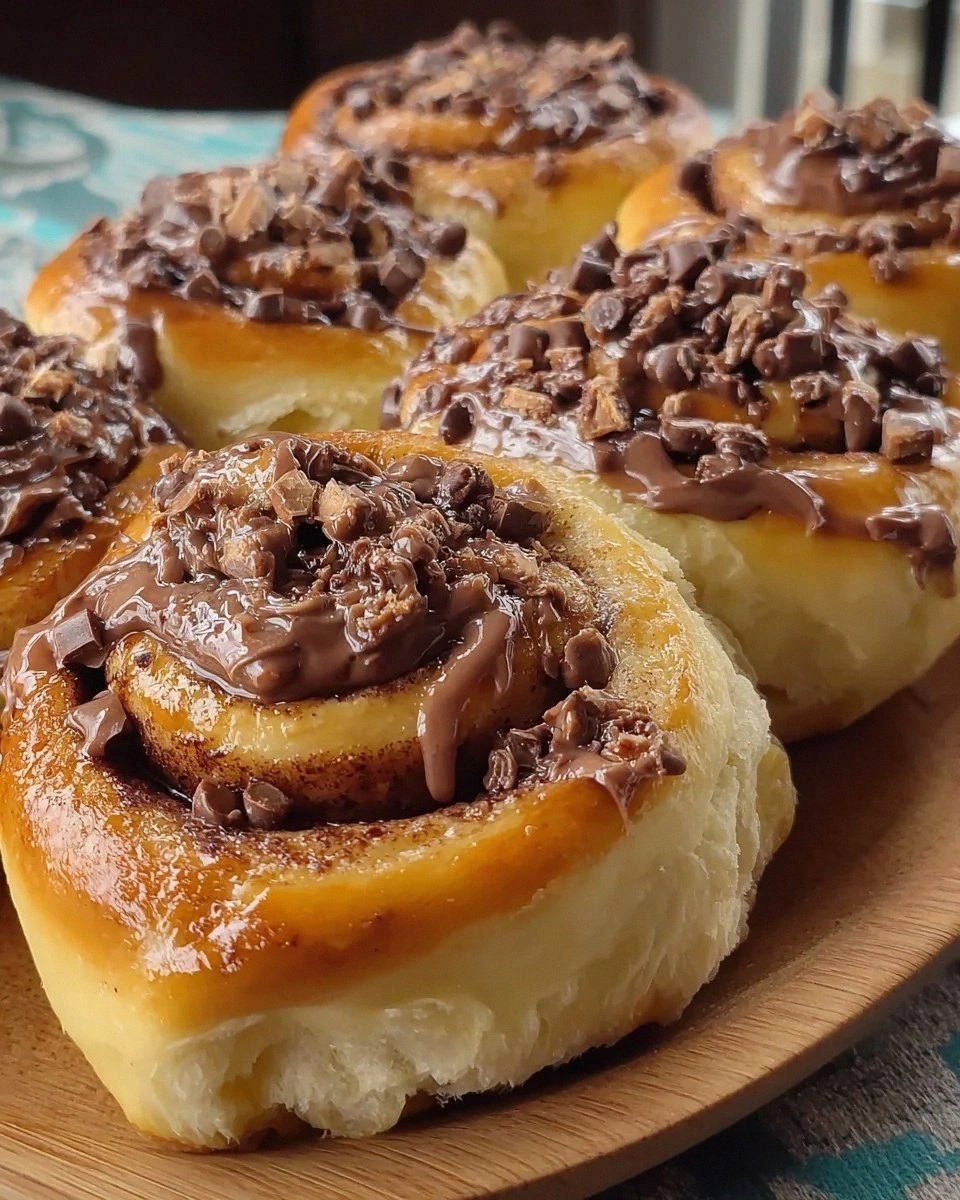
Chocolate Banana Swirl
Fold in a few tablespoons of melted dark chocolate into the filling. The chocolate will create swirls that look like chocolate river in a roll. This variation is a hit with chocolate lovers.
Maple Walnut Delight
Replace the brown sugar with maple syrup in the filling. Add chopped walnuts for a sweet, nutty flavor. The maple syrup adds a subtle depth that complements the banana.
Coconut Banana Bliss
Swap the cream cheese with coconut cream. Add shredded coconut to the dough for a tropical twist. The coconut adds a subtle sweetness and a chewy texture.
Spiced Apple Banana Roll
Add diced apples to the dough and a pinch of nutmeg to the filling. The apple adds a tart contrast to the banana’s sweetness. This variation is perfect for fall.
Almond Butter Roll
Replace the butter with almond butter for a nutty flavor. Use almond flour instead of all-purpose flour for a gluten-free version. The almond butter adds a rich, buttery taste.
Storing and Bringing It Back to Life
Fridge Storage
Store the baked rolls in an airtight container in the fridge for up to 5 days. The rolls stay moist and flavorful. Wrap them in parchment paper before sealing the container for extra protection.
Freezer Friendly
Freeze the rolls in a single layer on a baking sheet before transferring them to a freezer bag. They’ll keep for up to 3 months. When ready to eat, thaw overnight in the fridge.
Best Reheating Method
Reheat in a preheated oven at 350°F (175°C) for 8–10 minutes. Add a tiny splash of water to the pan to create steam and keep the rolls moist. Alternatively, microwave for 20–30 seconds, then finish in the oven for a crisp exterior.
And that’s the full journey from banana to roll. I hope you enjoy the process as much as the final product. If you have any tweaks or favorite variations, drop them in the comments below. Happy baking!
I’ve poured my heart into this recipe, and I can’t wait to hear how it turns out in your kitchen. The next time you’re craving something sweet and comforting, remember that banana cinnamon rolls are just a handful of ingredients away from turning your day around. Give it a try, and you’ll see why I keep coming back to this recipe time and time again.
If you found this article helpful, share it with friends who love baking, or save it for your next weekend cooking session. I’ll be here, ready to share more delicious adventures. Until next time, keep rolling and keep baking.