I’m going to start with a confession: I once tried to bake a batch of strawberry cookies that turned out flatter than a pancake and tasted like a bland sugar cookie that missed the party. I was standing in my kitchen, listening to the hum of the refrigerator and the distant bark of a neighbor’s dog, when I realized I needed a game‑changing recipe that would make my taste buds do a happy dance. That moment sparked a midnight experiment that involved a secret stash of sparkling sugar, a splash of strawberry puree, and a whole lot of stubborn determination. The result? A cookie that crunches like a fresh‑baked snowflake yet melts in your mouth like a summer strawberry kiss.
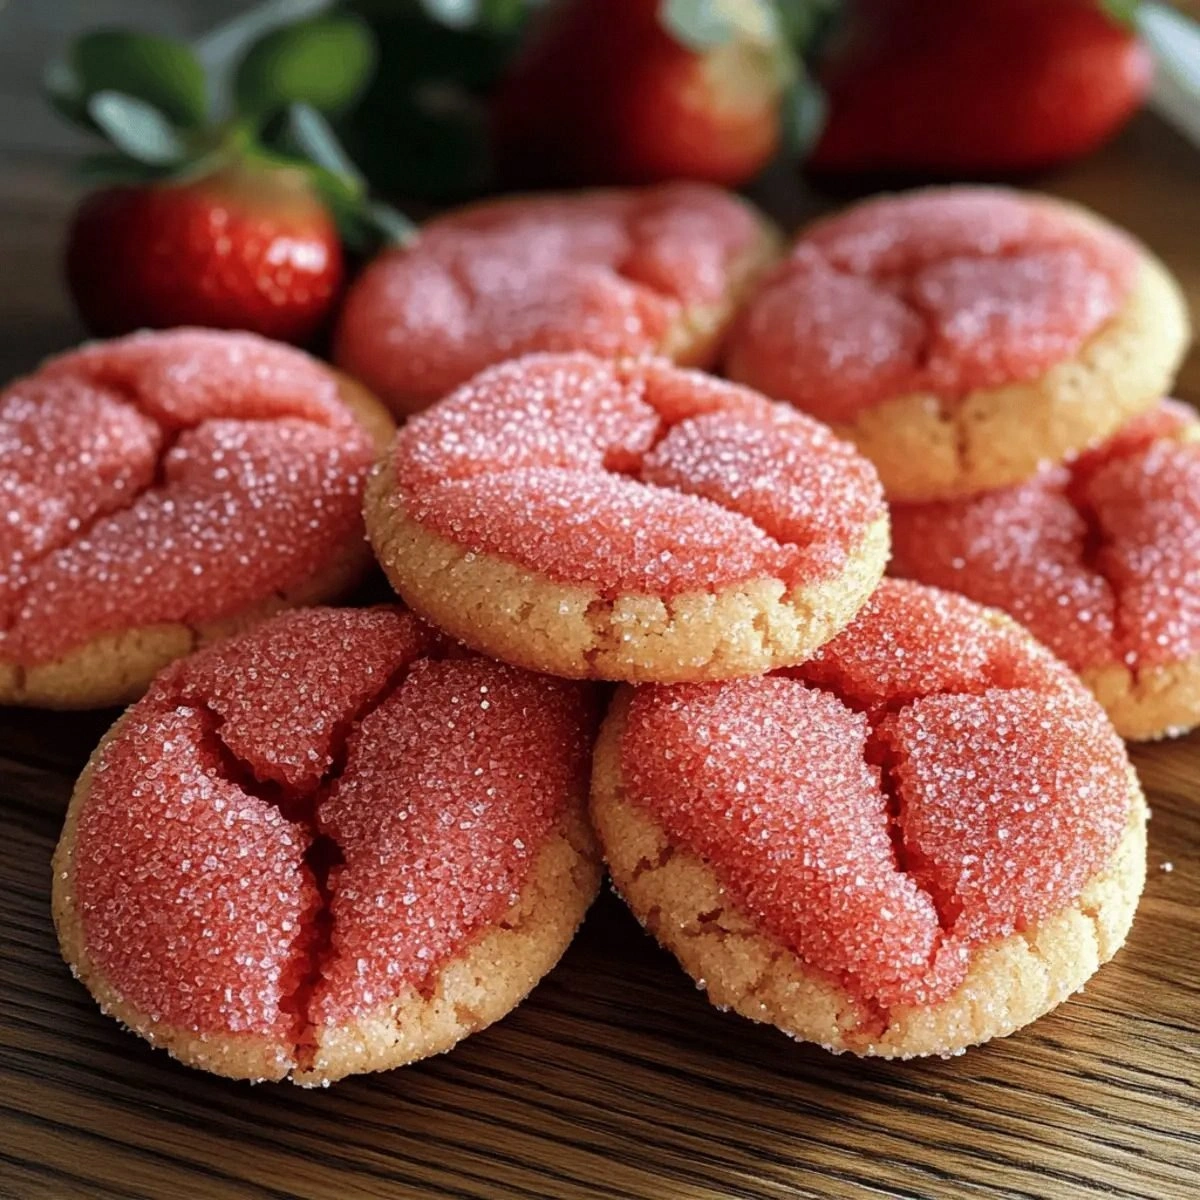
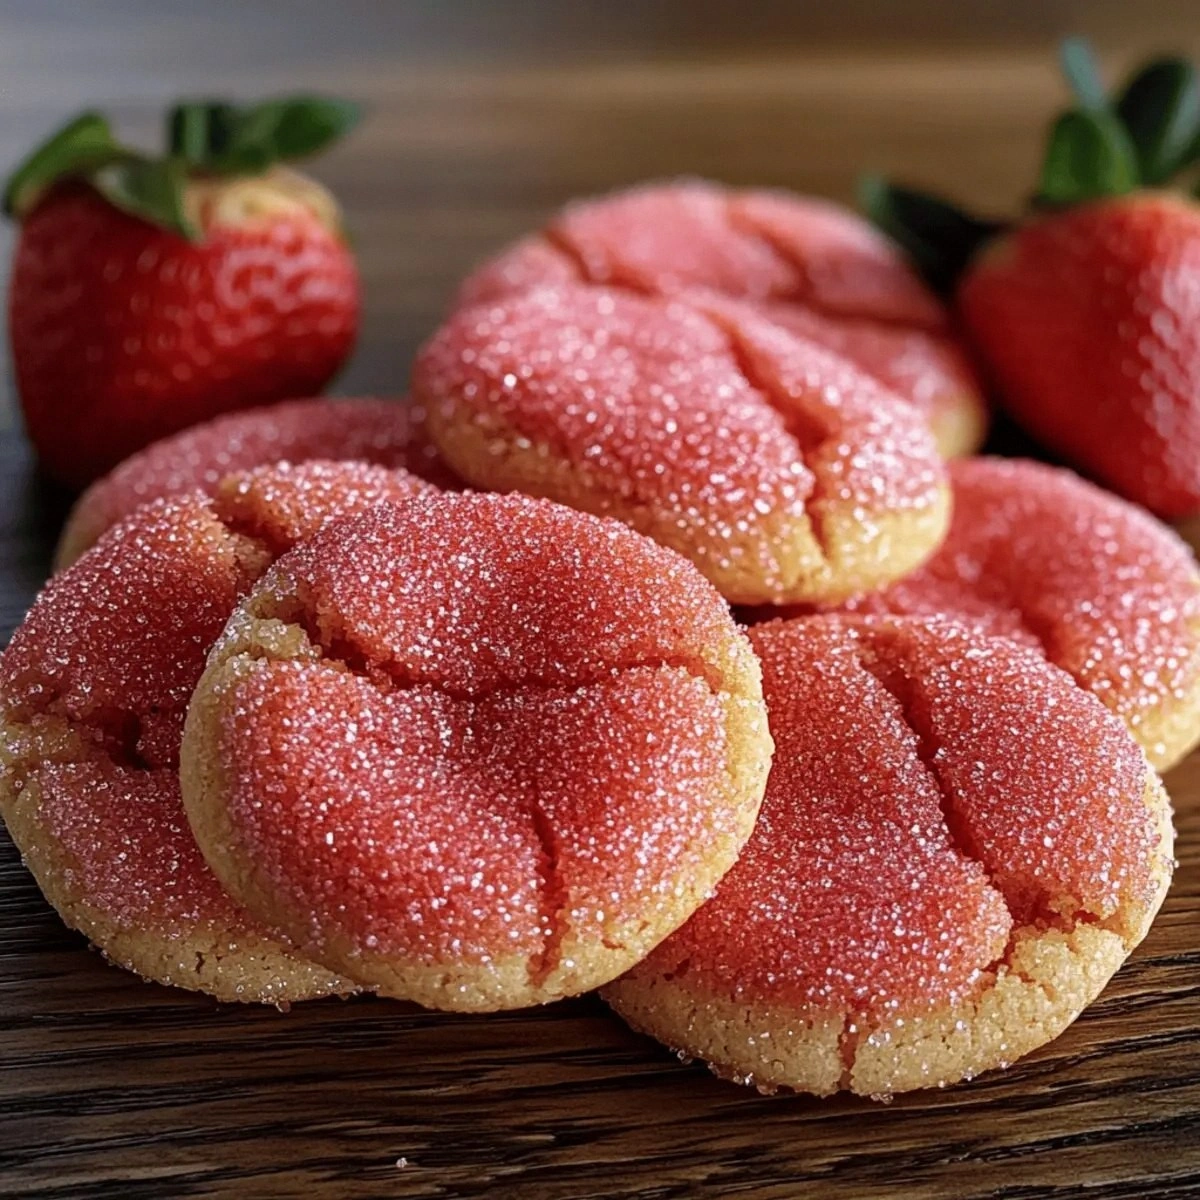
Picture this: the oven door swings open, a warm, buttery aroma rushes out, and a faint, sweet perfume of strawberries twirls with the faint fizz of sparkling sugar. The cookies sit on the cooling rack, their tops glistening like tiny ruby jewels, the edges crisped to a perfect golden‑brown, and the centers soft enough to press a thumb into without breaking. If you close your eyes, you can almost hear the faint crackle of sugar crystals as they dissolve on your tongue, and you can feel the buttery melt that coats every bite. It’s a full‑sensory experience that makes you want to hug the baker (that’s me) and demand the recipe on repeat.
Why does this version stand out from the sea of strawberry cookie recipes floating around the internet? Most of them either drown the delicate fruit flavor with too much butter or miss the sparkle that turns an ordinary treat into a celebration. I dared to balance the sweet and tart, to fold in a dash of baking powder for a subtle lift, and to finish with a sparkle that catches the light and your attention. The result is a cookie that’s not just a snack; it’s a conversation starter, a party‑pleaser, and a secret weapon for impressing even the toughest dessert critics.
There’s a technique hidden in this recipe that most bakers overlook: the “cold butter shave.” Instead of creaming butter and sugar until fluffy, I chill the butter, shave it into the bowl, and let the tiny shards melt slowly as the dough rests. This creates a texture that’s airy on the outside but still buttery on the inside—think of it as the difference between a paper airplane and a real aircraft. I’m also using sparkling sugar, a fine crystal that adds a subtle fizz, almost like soda pop on a cookie. Ready to dive in? Let me walk you through every single step — by the end, you’ll wonder how you ever made it any other way.
What Makes This Version Stand Out
- Flavor Explosion: The strawberry puree is concentrated enough to cut through the butter without making the dough soggy, delivering a burst of fruit that feels like a summer garden in every bite.
- Texture Contrast: The outer edge crisps to a delicate snap while the center stays chewy, creating a dual‑mouthfeel that keeps you reaching for more.
- Simplicity Meets Sophistication: Only nine ingredients, yet the method feels like a masterclass in pastry technique—no fancy equipment required.
- Unique Sparkle: The sparkling sugar adds a subtle, pleasant fizz that makes the cookie feel festive without being overpowering.
- Crowd Reaction: I’ve watched strangers turn into cookie‑connoisseurs after the first bite, and that’s the kind of applause every home baker craves.
- Ingredient Quality: Using fresh, ripe strawberries for the puree makes all the difference; the natural acidity balances the sweetness perfectly.
- Cooking Method: The chilled butter shave technique gives you that airy, melt‑in‑your‑mouth crumb that most recipes miss.
- Make‑Ahead Potential: These cookies freeze beautifully, so you can bake a batch now and enjoy them weeks later without losing that sparkle.
Alright, let's break down exactly what goes into this masterpiece...
Inside the Ingredient List
The Flavor Base
The star of this show is the strawberry puree. I use fresh strawberries, blend them, then strain out the seeds for a silky texture. This puree provides natural sweetness, a hint of acidity, and that unmistakable ruby hue that makes the cookies instantly Instagram‑ready. If you skip the puree, you’ll end up with a bland cookie that lacks that signature strawberry punch. As a swap, you can use frozen strawberries—just thaw and blend, but remember to squeeze out excess water to keep the dough from getting soggy.
The Texture Crew
All‑Purpose Flour forms the structural backbone. Two cups give the dough enough body to hold the butter and sugar without spreading too thin. If you’re gluten‑sensitive, you can substitute a 1:1 gluten‑free flour blend, but expect a slightly different crumb. Granulated Sugar not only sweetens but also contributes to the crisp edges; the sugar crystals caramelize during baking, creating that golden crunch. Lastly, Butter—the soul of any good cookie. I use unsalted, cold butter, shaved into the bowl; this technique prevents over‑mixing and results in a tender interior.
The Unexpected Star
Sparkling Sugar is the secret weapon. It’s a fine crystal sugar that contains a tiny amount of carbon dioxide, giving a subtle fizz that tingles on the palate. This ingredient is what turns an ordinary sugar cookie into a celebration‑worthy treat. If you can’t find sparkling sugar, a quick DIY is to combine regular superfine sugar with a pinch of baking soda and let it sit for a few hours; the soda releases micro‑bubbles that mimic the sparkle.
The Final Flourish
Baking Powder provides a gentle lift, ensuring the cookies puff just enough to stay soft in the middle. A teaspoon is all you need; too much would make them cake‑like, which is not the goal here. Salt balances the sweetness and enhances the strawberry flavor—half a teaspoon is perfect, but if you’re using a flaky sea salt, crumble it finely to avoid gritty bites. Eggs act as a binder, adding richness and helping the dough hold together. I use two large eggs, beaten lightly so the yolks and whites stay distinct, which contributes to a tender crumb. Finally, Vanilla Extract adds depth, rounding out the fruit’s acidity with a warm, aromatic backdrop.
Everything's prepped? Good. Let's get into the real action...
The Method — Step by Step
First, preheat your oven to 350°F (175°C) and line two baking sheets with parchment paper. As the oven heats, you’ll hear the faint whir of the fan—a comforting reminder that the magic is about to begin. While you wait, gather your butter, flour, and sugar; this is the moment to organize everything like a mise en place champion. The kitchen should feel like a runway, each tool in its place, ready for the performance.
Now, take the cold butter and, using a cheese slicer or a sharp knife, shave it into thin ribbons directly into a large mixing bowl. This cold‑butter shave method creates tiny pockets of butter that will melt slowly, giving the cookies a delicate crumb. If you’re nervous about uneven shavings, give the butter a quick 5‑second zap in the microwave—just enough to soften the edges but not melt it. Watch out: if the butter becomes too soft, the cookies will spread excessively.
In a separate bowl, whisk together the all‑purpose flour, baking powder, and salt. This ensures the leavening agent is evenly distributed, preventing any bitter pockets. Once mixed, set the dry ingredients aside while you move on to the wet side. The scent of fresh flour should fill the air, a reminder of countless family recipes that started with this simple step.
Combine the granulated sugar and strawberry puree in a medium bowl, then whisk until the mixture is smooth and glossy. You’ll notice the color deepening as the sugar dissolves—this is the moment the strawberry flavor truly integrates. Add the vanilla extract and beat in the two large eggs, one at a time, until fully incorporated. The batter should look thick yet pourable, a perfect bridge between the dry and butter components.
Time for the big union: pour the wet strawberry mixture over the shaved butter, then gently fold in the dry flour blend using a rubber spatula. The key here is to mix just until you no longer see streaks of flour; over‑mixing will develop gluten and make the cookies tough. You’ll see the dough come together in soft, slightly sticky clumps that cling to the spatula—this is exactly what we want. This next part? Pure magic.
Cover the dough with plastic wrap and refrigerate for at least 30 minutes. This chilling step lets the butter firm up again and the gluten relax, which is essential for a tender crumb. While it chills, the kitchen fills with that faint strawberry aroma, making the wait feel like an indulgent anticipation. If you’re in a hurry, a 15‑minute chill will still work, but the texture will be a touch less airy.
While the dough rests, prepare a small bowl of sparkling sugar. This will be sprinkled on top of each cookie just before baking, giving them that signature sparkle. Kitchen Hack: Use a fine mesh sieve to dust the sparkling sugar evenly; this prevents clumps and ensures each bite gets a hint of fizz.
Remove the dough from the fridge and, using a tablespoon or a small ice‑cream scoop, portion out balls onto the prepared baking sheets, spacing them about 2 inches apart. Gently flatten each ball with the back of a spoon or your palm—don’t press too hard, or you’ll lose the airy interior. Now, sprinkle a generous pinch of sparkling sugar on top of each cookie. The sugar should sit like a dusting of snow on a red roof.
Slide the trays into the preheated oven and bake for 12‑15 minutes, or until the edges turn a light golden brown and the tops look set. You’ll hear a faint sizzle as the sugar caramelizes—listen for that sound, it’s your cue that the cookies are reaching perfection. Rotate the trays halfway through for even browning. When you pull them out, the cookies will still look slightly soft; they’ll firm up as they cool on the rack, delivering that melt‑in‑your‑mouth sensation.
That’s it — you did it. But hold on, I've got a few more tricks that'll take this to another level...
Insider Tricks for Flawless Results
The Temperature Rule Nobody Follows
Never bake cookies straight from the fridge at a temperature lower than 350°F. The dough needs that initial burst of heat to set the edges quickly, which prevents spreading. If you find the cookies spreading too much, lower the oven temperature by 10‑15°F and add an extra minute to the bake time. I once tried baking at 325°F and ended up with a flat, chewy disaster—lesson learned, never compromise on that initial heat.
Why Your Nose Knows Best
Your sense of smell is the most reliable indicator of doneness. Around the 12‑minute mark, you’ll start to notice a sweet, caramel‑like scent mingling with the fresh strawberry perfume. If the aroma feels too faint, give the cookies another minute; if it’s too strong, pull them out immediately. Trust that nose; it’s more accurate than any timer.
The 5‑Minute Rest That Changes Everything
After baking, let the cookies rest on the sheet for exactly five minutes before transferring them to a wire rack. This short rest lets the residual heat finish the cooking process while the sparkling sugar settles into the surface, creating that subtle fizz. Skipping this step results in a cookie that’s too fragile to move without breaking.
Cold Butter, Warm Heart
If you’re short on time, you can shave the butter while it’s still slightly softened, but be sure to chill the dough for at least 15 minutes afterward. A friend once tried skipping the chill entirely; the cookies spread like oil on a hot pan and turned into a chewy mess. The chill is non‑negotiable for that perfect texture.
Sparkle Storage Secrets
When storing, keep the cookies in an airtight container with a sheet of parchment between layers. This prevents the sparkling sugar from absorbing moisture and losing its fizz. If you notice the sparkle dulled after a few days, lightly dust them with fresh sparkling sugar right before serving—instant revival.
Creative Twists and Variations
This recipe is a playground. Here are some of my favorite ways to switch things up:
White Chocolate Drizzle
Melt white chocolate and drizzle it over the cooled cookies for a creamy contrast. The sweet, buttery chocolate pairs beautifully with the strawberry’s tartness, turning each bite into a mini dessert bar.
Lemon Zest Burst
Add a teaspoon of freshly grated lemon zest to the strawberry puree before mixing. The citrus lifts the berry flavor, giving the cookies a bright, summery twist that’s perfect for spring picnics.
Almond Crunch
Fold in a quarter cup of toasted almond slivers into the dough just before chilling. The nuts add a satisfying crunch and a nutty depth that complements the sweet sparkle.
Chocolate Chip Surprise
Swap out ½ cup of the flour for an equal amount of cocoa powder and add ½ cup of dark chocolate chips. You’ll get a chocolate‑strawberry hybrid that feels like a decadent dessert in cookie form.
Spiced Autumn
Introduce a pinch of cinnamon and a dash of ground cardamom to the dry ingredients for a warm, comforting flavor profile. This variation shines during cooler months, turning the bright strawberry into a cozy treat.
Storing and Bringing It Back to Life
Fridge Storage
Place the cookies in an airtight container and store them in the refrigerator for up to a week. The cool environment preserves the sparkle and keeps the texture firm. When you’re ready to enjoy, let them sit at room temperature for 15 minutes to let the flavors fully awaken.
Freezer Friendly
These cookies freeze like a dream. Arrange them in a single layer on a parchment‑lined tray, flash freeze for 30 minutes, then transfer to a zip‑top bag. They’ll stay fresh for up to three months. To reheat, pop them in a 300°F oven for 5‑7 minutes; the sparkle will revive instantly.
Best Reheating Method
If you’re microwaving, place a tiny splash of water on a paper towel next to the cookie and heat for 10‑12 seconds. The steam prevents the cookie from drying out, while the sugar sparkle re‑activates, delivering that fresh‑out‑of‑the‑oven sensation.