I still remember the night I ruined three lasagnas in a row. The noodles tore, the cheese seized into rubber, and the sauce? Let's just say it looked like something out of a horror movie. My dinner guests were due in two hours, my kitchen looked like a crime scene, and I was ready to admit defeat and order pizza. But then, in a moment of culinary desperation, I grabbed a stick of butter, a mountain of garlic, and decided to roll with it—literally. What emerged from that chaotic experiment were these garlic butter lasagna roll-ups that made my friends cancel their Uber Eats orders and hover around my oven like vultures.
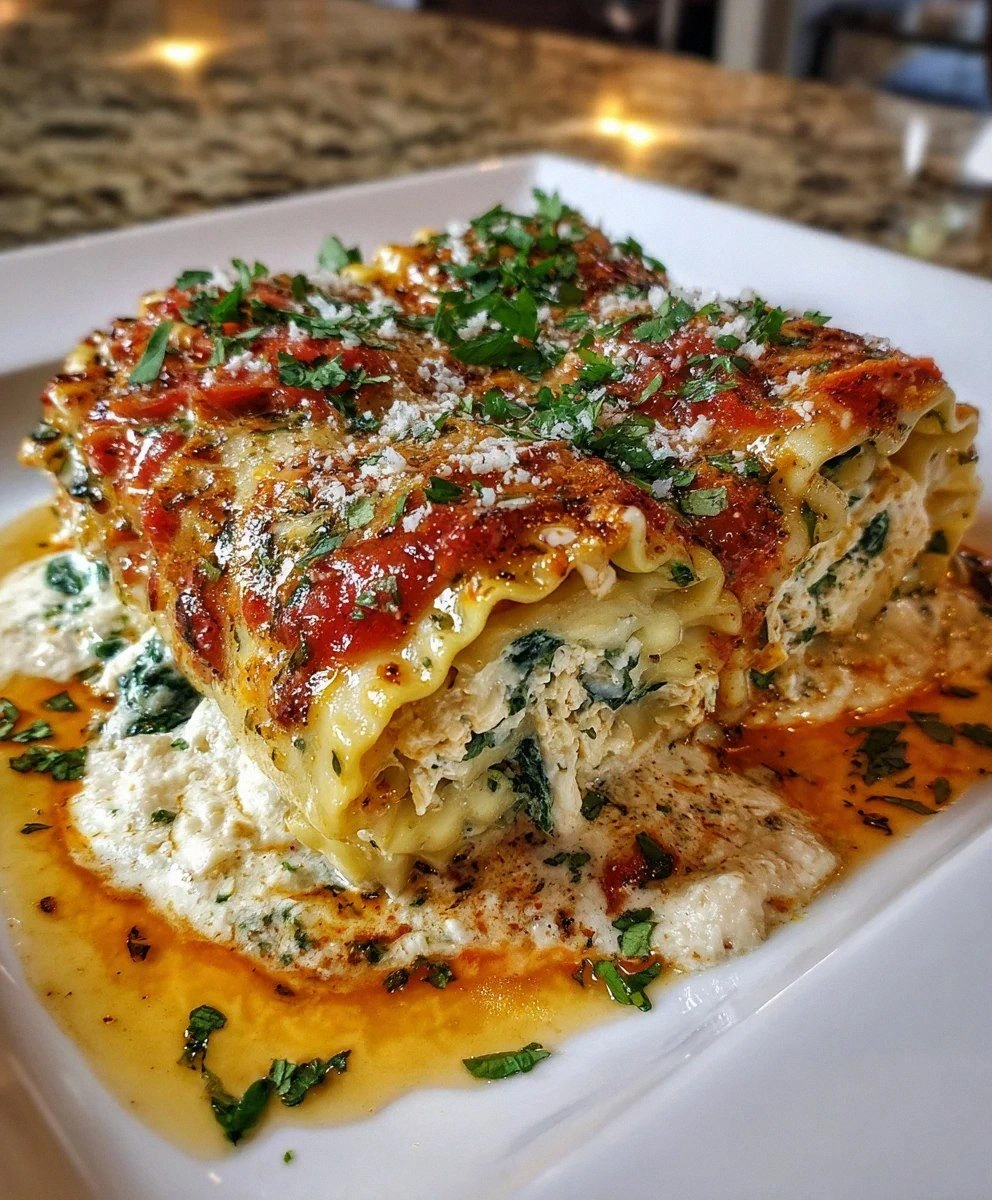
The smell alone is enough to make you question every lasagna you've ever eaten. Picture this: nutty brown butter mingling with roasted garlic, creating this intoxicating aroma that drifts through your house and makes neighbors suddenly remember they need to borrow a cup of sugar. The first bite is pure revelation—tender pasta spirals cradling a molten core of three cheeses, with spinach providing just enough virtue to justify eating four in one sitting. The edges get crispy and golden, while the centers stay luxuriously creamy, creating this incredible textural contrast that'll ruin you for regular lasagna forever.
What makes these roll-ups absolutely genius isn't just their Instagram-worthy appearance (though they do photograph like supermodels). It's how they solve every lasagna problem you've ever had. No more wrestling with slippery sheets that tear when you look at them wrong. No more serving up collapsed towers that look like they've been through an earthquake. Each roll-up is a perfectly portioned, self-contained package of joy that holds its shape and delivers maximum flavor in every bite. Plus, they're basically built-in portion control—though I won't judge if "one portion" means six of these beauties.
Here's the kicker that'll make you the hero of your next potluck: these roll-ups are actually easier to make than traditional lasagna. You don't need to be some Italian nonna with decades of experience. If you can boil noodles, mix cheese, and roll stuff up, you're qualified. And that garlic butter sauce? It's so good you'll want to bottle it and wear it as perfume. Let me walk you through every single step—by the end, you'll wonder how you ever made it any other way.
What Makes This Version Stand Out
Garlic Butter Magic: Most lasagna recipes treat garlic like an afterthought, but we're making it the star of the show. By browning the butter first, then infusing it with a ridiculous amount of garlic, we create this nutty, aromatic base that seeps into every crevice of the roll-ups. It's like liquid gold that transforms humble ingredients into something transcendent.
Individual Portions: Gone are the days of messy lasagna squares that fall apart on your plate. Each roll-up is a self-contained serving that looks elegant and is impossible to mess up. They're perfect for dinner parties because everyone gets their own little package of deliciousness, and kids go absolutely bonkers for them.
Texture Paradise: We're talking crispy edges that shatter like thin ice, giving way to a creamy, molten center that stretches into cheese pulls worthy of a food commercial. The contrast between the golden, slightly crunchy exterior and the silky interior creates a texture experience that'll make your eyes roll back in your head.
Make-Ahead Champion: These roll-ups are meal prep royalty. You can assemble them completely, freeze them raw, and bake them straight from frozen when you need an impressive dinner with zero effort. They're also fantastic for portioning out leftovers—just grab as many as you need and reheat.
Vegetable Ninja Mode: The spinach in this recipe is like a stealth bomber of nutrition. It melts into the cheese mixture so completely that even the most vegetable-phobic eaters will devour it without complaint. You're basically hiding a salad in comfort food, and nobody needs to know.
Butter Sauce Brilliance: Instead of the usual heavy tomato sauce that can make lasagna feel like a brick in your stomach, we're using a light, garlicky butter sauce that coats everything in flavor without the weight. It's sophisticated enough for date night but comforting enough for a Tuesday.
Cheese Mastery: We're using a holy trinity of cheeses that each bring something special to the party. Ricotta for creaminess, mozzarella for that stretchy pull, and Parmesan for that umami punch that makes you close your eyes and sigh with satisfaction.
Failure-Proof Construction: If you've ever struggled with lasagna layers sliding around or noodles tearing, this method is your salvation. Rolling the noodles around the filling creates structural integrity that would make an architect jealous.
Inside the Ingredient List
The Flavor Foundation
Lasagna noodles are the canvas for our masterpiece, and choosing the right ones makes all the difference. Go for the regular, old-fashioned noodles that need boiling—none of those no-boil sheets that taste like cardboard and have the texture of rubber bands. The boiling process allows the noodles to absorb just enough water to become pliable without turning mushy. Pro tip: add a splash of olive oil to your boiling water to prevent sticking, and don't overcook them—they'll finish cooking in the oven, and you want them to maintain some bite.
Garlic is where we separate the pros from the amateurs. Fresh garlic, minced within an inch of its life, releases all those pungent compounds that make your kitchen smell like an Italian grandmother's dreams. Don't you dare use that pre-minced stuff from a jar—it tastes like disappointment and preservatives. We're using enough garlic to ward off a vampire convention, but when it mingles with the butter and cheeses, it becomes sweet and nutty rather than harsh.
Unsalted butter gives us complete control over the seasoning. Salted butter is a wildcard—sometimes it's perfectly balanced, sometimes it tastes like a salt lick. By starting with unsalted, we can build our flavors exactly how we want them. Plus, when we brown the butter, the milk solids caramelize and create this incredible nutty flavor that makes everything taste like it was kissed by culinary angels.
The Texture Crew
Ricotta cheese is the cloud-like foundation of our filling, but here's where most recipes go wrong—they use it straight from the container. Big mistake. Ricotta straight from the tub is grainy and can weep moisture, turning your roll-ups into soggy disasters. The fix is simple: drain it in cheesecloth or a fine-mesh sieve for about 30 minutes. What you're left with is thick, creamy ricotta that'll hold its shape and create the most luxurious texture.
Mozzarella is the stretchy superstar that makes these roll-ups Instagram-famous. Fresh mozzarella is gorgeous but too watery for this application—we want the low-moisture, block stuff that you shred yourself. Pre-shredded cheese is coated with cellulose to prevent clumping, which means it won't melt into those gorgeous cheese pulls we crave. Take the extra two minutes to shred it yourself, and you'll be rewarded with molten, stretchy perfection.
Parmesan is our umami bomb, the secret weapon that makes people say "what's that amazing flavor?" It adds depth and complexity that takes these roll-ups from good to legendary. Skip the powdered stuff in the green can—it's mostly cellulose and disappointment. Buy a wedge of real Parmigiano-Reggiano and grate it yourself. Yes, it costs more, but a little goes a long way, and the flavor difference is like comparing a Ferrari to a bicycle.
The Unexpected Star
Fresh spinach might seem like an afterthought, but it's actually the ingredient that makes this dish feel balanced rather than like a cheese bomb. When you mix raw spinach into the hot cheese mixture, it wilts just enough to become tender without turning into that slimy, overcooked spinach that haunts childhood nightmares. The key is to chop it finely so it distributes evenly throughout the filling. If you're dealing with spinach skeptics, they'll never even notice it's there—they'll just think the filling has an amazing freshness.
Large eggs act as the binder that holds our filling together. Without them, you'd have a molten mess that oozes out of the roll-ups like lava. One egg is enough to set the mixture without making it taste like breakfast. Beat it well before adding it to the cheese mixture—you want it fully incorporated so you don't get scrambled egg surprises in your lasagna.
Fresh basil brings that unmistakable Italian perfume that makes everything taste like summer in Naples. Dried basil is a completely different herb with a muted, almost dusty flavor. If you can't find fresh basil, it's better to skip it entirely than substitute dried. The basil goes in at the very end, just before rolling, so it stays bright and vibrant rather than turning black and bitter.
The Final Flourish
Crushed red pepper flakes are optional but highly recommended if you like your food with personality. A pinch adds just enough heat to make your tongue tingle without overwhelming the delicate flavors. It's like adding a bass note to a symphony—it doesn't steal the show, but you'd miss it if it weren't there. Start conservative; you can always add more, but you can't take it out once it's in there.
Salt and pepper might seem too basic to mention, but they're the difference between good food and food that makes people close their eyes in pleasure. Season each component separately—the cheese mixture, the garlic butter, even the pasta water. Taste as you go, because different brands of cheese have different salt levels. And please, use freshly ground black pepper. The pre-ground stuff tastes like sawdust and disappointment.
Fresh parsley for garnish isn't just about making things pretty—it adds a burst of freshness that cuts through the richness. Chop it just before serving so it stays perky and green. Flat-leaf parsley has more flavor than the curly variety, but use whatever you can find. A little sprinkle at the end makes everything taste brighter and more alive.
The Method — Step by Step
- Start by bringing a large pot of well-salted water to a rolling boil—think ocean-level salty, because this is your only chance to season the pasta itself. While you're waiting, spread out a clean kitchen towel on your counter where you'll lay the cooked noodles. Once the water's dancing, add your lasagna noodles one at a time so they don't stick together like clingy relatives. Cook them for exactly 6 minutes—they should be pliable but still have a firm bite, because nobody wants mushy pasta that disintegrates faster than your willpower at an all-you-can-eat buffet. Drain them carefully and immediately lay them flat on your prepared towel, making sure they're not touching or they'll weld themselves together in ways that would require industrial tools to separate.
- While the pasta's doing its thing, let's create the cheese filling that'll make angels weep. In a large bowl, combine your drained ricotta, half the mozzarella, half the Parmesan, the egg, spinach, basil, and a generous seasoning of salt and pepper. Mix it gently—overworking it makes the ricotta tough and grainy, like your ex's personality. The mixture should be thick enough to hold its shape when you scoop it, but creamy enough to spread easily. Taste it now and adjust the seasoning; this is your chance to get it right before it becomes part of your roll-up destiny.
- Now for the garlic butter that'll have you licking the pan like a heathen. Melt your butter over medium heat in a saucepan that's big enough to hold all your roll-ups eventually. Keep a close eye on it—butter goes from golden and nutty to burnt and bitter faster than you can say "I'll just check Instagram real quick." When it starts to smell like hazelnuts and the milk solids turn golden brown, throw in your minced garlic. It'll sizzle dramatically and fill your kitchen with an aroma so good you'll consider bottling it as cologne.
- Here's where the magic happens: spread each noodle out on your cutting board like you're preparing a tiny, delicious sleeping bag. Spoon about 3 tablespoons of the cheese mixture along the shorter edge of each noodle, leaving a little border so it doesn't squirt out like a cheese toothpaste when you roll it. Spread it evenly but don't go all the way to the edges—think of it as a cheese carpet, not cheese wallpaper. If you overfill them, they'll explode in the oven like little dairy bombs, creating a mess that'll have you scraping baked-on cheese for days.
- The rolling technique is crucial—too tight and the filling will burst out like it's escaping prison, too loose and it'll all fall apart faster than my New Year's resolutions. Start rolling from the filled edge, keeping it snug but not strangled. Place each roll-up seam-side down in your buttered baking dish, nestling them together like they're having a cozy pasta party. They should fit snugly but not be crammed in there like commuters on a rush-hour subway.
- Once all your roll-ups are arranged in the pan, pour that glorious garlic butter evenly over the top, making sure each roll gets its fair share of the liquid gold. Tilt the pan around to distribute it, but don't drown them—they should be bathed, not swimming. Sprinkle the remaining mozzarella and Parmesan over the top, creating a cheese blanket that'll melt into a gorgeous golden crust. The cheese on top is what creates those Instagram-worthy brown spots that make people drool on their phones.
- Cover the dish with foil, but here's the pro tip: tent it so it's not touching the cheese, or you'll end up with a disappointing cheese skin stuck to the foil instead of on your roll-ups. Bake in a preheated 375°F oven for 20 minutes, just until the cheese is melted and bubbly. Then remove the foil and let it go for another 10 minutes to get that gorgeous golden top that looks like it was kissed by the sun. Your kitchen will smell so good that neighbors might start showing up with Tupperware and hopeful expressions.
- The final step is the hardest: let them rest for 5 minutes before serving. I know, I know—they're calling your name and you're drooling like one of Pavlov's dogs. But if you cut into them immediately, the cheese will flow out like lava and burn your tongue in ways that'll ruin the experience. Plus, the resting time allows everything to set up so you can actually remove them from the pan without them falling apart like my attempts at online dating. Sprinkle with fresh parsley for color and freshness, then serve them up and watch people propose marriage.
That's it—you did it. But hold on, I've got a few more tricks that'll take this to another level...
Insider Tricks for Flawless Results
The Temperature Rule Nobody Follows
Here's the thing that separates restaurant-quality results from home cooking disasters: temperature control. Your cheese mixture should be at room temperature before you start assembling, because cold ricotta is stubborn and won't spread smoothly, leading to torn noodles and frustration that might make you question your life choices. Take everything out of the fridge 30 minutes before you start cooking—the cheeses, the eggs, even the butter. Room temperature ingredients combine more easily and cook more evenly, preventing that weird phenomenon where the outside is molten but the center is still refrigerator-cold. This simple step is the difference between silky, cohesive filling and a grainy, broken mess that looks like it curdled in protest.
Why Your Nose Knows Best
Trust your sense of smell—it knows when your garlic butter is perfectly browned better than any timer or recipe. When the butter first melts, it'll smell like, well, butter. Then it'll get foamy and quiet for a bit, and that's when the magic is happening. Suddenly, you'll catch this nutty, almost hazelnut-like aroma—that's your cue that the milk solids are caramelizing. When you add the garlic, it should smell fragrant and sweet, not harsh or acrid. If it smells bitter or burnt, you've gone too far and need to start over, because there's no saving burnt butter. This is why I always say cook with your nose first, eyes second, and timer third.
The 5-Minute Rest That Changes Everything
I cannot stress this enough: those five minutes of resting time are non-negotiable. When you pull these beauties from the oven, they're essentially molten cheese lava that will destroy your mouth and your soul if you rush them. But beyond the burn factor, resting allows the proteins in the cheese to relax and reabsorb some of the moisture, so your roll-ups hold together when you serve them. It's like the difference between cutting into a steak right off the grill versus letting it rest—the juices redistribute instead of running all over your cutting board. Use this time to set the table, open wine, or just hover over the pan inhaling the garlic fumes like a normal person.
The Cheese Grating Game-Changer
Buy your cheese in blocks and grate it yourself—this isn't about being a food snob, it's about science. Pre-shredded cheese is coated with cellulose to prevent clumping, but that same coating prevents it from melting into the smooth, stretchy perfection we crave. When you grate cheese fresh, it melts more evenly and creates those Instagram-worthy cheese pulls that make people weak in the knees. Plus, block cheese is often cheaper per pound than pre-shredded, so you're saving money while making better food. Store the extra in a zip-top bag with a paper towel to absorb moisture, and you'll always have fresh-grated cheese ready to go.
The Make-Ahead Miracle Method
Here's where this recipe becomes your weeknight superhero: you can assemble these roll-ups completely, cover them tightly, and refrigerate for up to 24 hours before baking. The flavors actually meld and improve, making them even more delicious. When you're ready to bake, just add an extra 5-10 minutes to the covered cooking time since they'll be cold from the fridge. For longer storage, freeze them unbaked on a baking sheet until solid, then transfer to a freezer bag. They'll keep for up to 3 months and can go straight from freezer to oven—just add 15-20 extra minutes to the covered baking time. This is how you win at meal prep while looking like a culinary genius.
Creative Twists and Variations
This recipe is a playground. Here are some of my favorite ways to switch things up:
The Meat Lover's Dream
Add cooked Italian sausage to the cheese mixture for a heartier version that'll satisfy the carnivores in your life. Brown about 8 ounces of sausage, breaking it up into small pieces, and let it cool before mixing it in. The fennel in the sausage plays beautifully with the garlic butter, creating this incredible depth of flavor. Just make sure to drain off any excess fat, or you'll end up with greasy roll-ups that no amount of deliciousness can fix.
The Mediterranean Escape
Swap the spinach for chopped sun-dried tomatoes and add some crumbled feta to the cheese mixture. The tangy feta and sweet-tart tomatoes transport you straight to a Greek island, minus the expensive plane ticket. Add some chopped fresh oregano and a squeeze of lemon to the garlic butter for brightness. This version pairs beautifully with a crisp white wine and makes you feel like you're dining al fresco even if you're in a studio apartment.
The Autumn Comfort
Replace spinach with roasted butternut squash cubes and sage for a fall-inspired version that tastes like autumn in New England. Roast the squash until it's caramelized and tender, then fold it into the cheese mixture. Add some toasted pine nuts for crunch and swap the basil for fresh sage. The sweetness of the squash against the savory cheeses creates this incredible balance that'll have you making these well into winter.
The Spicy Southwest
Add a can of diced green chiles, some cumin, and swap the mozzarella for pepper jack for a roll-up with serious attitude. The chiles add moisture and flavor without overwhelming heat, while the pepper jack brings a subtle kick that builds as you eat. Add some chopped cilantro to the garlic butter and serve with a side of salsa for dipping. This version is perfect for game day or when you need comfort food with a personality.
The Fancy Date Night
Add some cooked lobster or crab meat to the filling for a version that screams "I love you" or "I'm trying really hard to impress you." The seafood stays tender and sweet against the rich cheeses, creating this luxurious experience that's still comfort food at heart. Use a mix of fontina and mozzarella for extra meltiness, and add a splash of white wine to the garlic butter. Serve with champagne and prepare for some serious brownie points.
The Green Goddess
Pack in extra nutrients by adding finely chopped kale, arugula, and chives to the spinach. The variety of greens adds complexity and makes you feel virtuous about eating what is essentially a cheese delivery system. Add some lemon zest to brighten everything up, and you've got a version that tastes like health food but eats like comfort food. Even the most dedicated vegetable haters will convert after trying these.
Storing and Bringing It Back to Life
Fridge Storage
Cooked roll-ups will keep in the refrigerator for up to 4 days, but let's be honest—they'll never last that long. Store them in an airtight container with a piece of parchment paper between layers to prevent them from becoming a solid cheese brick. The key to successful reheating is adding moisture: place them in a baking dish with a splash of water, cover with foil, and reheat at 350°F for about 15 minutes. The steam will revive them and prevent the edges from becoming chewy and sad. Never microwave them unless you enjoy rubbery cheese and disappointment.
Freezer Friendly
These roll-ups are freezer champions, maintaining their quality for up to 3 months if stored properly. Freeze them unbaked for best results—assemble them on a parchment-lined baking sheet, freeze until solid, then transfer to a freezer bag with as much air removed as possible. Label them with the date and contents, because future you will not remember what mysterious frozen food blob this is. When you're ready to bake, no need to thaw—just add 15-20 minutes to the covered cooking time. For already-baked leftovers, wrap individual roll-ups in plastic wrap, then foil, for perfect single-serving portions.
Best Reheating Method
The oven is your friend when it comes to reheating these beauties. Place them in a baking dish with a tablespoon of water per roll-up, cover tightly with foil, and bake at 350°F until heated through—about 15-20 minutes for refrigerated, 25-30 for frozen. The water creates steam that prevents them from drying out and keeps the cheese gloriously melty. If you're in a hurry, you can microwave them for 30-45 seconds just to take the chill off, then finish them in a hot skillet with a bit of butter to crisp up the bottoms. This hybrid method gives you speed without sacrificing texture.