Picture this: it’s a Saturday morning, the alarm blares, and you stumble into the kitchen half‑asleep, only to be greeted by the unmistakable scent of burnt toast from yesterday’s failed attempt at “quick breakfast”. I was there, staring at a pan that had turned my pancake dreams into a charcoal nightmare, and I swore I’d never try pancakes again. Then a friend dared me to make a batch that could actually survive a second round of flipping without collapsing like a sad house of cards. I accepted, and after a few frantic YouTube rewinds, I emerged with a version that makes the ordinary whole wheat pancake look like a bland sidekick. This isn’t just another breakfast staple; it’s the kind of dish that makes you want to set an alarm for the weekend just to hear that sizzle.
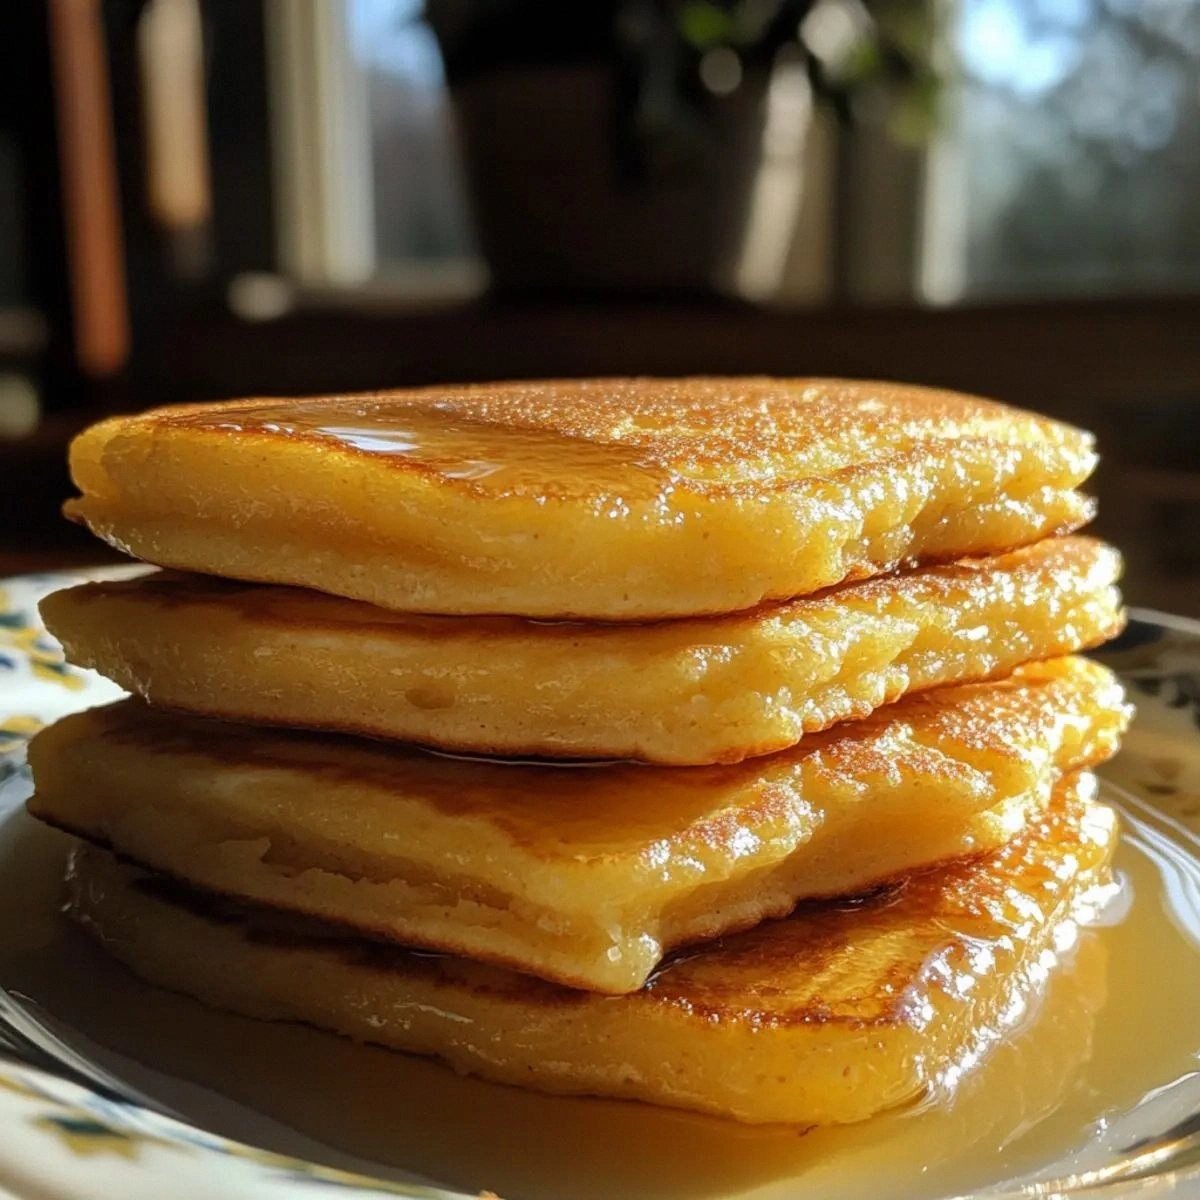
The moment the batter hits the skillet, the kitchen fills with a buttery aroma that whispers promises of fluffy clouds and nutty undertones. The batter itself is a deep, amber‑gold hue, glossy enough to catch the morning light, and when it spreads across the pan it forms a perfect circle that looks like a tiny sunrise. As the edges start to set, you’ll hear a gentle crackle—a sound that says, “stay calm, I’m about to turn golden”. The first bite? A crisp, caramelized crust that gives way to a tender, slightly chewy interior, the kind of texture that makes you close your eyes and say, “that’s it, I’m in love”. And the taste? A subtle earthiness from the whole wheat, balanced by a sweet‑savory kiss of butter and a hint of vanilla that lingers like a warm hug.
Most whole wheat pancake recipes either over‑mix and end up dense, or they skim on flavor, leaving you with something that tastes like a sad, dry biscuit. I’ve been there, and I’ve learned that the secret lies in a few key moves: a brief rest for the batter, a gentle fold rather than a vigorous stir, and the right heat that’s hot enough to create that perfect edge but not so hot that it burns the surface. I also toss in a surprise ingredient that most people overlook, and it’s the game‑changer that turns this from “just okay” to “hands down the best version you’ll ever make at home”. Trust me, I dare you to taste this and not go back for seconds.
Okay, ready for the game‑changer? I’m about to walk you through every single step — by the end, you’ll wonder how you ever made pancakes any other way. Stay with me here — this is worth it.
What Makes This Version Stand Out
- Flavor: The whole wheat flour is toasted just enough to bring out a nutty depth, while the vanilla and melted butter add a sweet‑savory harmony that feels indulgent without being over the top.
- Texture: A brief batter rest creates tiny air pockets, giving you that coveted fluffy interior paired with a crisp, caramelized edge that shatters like thin ice when you bite.
- Simplicity: Only eight pantry staples are needed, and the method uses one bowl and one pan, making cleanup a breeze.
- Uniqueness: A splash of milk‑based buttermilk (made by adding a dash of lemon juice) adds a subtle tang that cuts through the wheat’s earthiness, a trick most recipes miss.
- Crowd Reaction: Serve these to a sleepy crowd and watch them transform into pancake enthusiasts, begging for the secret ingredient.
- Ingredient Quality: Using stone‑ground whole wheat flour preserves the grain’s natural oils, delivering richer flavor than pre‑sifted varieties.
- Cooking Method: Medium‑low heat ensures an even rise and prevents the dreaded “raw middle” while still achieving that golden crust.
- Make‑Ahead Potential: The batter can sit for up to 30 minutes, allowing flavors to meld, and the pancakes freeze beautifully for a quick reheat later.
Inside the Ingredient List
The Flavor Base
Whole wheat flour (1 cup) is the heart of this recipe. Its natural nuttiness provides depth that white flour simply can’t match. If you substitute with all‑purpose flour, you’ll lose that earthy backbone, and the pancakes will taste flat. For the best results, choose stone‑ground or unbleached whole wheat; it retains more of the bran’s oils, which translate into a richer aroma. A quick tip: give the flour a brief toast in a dry skillet for 2‑3 minutes before measuring – it intensifies the flavor without adding any extra steps.
The Texture Crew
Milk (1 cup) brings moisture and helps activate the baking powder. I prefer whole milk because the extra fat contributes to a tender crumb, but any milk will do. If you’re dairy‑free, almond or oat milk works, but add a teaspoon of extra melted butter to compensate for the missing richness. Eggs (1 large) act as a binder and add lift; they also introduce a subtle silkiness that makes each bite feel luxurious. Skipping the egg will result in a denser pancake that’s more like a waffle.
The Unexpected Star
Baking powder (2 tsp) is the leavening hero, creating those airy pockets that make the pancake rise. Too much and you’ll get a metallic aftertaste; too little and the pancake stays flat. I always sift it with the flour to ensure even distribution. A pinch of salt (½ tsp) might seem trivial, but it amplifies the sweetness and balances the wheat’s bitterness. Finally, a tablespoon of sugar adds a gentle caramel note without turning the pancake into a dessert.
The Final Flourish
Butter (2 tbsp, melted) is the secret that gives the pancakes their golden crust and a buttery perfume that fills the kitchen. Use real butter, not margarine, for authentic flavor. If you’re short on time, a high‑quality melted coconut oil works as a vegan alternative, though the taste profile will shift slightly. A splash of vanilla extract (1 tsp) rounds out the flavor, adding a sweet, aromatic note that makes the pancakes taste like a bakery treat. Skipping vanilla? You’ll miss that subtle perfume that makes the pancakes feel special.
Everything's prepped? Good. Let's get into the real action...
The Method — Step by Step
Gather all ingredients and equipment: a large mixing bowl, a whisk, a ladle, and a non‑stick skillet. I like to line the skillet with a thin layer of melted butter before heating; this ensures the first pancake won’t stick and sets the tone for the rest. Heat the skillet over medium‑low heat; you’re aiming for a surface temperature of about 350°F (175°C). The moment the butter sizzles lightly, you know you’re ready. That sizzle when it hits the pan? Absolute perfection.
In the bowl, whisk together the whole wheat flour, baking powder, salt, and sugar. This dry mix should be uniform, with no clumps—think of it as a fine, golden sand. I always give the flour a quick sniff at this point; you should catch a faint nutty aroma that tells you you’re on the right track. If any lumps remain, give it another quick whisk or sift it. This dry foundation is crucial because any unevenness will translate into uneven pancakes.
In a separate container, combine the milk, egg, melted butter, and vanilla extract. Beat lightly until the mixture is homogenous; you’re looking for a silky liquid that glistens. I like to add a teaspoon of lemon juice here to create a quick buttermilk effect—this adds a subtle tang that brightens the flavor. Once mixed, pour the wet ingredients into the dry bowl.
Now, the folding. Using the whisk, gently stir the batter just until the flour is incorporated. You’ll notice a few small lumps—this is intentional. Over‑mixing develops gluten, which makes the pancake tough, and we don’t want that. The batter should be thick but pourable, resembling a smooth pancake batter that clings to the spoon. If it feels too thick, add a splash of milk; if too runny, sprinkle a little extra flour.
After the rest, give the batter a gentle stir—just a few seconds—to re‑incorporate any settled flour. This is the trickiest part: you want a uniform texture without re‑activating gluten. Watch Out: If you over‑stir now, the pancakes will turn rubbery. The batter should be smooth, with a few tiny bubbles on the surface, indicating that the leavening is ready to work.
Using a ladle (about ¼ cup), pour the batter onto the skillet. Let it spread naturally; you don’t need to force it. The edges will begin to set within 30‑45 seconds, and you’ll see tiny bubbles forming on the surface. When the edges start pulling away from the pan and the tops look matte, it’s time to flip. This is the moment of truth—slide the spatula under and flip confidently. You’ll hear a soft “whoosh” as the pancake lands back on the pan, and the second side should brown for another 30 seconds.
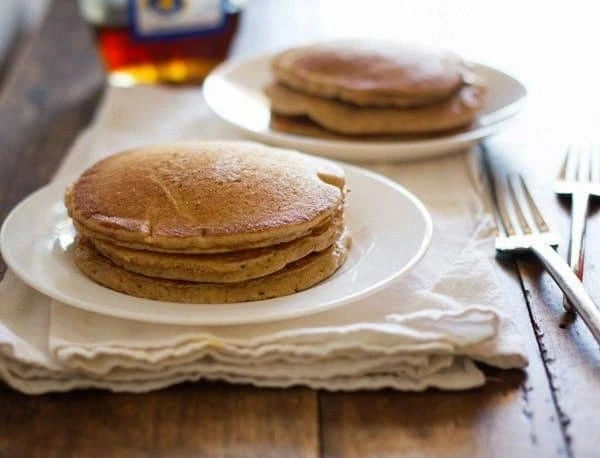
Repeat the process until the batter is gone, adjusting the heat as needed. If the skillet starts to look dry, add a tiny dab of butter before each new round. As you stack the pancakes, you’ll notice they retain their heat and puff up slightly from the steam trapped between layers. Serve immediately with maple syrup, fresh berries, or a dollop of Greek yogurt for a balanced bite.
Finally, take a moment to admire your handiwork. Picture yourself pulling this out of the oven, the whole kitchen smelling incredible, and the first bite delivering that perfect crunch‑to‑soft contrast. That’s the payoff for all the careful steps. That’s it — you did it. But hold on, I've got a few more tricks that'll take this to another level...
Insider Tricks for Flawless Results
The Temperature Rule Nobody Follows
Most home cooks set the stove to “medium” and hope for the best. The truth is, every stove is different, and the ideal pancake surface is around 350°F. Use an infrared thermometer or the “hand test” (hold your hand 2 inches above the pan; you should feel a steady warmth for about 5 seconds). If it’s hotter, lower the flame; if cooler, increase it slightly. Consistent temperature ensures even browning and prevents the dreaded raw center.
Why Your Nose Knows Best
Before you even flip, trust the aroma. When the batter begins to emit a faint nutty scent, that’s the wheat toasting. If you smell a hint of burnt butter, the pan is too hot. Your nose is a built‑in thermometer; let it guide you more than the timer. I once relied on a timer and ended up with a charcoal crust—never again.
The 5‑Minute Rest That Changes Everything
Allowing the batter to rest for 5‑15 minutes lets the flour fully hydrate and the gluten relax. This step is often skipped because we’re in a hurry, but the payoff is a fluffier interior and less “chewy” texture. I’ve tried skipping it, and the pancakes turned dense, like a biscuit gone wrong. Set a timer, sip coffee, and let the batter do its magic.
Butter vs. Oil: The Golden Debate
Butter gives flavor, oil gives crispness. My secret is a 50/50 blend: melt butter, then whisk in a tablespoon of neutral oil (like canola). This combo prevents the butter from burning while still delivering that rich taste. If you use only butter, you risk a burnt edge; only oil, and you lose the buttery aroma.
Stacking Strategy for Maximum Fluff
When you stack pancakes, place a sheet of parchment between each layer. The steam trapped inside each pancake will re‑hydrate the layer below, keeping the stack soft. Skipping this step results in a soggy bottom and a dry top. It’s a small trick that makes a huge difference for brunch parties.
Creative Twists and Variations
This recipe is a playground. Here are some of my favorite ways to switch things up:
Blueberry Burst
Fold a handful of fresh blueberries into the batter right before cooking. The berries burst mid‑cook, releasing sweet juices that caramelize on the edges, creating pockets of fruity delight. Perfect for a summer brunch.
Spiced Apple
Add ¼ cup of grated apple, a pinch of cinnamon, and a dash of nutmeg to the batter. The apple’s moisture keeps the pancakes extra tender, while the spices give a warm, comforting aroma reminiscent of a cozy fall morning.
Chocolate Chip Indulgence
Stir in dark chocolate chips (about 2 tbsp) for a melty surprise. The chocolate melts into pockets of gooey goodness, making each bite feel like a dessert. Pair with a drizzle of caramel for extra decadence.
Savory Herb
Swap the vanilla for 1 tsp of dried rosemary and add a grated cheddar cheese (¼ cup). The result is a savory pancake that pairs beautifully with poached eggs and a drizzle of hot sauce—a brunch twist that feels like a gourmet upgrade.
Protein Power
Replace half of the whole wheat flour with vanilla whey protein powder and add a tablespoon of Greek yogurt. This boosts the protein content without sacrificing texture, ideal for post‑workout fuel.
Coconut‑Lime Dream
Swap regular milk for coconut milk and add a teaspoon of lime zest. The tropical aroma transports you to a beachside breakfast, especially when topped with toasted coconut flakes.
Storing and Bringing It Back to Life
Fridge Storage
Place cooled pancakes in an airtight container lined with parchment. They’ll stay fresh for up to three days. When reheating, a quick microwave burst (30 seconds) works, but for best texture, reheat in a skillet with a dab of butter.
Freezer Friendly
Stack pancakes between sheets of parchment, then seal in a zip‑top freezer bag. They freeze solid for up to two months. To reheat, pop them straight into a preheated 350°F oven for 8‑10 minutes, or microwave with a sprinkle of water.
Best Reheating Method
For ultimate fluff, sprinkle a tiny splash of water (about a teaspoon) over the pancake before microwaving for 20‑30 seconds. The steam revives the interior, while the outer surface remains slightly crisp. This trick saves you from soggy leftovers.