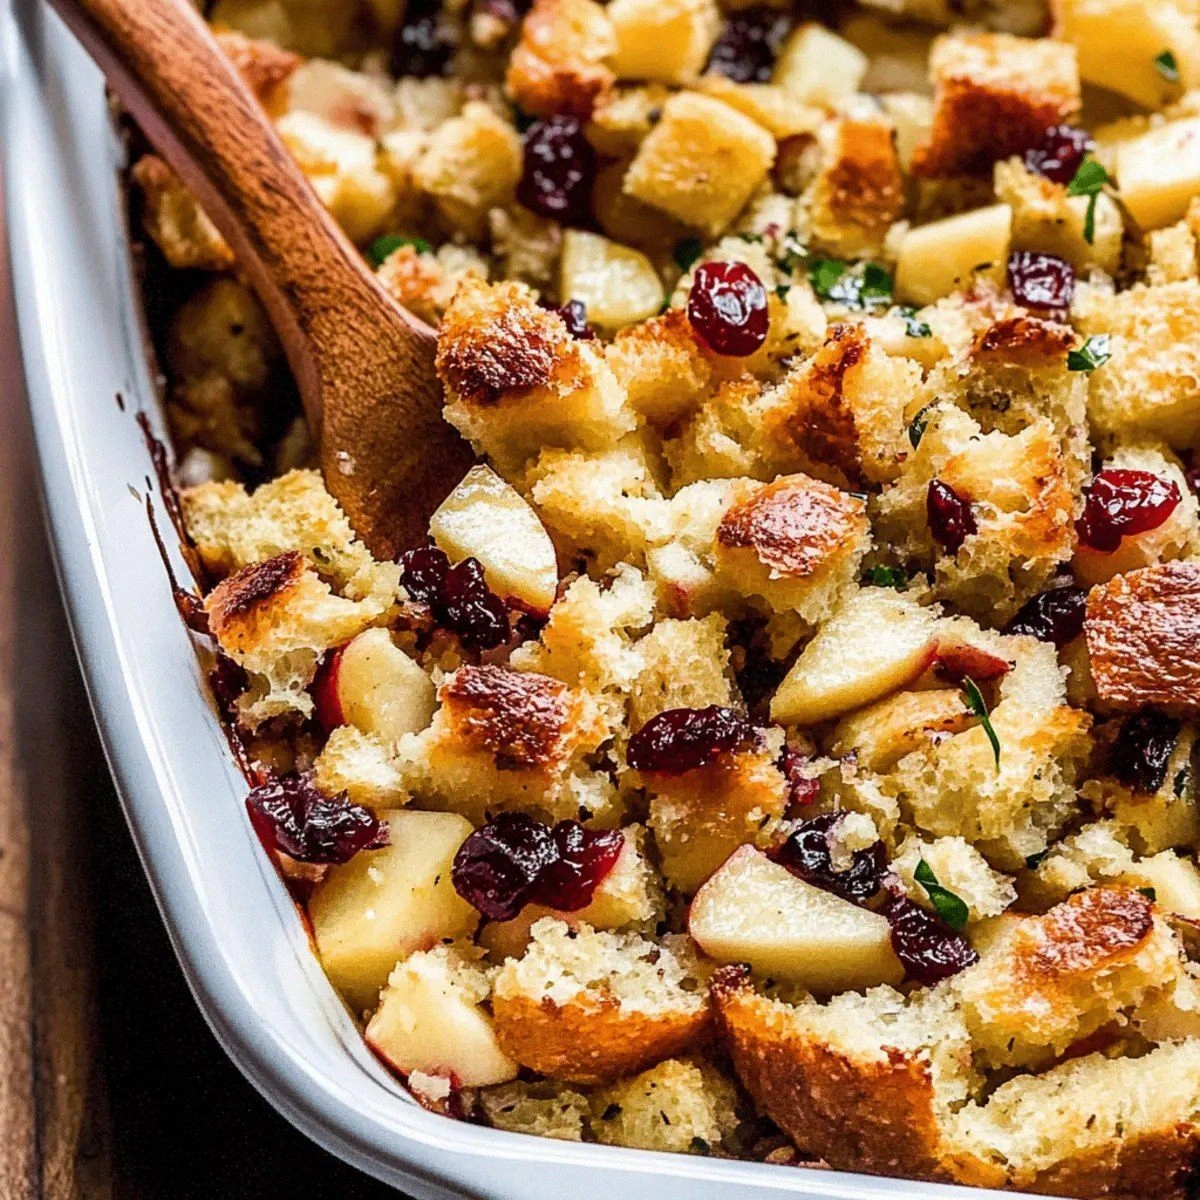
I still remember the Thanksgiving when my cousin brought her secret stuffing recipe to our family dinner. The aroma hit me like a warm hug from across the kitchen — sweet apples mingling with tart cranberries, herbs dancing in the air, and that unmistakable golden-brown crust peeking out from the baking dish. One bite and I was done for. The traditional stuffing I'd grown up with suddenly tasted like cardboard in comparison. That moment sparked a three-year obsession that led me here, sharing what I confidently call the best cranberry apple stuffing you'll ever make in your home kitchen.
Picture this: it's 6 AM on Thanksgiving morning, and I'm in my tiny apartment kitchen, determined to recreate that magical flavor. The first attempt was a disaster — mushy bread, mushy apples, and cranberries that somehow managed to taste like rubber balls. The second try was better but still missing that wow factor. By attempt number seven, my neighbors were starting to avoid eye contact in the hallway, probably tired of smelling burnt bread experiments at all hours. But then came the breakthrough moment when I realized I'd been approaching this all wrong. Most recipes treat the fruit as an afterthought, tossing everything together like some sad fruit salad. But here's the thing — when you treat the apples and cranberries like the stars they are, something magical happens.
The secret lies in building layers of flavor that complement rather than compete. This isn't your grandmother's stuffing with a few sad apple chunks thrown in as an apology. No, this is a carefully orchestrated symphony where each ingredient has a specific role to play. The apples provide natural sweetness and moisture, while the cranberries bring that essential tang that cuts through the richness. Combined with perfectly toasted sourdough and a blend of fresh herbs that would make any Italian grandmother weep with joy, this stuffing achieves that impossible balance of sweet and savory that keeps everyone reaching for seconds.
Okay, ready for the game-changer? The technique that transformed my stuffing from "pretty good" to "please make this every year forever"? It all comes down to how you treat your bread and when you add your fruit. Most recipes get this completely wrong, leading to either soggy mush or dry disappointment. But once you understand the method I'm about to share, you'll wonder how you ever made it any other way. Let me walk you through every single step — by the end, you'll have a stuffing that steals the show from the turkey itself.
What Makes This Version Stand Out
Flavor Explosion: This isn't just sweet or just savory — it's both dancing together in perfect harmony. The tart cranberries wake up your taste buds while the apples provide a gentle sweetness that plays beautifully against the herb-infused bread. It's like having a conversation where every participant has something interesting to say, and nobody dominates the discussion.
Texture Paradise: We're talking crispy edges that shatter like thin ice, revealing a tender, moist interior studded with soft fruit and aromatic herbs. The contrast between the crunchy top and the custardy middle creates a textural experience that'll make you close your eyes in appreciation. Every bite offers something new — a bit of chewy cranberry here, a tender apple cube there, all wrapped in perfectly seasoned bread.
Foolproof Method: If you've ever struggled with stuffing that's either too wet (hello, bread pudding) or too dry (hello, crouton casserole), you're not alone — and I've got the fix. The technique I'm sharing ensures consistent results every single time, even if you're the kind of cook who burns water. The secret lies in controlling moisture levels and understanding exactly when each component should join the party.
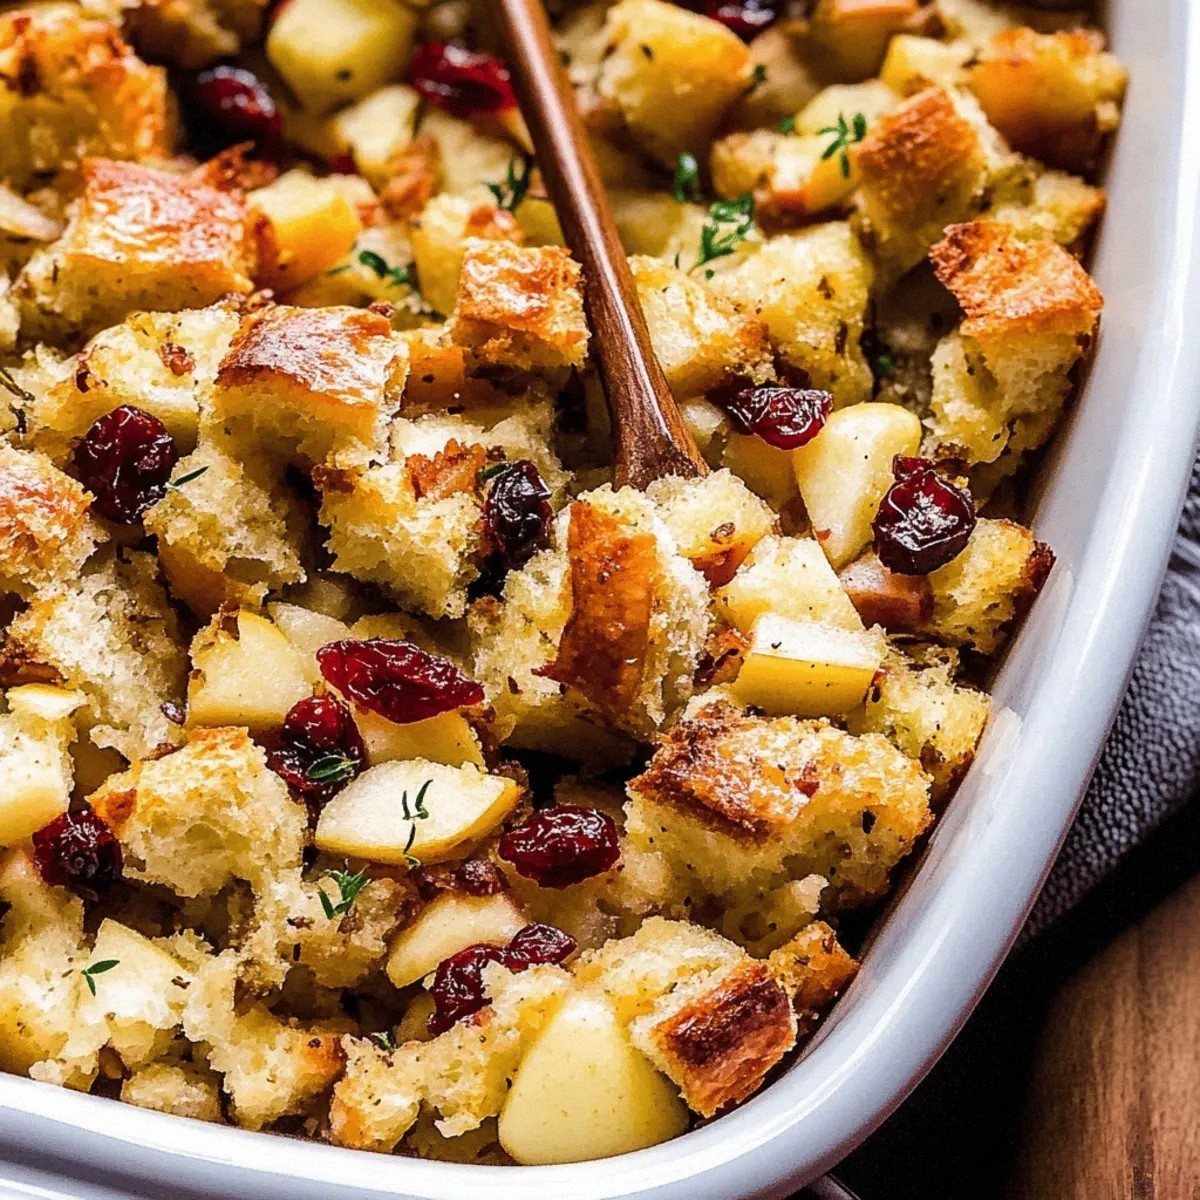
Show-Stopping Presentation: This stuffing doesn't just taste amazing — it looks like it belongs in a food magazine. The jewel-toned cranberries peek through like rubies, while the golden apples create little pockets of sunshine throughout. When you set this on the table, watch how conversations pause as people take in the visual feast before them.
Make-Ahead Magic: Here's where I confess my favorite part — you can prep this entire dish up to two days ahead. The flavors actually improve as they mingle in the refrigerator, creating a deeper, more complex taste. On Thanksgiving day, you simply pop it in the oven and take all the credit for being an organizational genius.
Crowd-Pleasing Guarantee: I dare you to taste this and not go back for seconds. In my family, we now make double batches because the "tastes better than dessert" comments started getting out of hand. Even the picky eaters who claim to hate fruit in their savory dishes find themselves converted after one skeptical bite.
Ingredient Quality Focus: This recipe celebrates each component by using the best versions available. Real butter (never margarine), fresh herbs (never dried), and proper sourdough bread (never packaged stuffing mix) create a final product that tastes like you cared — because you did.
Alright, let's break down exactly what goes into this masterpiece...
Inside the Ingredient List
The Foundation Builders
The sourdough bread isn't just a vehicle for other flavors — it's a flavor bombshell in its own right. That tangy, complex taste provides the perfect backdrop for our sweet and tart additions, creating depth that plain white bread simply can't match. When selecting your loaf, look for one with a nice open crumb structure and a good crust. Avoid the pre-sliced sandwich bread at all costs — we're building something special here, not making glorified toast. The nine to ten cups might seem like overkill, but trust me, once you taste how much it shrinks during baking and how quickly your guests devour it, you'll understand why we start with what seems like a mountain of bread.
Butter might seem basic, but using unsalted butter gives you complete control over the seasoning. Salted butter varies wildly between brands, and the last thing you want is an overly salty stuffing that masks all your careful flavor building. Plus, the butter here does double duty — it sautés our aromatics to perfection and helps create those crave-worthy crispy edges we all fight over. Don't you dare reach for the olive oil here; we're creating richness, not a Mediterranean vacation.
The Aromatic Army
Celery and onions form the classic aromatic base, but we're treating them with the respect they deserve. Dice them evenly so they cook uniformly — nobody wants a surprise crunchy onion bite in their stuffing. The celery brings an essential vegetal bitterness that balances the sweetness from our fruit, while the onion provides that savory depth that makes stuffing taste like stuffing instead of bread pudding. Cook them slowly over medium heat until they're translucent and fragrant, but not browned — we want their sweetness, not their caramelization.
The Sweet-Tart Superstars
Honeycrisp apples are the Beyoncé of the apple world — they hold their shape during baking while providing just the right amount of sweetness. Their cellular structure is like nature's perfect cooking vessel, staying firm instead of dissolving into apple sauce. Dice them into half-inch pieces so you get nice apple chunks in every bite rather than apple confetti scattered throughout. If Honeycrisp isn't available, Pink Lady or Braeburn make excellent understudies — just avoid Red Delicious, which turns to mealy mush faster than you can say "stuffing disaster."
Dried cranberries might seem like the supporting actor here, but they're actually the secret weapon that makes this dish sing. Their concentrated tartness provides little bursts of flavor that cut through the richness like a culinary lightsaber. Don't be tempted to substitute with raisins or other dried fruit — we need that specific cranberry tang that balances the sweetness perfectly. And definitely don't use fresh cranberries unless you enjoy the sensation of biting into tiny sour bombs.
The Herbal Orchestra
Fresh herbs make the difference between stuffing that tastes like it came from a box and stuffing that tastes like it came from a five-star restaurant. The combination of thyme, rosemary, and sage creates a symphony of flavors that screams "holiday" without being overwhelming. Thyme brings earthiness, rosemary contributes piney notes, and sage adds that distinctive savory flavor that makes stuffing taste like stuffing. Chop them finely so they distribute evenly — nobody wants to bite into a whole rosemary needle. And please, I'm begging you, use fresh herbs. Dried herbs have their place, but it's not here, not now, not in this masterpiece.
The Binding Agents
The egg might seem optional, but it's the glue that holds our beautiful creation together. It creates a custardy texture that transforms this from a pile of seasoned bread to a cohesive, sliceable dish. Use a large egg at room temperature — cold eggs don't incorporate as smoothly and can create pockets of eggy flavor that break the spell. Beat it thoroughly with the broth before adding to ensure even distribution throughout the stuffing.
Low-sodium chicken broth provides moisture and flavor without overwhelming saltiness. We're using two cups, but keep extra on hand — different breads absorb liquid differently, and you might need to adjust. Warm broth incorporates better than cold, and it helps the flavors meld more quickly. If you're vegetarian, vegetable broth works, but choose a high-quality one since it provides much of the background flavor.
Everything's prepped? Good. Let's get into the real action...
The Method — Step by Step
Preheat your oven to 375°F (190°C) and position the rack in the center. This temperature is the sweet spot that gives us crispy edges without burning our precious fruit additions. While the oven heats, cube your sourdough into 3/4-inch pieces — not too small or they'll dissolve, not too large or they won't absorb enough flavor. Spread them on a baking sheet and toast for 12-15 minutes until they're golden and dry to the touch. That sizzle when they hit the pan? Absolute perfection. This step is crucial — we're not just drying bread, we're creating flavor through the Maillard reaction that will give our stuffing incredible depth.
While the bread toasts, melt your butter in a large skillet over medium heat. Watch it closely — we want melted, not browned, though a few golden specks won't hurt anything. Add your diced onions and celery with a pinch of salt, stirring to coat everything in that glorious butter. Cook for 6-8 minutes, stirring occasionally, until the vegetables are translucent and fragrant but haven't taken on any color. The salt helps draw out moisture and prevents browning while encouraging the vegetables to release their natural sweetness. Your kitchen should start smelling like Thanksgiving at Grandma's house right about now.
Add your diced apples to the skillet and cook for another 4-5 minutes. The apples should soften slightly but still hold their shape — think al dente pasta, not applesauce. Stir in your fresh herbs and cook for just 30 seconds to release their aromatic oils. This is where most recipes go wrong — they either add the herbs too early (hello, bitter disappointment) or too late (goodbye, flavor development). Thirty seconds is the magic number that awakens the herbs without burning them. Remove from heat and let cool slightly.
In your largest bowl, combine the toasted bread cubes, the apple-celery mixture, and dried cranberries. Toss gently but thoroughly — you want every piece of bread to have contact with the flavorful additions. The warmth from the sautéed mixture will slightly soften the cranberries, helping them release their flavor throughout the stuffing. Don't overmix or you'll break down the bread structure we're worked so hard to create. Think of it like folding egg whites — gentle and deliberate movements that distribute without destroying.
Whisk together the egg and chicken broth in a separate bowl until completely combined. The mixture should be a pale yellow with no streaks of egg visible. Pour this mixture over your bread cubes, stirring gently to coat everything evenly. The bread should be moistened but not swimming — think of a well-dressed salad rather than soup. Let it sit for 5 minutes to absorb the liquid, stirring once halfway through. This waiting period is crucial — it allows the bread to fully hydrate without becoming mushy.
Transfer the mixture to a buttered 9x13-inch baking dish, pressing down gently to create an even layer. Don't pack it too tightly — we want some air pockets for texture variation. Cover with foil and bake for 25 minutes. This covered period allows the stuffing to steam and cook through without drying out. The foil traps moisture, creating a mini sauna that ensures every bite is tender and flavorful rather than dry and disappointing.
Remove the foil and bake for another 20-25 minutes until the top is golden brown and crispy. This is the moment of truth — those edges should be caramelized and slightly crunchy, while the interior remains moist and tender. If the top browns too quickly, tent loosely with foil. You're looking for a deep golden color with some darker spots for flavor concentration. The smell wafting from your oven should be driving everyone in the house crazy with anticipation.
Let the stuffing rest for 10 minutes before serving. I know, I know — you've been smelling this incredible aroma for almost an hour and now I'm asking you to wait. But this rest allows the custard to set properly, transforming from a loose mixture to a cohesive, sliceable dish. Plus, it prevents your guests from burning their mouths in their eagerness to dig in. Use this time to carve the turkey, pour the wine, or just bask in the admiration of your culinary genius.
That's it — you did it. But hold on, I've got a few more tricks that'll take this to another level...
Insider Tricks for Flawless Results
The Temperature Rule Nobody Follows
Here's a confession: I ate half the batch before anyone else got to try it during my first successful attempt. The key was understanding that stuffing temperature matters more than turkey temperature. While your bird needs to hit 165°F, your stuffing is perfectly done at 160°F. Any hotter and you risk drying out those precious apple chunks. Use an instant-read thermometer inserted in the center — it should read 160°F when done. The residual heat will carry it to a safe temperature while maintaining that perfect creamy texture.
Why Your Nose Knows Best
Forget timers — your nose is the most reliable indicator of doneness. When the stuffing is perfectly cooked, your kitchen fills with the aroma of toasted bread, sweet apples, and fragrant herbs. It's like a symphony of scents that builds to a crescendo right when everything's perfect. A friend tried skipping this sensory check once — let's just say it didn't end well. She pulled it out when the timer dinged, but the top wasn't golden yet. Ten more minutes would have transformed it from good to extraordinary.
The 5-Minute Rest That Changes Everything
Picture yourself pulling this out of the oven, the whole kitchen smelling incredible, and your family circling like vultures. Resist the urge to serve immediately. Those five extra minutes of rest time allow the custard to set, the flavors to meld, and the texture to transform from good to absolutely transcendent. During this time, the residual heat continues cooking the center while the edges stay crispy. It's like hitting pause on a movie right at the best part — the anticipation makes the final reveal even better.
The Butter Brush Secret
For extra crispy edges that shatter like thin ice, brush the top with melted butter during the last 5 minutes of cooking. This creates a protective layer that browns beautifully while keeping the interior moist. Don't add it too early or the butter will burn and turn bitter. Wait until you see the top starting to turn golden, then brush gently and return to the oven. The result? Edges so crispy and flavorful that people will fight over the corner pieces.
The Make-Ahead Miracle
Most stuffing recipes deteriorate in quality when made ahead, but this one actually improves. The flavors have time to meld and deepen, creating a more complex taste profile. Assemble the entire dish up to two days ahead, cover tightly with plastic wrap, and refrigerate. When ready to serve, let it sit at room temperature for 30 minutes, then bake as directed, adding 10-15 minutes to the covered cooking time. The result tastes like you spent all day on it, even if you prepped it during a Sunday afternoon Netflix binge.
Creative Twists and Variations
This recipe is a playground. Here are some of my favorite ways to switch things up:
The Breakfast Club Version
Add cooked breakfast sausage and a handful of shredded sharp cheddar for a stuffing that works as a hearty breakfast casserole. The savory sausage plays beautifully against the sweet apples, while the cheddar adds a tangy note that brings everything together. Serve this with maple syrup on the side — trust me, the sweet-savory combination will make you question why we limit stuffing to dinner. Perfect for those post-Thanksgiving brunches when you need something impressive but easy.
The Nutty Professor
Toss in a cup of toasted pecans or walnuts for added crunch and richness. The nuts provide textural contrast and a buttery flavor that complements the fruit perfectly. Toast them first in a dry skillet until fragrant — this unlocks their oils and intensifies their flavor. Chop them coarsely so you get nice nutty chunks rather than dusty fragments. This version is particularly popular with the health-conscious crowd who feel better about eating stuffing when it contains "good fats."
The Tipsy Turkey Companion
Replace 1/4 cup of the chicken broth with good quality apple brandy or Calvados. The alcohol cooks off, leaving behind a sophisticated depth that makes people ask "what's that amazing flavor?" The brandy enhances the apple notes while adding complexity that takes this from home cooking to restaurant quality. Don't use cheap cooking wine — this is the time to break out something you'd actually drink. Your taste buds (and your guests) will thank you.
The Tropical Vacation
Substitute half the dried cranberries with golden raisins and add 1/2 cup of toasted coconut flakes. The coconut adds a tropical note that makes this perfect for those in warmer climates who want Thanksgiving flavors without the heavy richness. The golden raisins provide sweetness without the tartness of cranberries, creating a more mellow flavor profile. This version pairs beautifully with ham or pork instead of turkey, making it ideal for those who break tradition.
The Savory Sweet Swap
Replace the apples with firm pears and add 1/4 cup of crumbled blue cheese. The pears provide a more subtle sweetness that allows the blue cheese to shine without overwhelming the dish. Use a mild blue cheese like Gorgonzola dolce rather than something aggressive like Roquefort. The result is sophisticated enough for adult palates while still being approachable for kids. This version has converted more blue cheese skeptics than I can count.
The Spice Route Adventure
Add 1/2 teaspoon of cinnamon and 1/4 teaspoon of nutmeg to create warm spice notes that complement the fruit beautifully. These aren't enough to make it taste like dessert — just enough to add complexity and warmth. The cinnamon enhances the apple flavor while the nutmeg adds a subtle depth that makes people wonder why your stuffing tastes so much better than theirs. This is especially good for those cool autumn days when you want your food to feel like a warm hug.
Storing and Bringing It Back to Life
Fridge Storage
Let the stuffing cool completely before storing — hot stuffing in a sealed container creates condensation that leads to soggy sadness. Store in an airtight container in the refrigerator for up to 4 days. Press plastic wrap directly against the surface to prevent it from drying out. If you've made a double batch (smart move), store in multiple smaller containers rather than one large one. This allows it to cool faster and reheat more evenly. The flavors continue to develop in the fridge, making day-two stuffing arguably better than fresh.
Freezer Friendly
This stuffing freezes beautifully for up to 3 months. Cool completely, then portion into freezer-safe containers or heavy-duty freezer bags. Remove as much air as possible to prevent freezer burn. Label with the date and contents — future you will appreciate this thoughtfulness. To reheat, thaw overnight in the refrigerator, then warm in a 350°F oven for 20-25 minutes. Add a splash of chicken broth before reheating — it steams back to perfection, restoring that just-baked texture.
Best Reheating Method
Skip the microwave unless you enjoy rubbery, unevenly heated stuffing. Instead, reheat in a 350°F oven for 15-20 minutes, covered with foil for the first half to prevent drying out. Add a tablespoon of broth or water per cup of stuffing before reheating — this creates steam that restores moisture. For individual portions, reheat in a skillet with a splash of broth, stirring occasionally. The skillet method gives you crispy bits that rival the original fresh-from-the-oven experience. If you've frozen individual portions, reheat directly from frozen at 375°F for 30-35 minutes, adding extra broth as needed.