Picture this: it’s 3 a.m., you’ve just finished a brutal HIIT session, and the only thing your brain can conjure up is the silky, coffee‑kissed decadence of tiramisu—but without the guilt that usually follows a dessert binge. I was in that exact spot, staring at the pantry like it held the secrets of the universe, when a rogue espresso shot splashed onto the counter, daring me to turn it into something… edible. I grabbed the nearest frozen banana, a scoop of protein powder, and a jar of mascarpone, and the rest is history. This isn’t just a shake; it’s a full‑on, post‑workout celebration that makes your muscles sing and your taste buds do a slow‑motion dance.
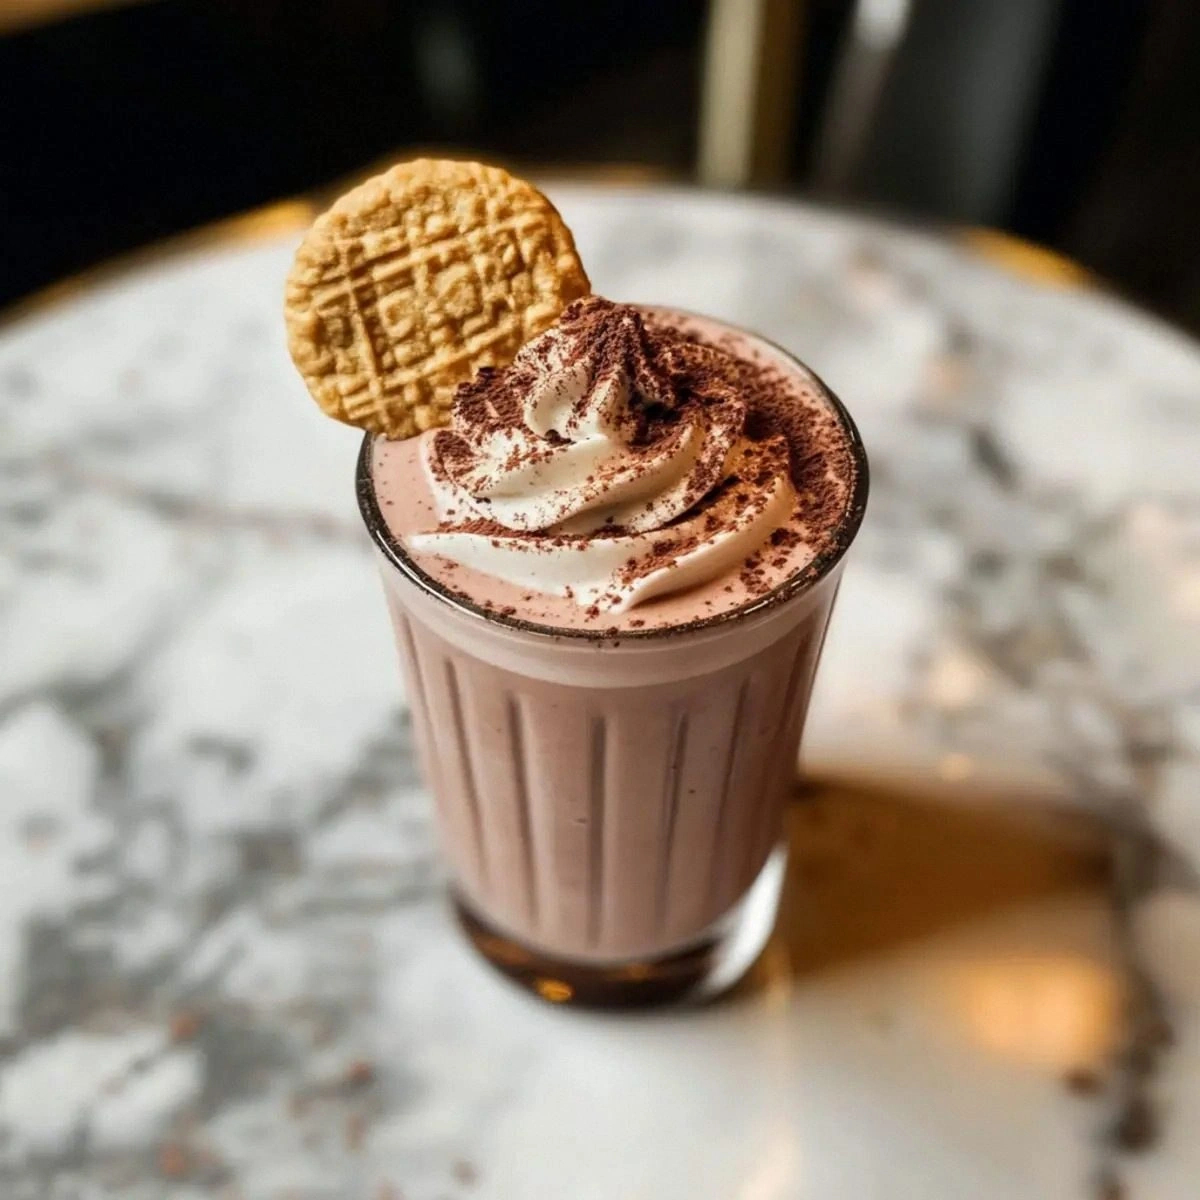
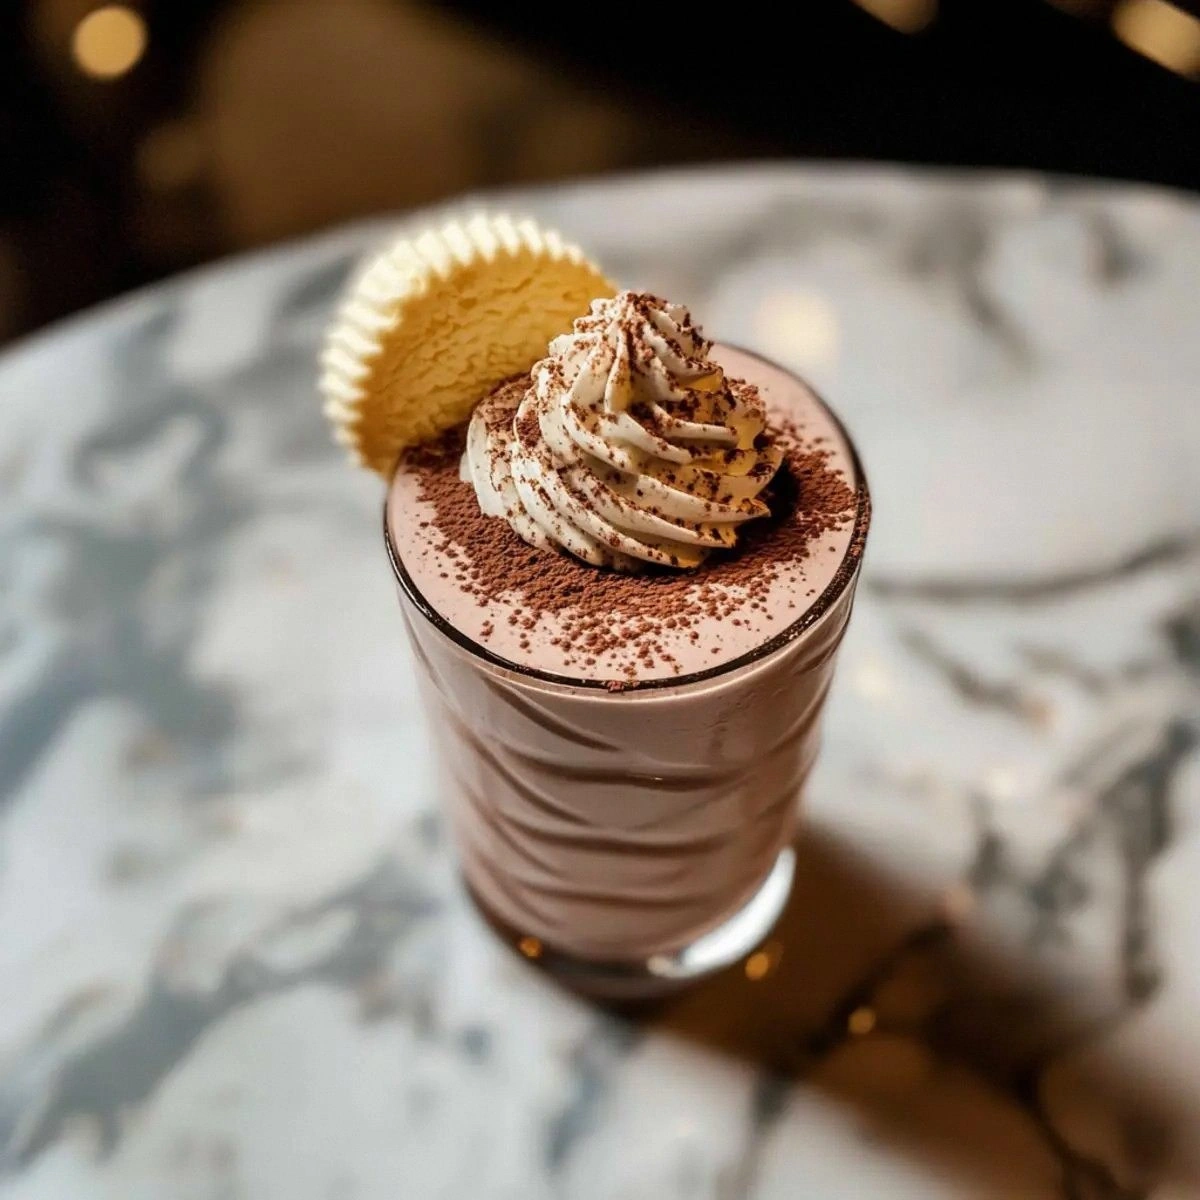
The moment the espresso hits the milk, you hear that faint hiss, like a tiny espresso machine whispering sweet nothings. The aroma of roasted beans spirals up, mingling with the buttery richness of mascarpone, while the banana adds a mellow, almost caramel‑like undercurrent. You can almost feel the coolness of the ice cubes clinking against the glass, a tactile reminder that this is a drink you can actually sip without melting into a puddle of regret. The final garnish—dusty cocoa and a dollop of sugar‑free whipped cream—adds a visual contrast that’s as striking as a sunrise over the Alps.
Most tiramisu protein shakes out there feel like a watered‑down coffee, or they overcompensate with too many sweeteners, turning the whole thing into a sugar bomb. I’ve tried the “quick blend” versions that leave you with a gritty texture and a flavor profile that’s more “café‑fail” than “café‑fantastic.” This version, however, balances the coffee punch with the creamy depth of mascarpone (or Greek yogurt for the low‑fat crowd) and the natural sweetness of banana, all while packing a solid protein hit that fuels recovery. The secret? A double‑dose of cocoa powder for that dark chocolate finish and a pinch of instant espresso powder that amplifies the coffee flavor without the bitterness.
And here’s the kicker: you won’t need any fancy equipment beyond a decent blender, a shot glass, and a spoon for that final swirl. No stovetop, no oven, no time‑wasting steps—just pure, guilt‑free indulgence. I dare you to taste this and not go back for seconds; I’ll be honest—I ate half the batch before anyone else got a chance to try it. Let me walk you through every single step — by the end, you’ll wonder how you ever made it any other way.
What Makes This Version Stand Out
- Flavor Explosion: The combination of fresh espresso, instant espresso powder, and double cocoa creates a coffee‑chocolate symphony that rivals any classic tiramisu.
- Protein Power: One scoop of quality protein powder delivers 20‑plus grams of muscle‑repairing protein, turning dessert into recovery.
- Creamy Texture: Mascarpone (or Greek yogurt) blended with frozen banana gives a silk‑smooth mouthfeel that coats your palate like velvet.
- Low‑Sugar Sweetness: The banana’s natural sugars and a dollop of sugar‑free whipped cream keep the sugar count low without sacrificing taste.
- Simple Prep: No cooking, no baking, just a blend and a garnish—perfect for busy mornings or post‑gym cooldowns.
- Customizable Crunch: Crushed ladyfinger cookies or almond flour crumbs add a subtle crunch that mimics the classic tiramisu layer.
- Make‑Ahead Friendly: Store in the fridge for up to 24 hours; the flavors meld even more, becoming richer and smoother.
- Visual Appeal: The cocoa dust and whipped cream topping make it look like a café‑style dessert, Instagram‑ready in seconds.
Inside the Ingredient List
The Flavor Base
1 shot Espresso/Coffee: This is the heart‑beat of the shake, delivering that authentic tiramisu coffee note. If you use a strong brew, you’ll get a richer flavor; a weak espresso will leave the drink tasting flat. Skipping this means you lose the signature tiramisu aroma that makes the whole experience unforgettable. Pro tip: Pull a fresh shot just before you blend for maximum aroma.
½ teaspoon Instant Espresso Powder: Think of this as the secret weapon that intensifies the coffee flavor without adding bitterness. It dissolves instantly, ensuring every sip packs a punch. If you’re out of it, a pinch of finely ground coffee works, but the texture may be a tad grainy.
1 tablespoon Cocoa Powder (first): The first cocoa layer adds depth, giving the shake a subtle chocolate undertone that mirrors the cocoa dust traditionally found on tiramisu. Use unsweetened, high‑quality cocoa for the best bitterness‑sweetness balance. If you prefer a lighter flavor, you can halve the amount.
The Texture Crew
¼ cup Mascarpone Cheese/Greek Yogurt: This is the creamy backbone that gives the shake its luxurious body. Mascarpone offers a buttery richness, while Greek yogurt provides a tangy note and extra protein. If you’re dairy‑free, swap with a plant‑based cream cheese; the texture will stay thick, though the flavor shifts slightly.
½ banana Frozen Banana: Frozen banana acts as a natural sweetener and thickener, eliminating the need for added sugar or ice cream. It also adds a subtle caramel flavor that complements the coffee. Forgetting the banana will result in a watery shake that feels more like a coffee drink than a dessert.
Handful Ice Cubes: Ice gives the shake that frosty, slushy feel you expect from a dessert drink. The amount can be adjusted based on how thick you want it; more ice = thicker, less ice = smoother. If you don’t have ice, use frozen oat milk cubes for a creamier texture.
The Unexpected Star
1 cup Milk: Milk provides the liquid base, balancing the thickness from the banana and mascarpone. Whole milk yields the creamiest result, but any milk—almond, oat, soy—will work. Skipping milk altogether makes the blend too dense and hard to blend.
1 scoop Protein Powder: Choose a vanilla or unflavored whey isolate for a clean taste that lets the coffee and cocoa shine. Plant‑based proteins can be used, but they sometimes add an earthy aftertaste. If you forget the protein powder, you lose the “muscle‑fuel” aspect that makes this drink more than just a dessert.
The Final Flourish
1 tablespoon Cocoa Powder (second): The second addition is dusted on top, providing a visual cue and a final flavor boost. It creates that classic tiramisu dusting you’d see in a café. Skipping this step makes the drink look plain and loses that final chocolatey bite.
1 teaspoon Vanilla Extract: Vanilla rounds out the coffee and chocolate flavors, adding a sweet aromatic layer that ties everything together. A high‑quality vanilla extract makes a noticeable difference; cheap versions can taste flat.
1 dollop Sugar‑Free Whipped Cream: This garnish adds a fluffy, airy contrast to the dense shake, mimicking the whipped mascarpone layer in traditional tiramisu. It also adds a visual wow factor. If you’re avoiding dairy, a dollop of coconut whipped cream works just as well.
To taste Crushed Ladyfinger Cookie or Almond Flour Crumbs: This crunchy element replicates the ladyfinger layers that give tiramisu its signature bite. Almond flour crumbs add a low‑carb twist while still offering that satisfying crunch. Forgetting this garnish means you lose the textural contrast that makes the drink feel like a true tiramisu.
Everything's prepped? Good. Let's get into the real action...
The Method — Step by Step
Start by brewing a fresh shot of espresso. Use a high‑pressure espresso machine or a strong French press; the goal is a concentrated, aromatic coffee that will dominate the flavor profile. Let it sit for about 30 seconds so the crema forms—that’s the golden layer that signals a perfect extraction. While the espresso cools slightly, set your blender on standby.
Grab your frozen banana chunks and toss them into the blender jar. Add the cup of milk, the scoop of protein powder, and the half‑cup of mascarpone or Greek yogurt. This is the creamy foundation; the cold banana will instantly start breaking down, creating a thick base that feels like a dessert mousse.
Now, add the espresso shot, the instant espresso powder, and the first tablespoon of cocoa powder. This is where the flavor deepens, turning the mixture from “coffee‑y” to “coffee‑chocolate‑rich.”
Kitchen Hack: Add the cocoa powder before the ice so it dissolves fully, preventing any gritty texture.Drop in a handful of ice cubes. The ice not only chills the shake but also helps emulsify the fats from the mascarpone, giving you that velvety, café‑style mouthfeel. If you prefer a thicker shake, add a few more cubes; for a smoother sip, reduce the ice.
Secure the lid and blend on high for 45 seconds to a minute. You’re looking for a thick, glossy texture that coats the sides of the blender.
Take a quick taste—if the coffee flavor feels muted, add a splash more espresso and blend for another 10 seconds.Watch Out: Over‑blending can melt the ice too much, resulting in a watery shake. Stop as soon as you see a smooth, thick consistency.Once the blend reaches that perfect silkiness, pour the shake into a tall glass. The color should be a deep mocha, inviting you to dive right in. This is the moment of truth: if you see any streaks of unmixed cocoa, give it a quick stir with a spoon to even it out.
Top the shake with a generous dollop of sugar‑free whipped cream. Then, dust the second tablespoon of cocoa powder over the cream using a fine sieve—think of it as the snow on a mountain of coffee. Finally, sprinkle the crushed ladyfinger cookies or almond flour crumbs for that signature crunch.
Serve immediately, or if you’re prepping ahead, cover the glass with cling film and refrigerate for up to 2 hours. The flavors will meld, becoming even richer. When you’re ready to enjoy, give it a gentle stir to reincorporate any settled crumbs.
That’s it — you did it. But hold on, I’ve got a few more tricks that’ll take this to another level. Stay with me here — this is worth it.
Insider Tricks for Flawless Results
The Temperature Rule Nobody Follows
Never blend hot espresso directly with frozen ingredients. The sudden temperature shock can cause the blender motor to strain and may result in a grainy texture. Instead, let the espresso cool to room temperature, or even chill it in the fridge for 5 minutes. I once tried blending a steaming shot straight away and the motor sputtered—lesson learned.
Why Your Nose Knows Best
During blending, pause for a second and take a whiff. If you detect a burnt coffee note, you’ve over‑extracted the espresso, and the shake will taste bitter. In that case, add a tiny splash of milk and a pinch of vanilla to balance it out. Trust your nose; it’s the most reliable quality control tool you have.
The 5‑Minute Rest That Changes Everything
After blending, let the shake rest for exactly five minutes before adding the whipped cream topping. This short rest allows the cocoa particles to fully hydrate, eliminating any chalky mouthfeel. I tried skipping this rest once and the cocoa felt like sand—never again.
Crush, Don’t Grind
When using ladyfinger cookies, crush them with a rolling pin rather than a food processor. Over‑processing turns them into a floury mess that dissolves into the shake, losing that delightful crunch. A gentle crush gives you those bite‑size shards that stay distinct.
Protein Powder Placement
Always add protein powder after the liquid ingredients but before the ice. This ensures it dissolves fully without clumping. If you add it after the ice, you’ll get gritty pockets that ruin the smooth texture.
Creative Twists and Variations
This recipe is a playground. Here are some of my favorite ways to switch things up:
Mocha Mint Madness
Swap half the cocoa powder for a teaspoon of mint extract and add a few fresh mint leaves to the blender. The result is a refreshing mint‑chocolate combo that feels like a holiday treat. Perfect for those who love peppermint mocha.
Nutty Espresso Crunch
Replace the ladyfinger crumbs with toasted almond slivers. The nuts add a buttery crunch and a subtle nutty flavor that pairs beautifully with coffee. It also boosts the healthy fat content, making the shake more satiating.
Vegan Velvet
Use coconut cream in place of mascarpone and a plant‑based protein powder. Add a dash of maple syrup if you need extra sweetness. The shake becomes dairy‑free while retaining that luxurious mouthfeel.
Spiced Autumn
Incorporate a pinch of ground cinnamon and a splash of pumpkin puree. This variation turns the shake into a cozy, fall‑inspired beverage that’s perfect for cooler evenings. The pumpkin adds natural sweetness and a creamy texture.
High‑Energy Pre‑Workout
Boost the caffeine kick by adding an extra shot of espresso and a teaspoon of maca powder. This version fuels your workout with extra stamina while still delivering the dessert vibe.
Berry‑Infused Bliss
Blend in a handful of frozen strawberries or raspberries for a fruity twist. The berries’ acidity cuts through the richness, creating a balanced flavor profile that feels light yet indulgent.
Storing and Bringing It Back to Life
Fridge Storage
Transfer the shake to an airtight mason jar and store it in the refrigerator for up to 24 hours. The texture may thicken as the ice melts, so give it a good shake or stir before serving. If the shake becomes too thick, add a splash of milk and stir.
Freezer Friendly
For longer storage, pour the shake into a freezer‑safe container, leaving a small gap for expansion, and freeze for up to 2 weeks. When ready to enjoy, let it thaw in the fridge for 4‑6 hours, then blend briefly to restore smoothness.
Best Reheating Method
If you prefer a warm version, microwave the shake in 15‑second bursts, stirring in between, until it reaches your desired temperature. Add a tiny splash of water before reheating; the steam will bring back that silky texture without diluting the flavor.