I was in the middle of a rainy Saturday night, the kind where the thunder is a low‑rumble soundtrack and the only thing keeping you sane is the promise of something sweet. I had just burned a batch of brownies—charred edges that looked like a crime scene—when my roommate dared me, “Bet you can’t make a cookie that’s softer than a pillow and still has that chocolate‑burst you love.” I laughed, grabbed the pantry, and set out on a mission that turned a kitchen disaster into a triumph. The result? A cookie so gooey it practically melts in your mouth, a texture that feels like a warm hug from the inside out.
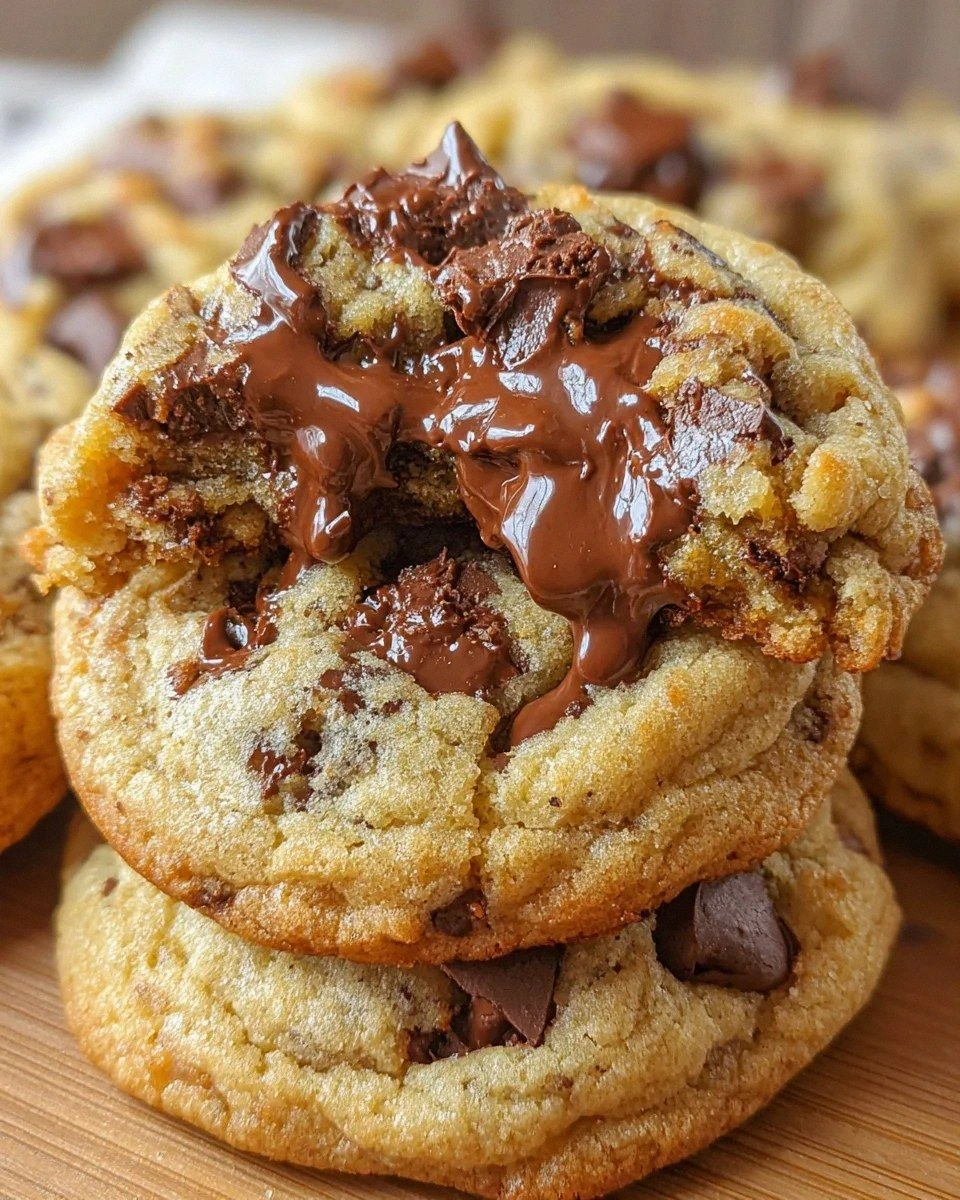
Picture this: the oven door swings open, a wave of buttery caramel and deep chocolate rolls over the room, and the air is thick with the scent of vanilla whispering against toasted sugar. The cookies themselves sit on the sheet, edges just beginning to turn golden, the tops glossy like a freshly polished marble countertop. When you bite in, the first thing you notice is the soft, almost cake‑like crumb that gives way to a river of melted chocolate that clings to the roof of your mouth. It’s the kind of indulgence that makes you forget you ever cared about counting calories.
Most cookie recipes out there either bake to a crisp, crumble like dry sand, or end up flat and lifeless. This version flips the script by marrying the science of corn starch and the richness of dark brown sugar, creating a dough that spreads just enough to get that perfect edge while staying thick and chewy in the middle. I’ll be honest—I ate half the batch before anyone else could get a taste, and I’m still not sorry. If you’ve ever struggled with cookies that turn out too hard or too cakey, you’re not alone, and I’ve got the fix.
The secret weapon? A tiny amount of corn starch that acts like a texture‑tamer, and a careful balance of leaveners that give the cookies a subtle lift without making them airy. I dare you to taste this and not go back for seconds. Okay, ready for the game‑changer? Let me walk you through every single step—by the end, you’ll wonder how you ever made it any other way.
What Makes This Version Stand Out
- Texture: The combination of corn starch and a precise butter‑to‑sugar ratio creates a chewy, melt‑in‑your‑mouth interior while the edges stay delightfully crisp.
- Flavor Depth: Dark brown sugar adds caramel notes that dance with the semi‑sweet chocolate, while a splash of vanilla lifts everything to a gourmet level.
- Simplicity: Only ten core ingredients, all pantry staples, mean you can whip this up without a trip to the specialty store.
- Consistency: Thanks to the corn starch and balanced leaveners, every batch turns out the same glorious gooeyness—no more guesswork.
- Crowd Reaction: These cookies have a habit of disappearing within minutes; they’re the kind of treat that turns a casual get‑together into a full‑blown celebration.
- Ingredient Quality: Using real butter and high‑quality chocolate chunks makes a world of difference; you’ll taste the love in every bite.
- Method Magic: The “creaming” technique we use locks in air, giving the cookies a light lift without sacrificing that dense, gooey core.
- Make‑Ahead Potential: Freeze the dough balls for up to a month, then bake fresh whenever the craving hits—no compromise on texture.
Inside the Ingredient List
The Flavor Base
Unsalted butter is the heart of any good cookie. When softened, it creates a smooth emulsion with the sugars, ensuring a tender crumb. If you substitute with margarine, you’ll lose that buttery richness and end up with a more rubbery texture. Pro tip: Use European‑style butter with at least 82% fat for an extra‑luxurious mouthfeel.
Dark brown sugar packs a caramel‑like depth that white sugar simply can’t match. It also adds moisture, which is essential for that gooey center. Skipping it for all white sugar will give you a cookie that’s sweet but flat, missing the complex notes that make these cookies unforgettable. If you’re looking for a lower‑calorie option, try a 50/50 blend of brown and coconut sugar, but expect a slightly different flavor profile.
White granulated sugar balances the richness, providing a clean sweetness that lifts the overall taste. It also aids in creating a slight crunch on the edges. You could replace it with demerara for a subtle crunch, but keep the quantity the same to maintain texture.
The Texture Crew
A large egg, at room temperature, acts as a binder and adds a gentle lift. Cold eggs will cause the butter to seize, leading to a gritty dough. If you’re vegan, a flax egg (1 tbsp ground flax + 3 tbsp water) works, though the cookie will be a shade denser.
All‑purpose flour provides the structural backbone. Too much flour and you’ll end up with a dry, cakey cookie; too little and the dough will spread into a flat disc. For a gluten‑free version, use a 1:1 blend of rice flour and tapioca starch, but add an extra ¼ teaspoon xanthan gum to mimic gluten’s elasticity.
Corn starch is the unsung hero that gives the interior its melt‑in‑the‑mouth quality. It interferes with gluten formation, keeping the crumb soft. If you’re out of corn starch, replace it with an equal amount of potato starch; the result is remarkably similar.
The Leavening Duo
Baking powder and baking soda work together to give the cookies a subtle rise without turning them into a cake. Baking soda reacts with the acidic brown sugar, while baking powder provides an extra puff. Over‑leavening leads to a puffy, cakey texture, so measure precisely.
A pinch of salt is the flavor‑enhancer that pulls all the sweet notes together. It prevents the cookie from tasting one‑dimensional. If you’re using sea salt flakes, sprinkle a few on top just before baking for a delightful crunch.
The Final Flourish
Semi‑sweet chocolate chunks or chips are the star that makes these cookies unforgettable. Chunks melt more slowly than chips, creating pockets of molten chocolate that ooze out with each bite. If you prefer a darker, more bitter bite, swap half the semi‑sweet for bittersweet chocolate.
Everything's prepped? Good. Let's get into the real action...
The Method — Step by Step
-
Start by preheating your oven to 350°F (175°C). While the oven warms, line two baking sheets with parchment paper; this prevents sticking and gives the cookies a uniform bottom. The moment the heat hits the metal, you’ll hear a faint sizzle as the butter begins to melt—trust me, that’s the sound of flavor being born.
Kitchen Hack: Place a second rack on the opposite side of the oven; this ensures even airflow and consistent browning. -
In a large mixing bowl, cream together the softened unsalted butter, dark brown sugar, and white granulated sugar. Use a handheld mixer on medium speed for about 3 minutes—until the mixture is pale, fluffy, and smells like a bakery. This aeration step is crucial; it incorporates tiny air bubbles that later expand, giving the cookies a light lift.
-
Add the room‑temperature egg and vanilla extract to the creamed butter mixture. Beat until just combined; over‑mixing at this stage can cause the dough to become tough. You’ll notice the batter turning glossy, a sign that the emulsification is perfect.
Watch Out: If the egg is too cold, the butter will seize, resulting in a grainy dough. Let the egg sit out for 15 minutes before adding. -
In a separate bowl, whisk together the all‑purpose flour, corn starch, baking powder, baking soda, and salt. Whisking ensures the leaveners are evenly distributed, preventing pockets of soda that could cause uneven spreading.
Gradually add the dry ingredients to the wet mixture, mixing on low speed. Stop as soon as the flour disappears; over‑mixing will develop gluten, making the cookies dense.
-
Fold in the semi‑sweet chocolate chunks with a spatula, ensuring they’re evenly dispersed. This is the moment of pure anticipation—each chunk promises a molten center. If you’re feeling adventurous, add a handful of toasted nuts for a crunch contrast.
-
Cover the dough with plastic wrap and refrigerate for at least 30 minutes, or up to 2 hours. This chilling step solidifies the butter, slowing spread and allowing the flavors to meld. I dare you to skip this and see what happens—trust me, the results are less impressive.
Kitchen Hack: Scoop dough onto a sheet of parchment, roll into a log, and slice into uniform balls for perfectly even cookies. -
Using a cookie scoop (or a tablespoon), place dough balls onto the prepared baking sheets, spacing them about 2 inches apart. The dough will spread a little, but not dramatically, thanks to the chilled butter.
Slide the sheets into the oven and bake for 12‑14 minutes, or until the edges are golden and the tops have a slight sheen. The centers will look under‑baked—that’s exactly what you want; they’ll finish cooking on the hot sheet.
-
Remove the cookies from the oven and let them rest on the sheet for 3‑5 minutes. This short cooling period allows the interior to set without losing its gooey heart. Then transfer to a wire rack to cool completely, or if you can’t wait, devour them warm—no judgment here.
Watch Out: Over‑baking by even a minute turns the soft center into a crumbly texture. Set a timer and trust it.
That's it — you did it. But hold on, I've got a few more tricks that'll take this to another level...
Insider Tricks for Flawless Results
The Temperature Rule Nobody Follows
Always bring your butter and egg to room temperature before mixing. Cold ingredients cause the butter to clump, leading to uneven pockets of dough that bake inconsistently. I once tried a shortcut by using butter straight from the fridge; the cookies spread like oil slicks and lost that coveted chew. Letting them sit for 15‑20 minutes is a tiny time investment for massive payoff.
Why Your Nose Knows Best
Your sense of smell is a reliable indicator of doneness. When the edges start to turn a light amber and you catch a faint caramel aroma, the cookies are ready to leave the oven. Relying solely on visual cues can be deceptive, especially with a dark chocolate chunk that masks the true color of the cookie.
The 5‑Minute Rest That Changes Everything
After baking, let the cookies sit on the hot sheet for exactly five minutes. This brief rest lets the interior finish cooking from residual heat, preserving the gooey center while the outer crust firms up. Skipping this step results in a cookie that collapses and becomes flat the moment you move it.
The Double‑Layer Baking Sheet Trick
Place a second baking sheet on the rack directly beneath the one with cookies. The extra metal absorbs excess heat, preventing the bottoms from over‑browning while the tops achieve that perfect caramelized finish. I tried this on a cold winter morning, and the cookies emerged with a uniform golden hue from top to bottom.
The Secret of a Light Dusting
Just before baking, lightly dust the tops with a pinch of flaky sea salt. The tiny crystals melt into the chocolate, creating a burst of flavor that balances the sweetness. It’s a pro tip that turns an ordinary cookie into a gourmet experience.
Creative Twists and Variations
This recipe is a playground. Here are some of my favorite ways to switch things up:
Salted Caramel Swirl
Add a swirl of homemade caramel sauce in the center of each dough ball before baking, then sprinkle a pinch of flaky sea salt on top. The result is a buttery‑sweet cookie with a caramel heart that oozes out as you bite.
Espresso Infusion
Dissolve 1 tablespoon of instant espresso powder in the vanilla extract before adding it to the wet ingredients. The coffee notes amplify the chocolate, creating a sophisticated flavor profile that’s perfect for an after‑dinner treat.
White Chocolate & Cranberry
Swap half the semi‑sweet chocolate chunks for white chocolate chips and fold in dried cranberries. The tartness of the cranberries cuts through the sweetness, delivering a festive twist that’s great for holiday gatherings.
Nutty Crunch
Stir in ½ cup of toasted chopped pecans or walnuts for a crunchy contrast. The nuts add a buttery depth that pairs beautifully with the gooey chocolate, making each bite a textural adventure.
Vegan Velvet
Replace butter with coconut oil, use a flax egg, and choose dairy‑free chocolate chips. The cookies retain their soft interior, and the coconut oil adds a subtle tropical aroma that’s surprisingly complementary.
Storing and Bringing It Back to Life
Fridge Storage
Place cooled cookies in an airtight container with a paper towel on the bottom to absorb excess moisture. They’ll stay fresh for up to five days. If you notice any condensation, simply open the lid for a minute to let the humidity escape.
Freezer Friendly
Arrange individual cookies on a parchment‑lined tray and freeze until solid, then transfer to a zip‑top freezer bag. They’ll keep for three months. When you’re ready to eat, let them thaw at room temperature for 10 minutes, then pop them in a 300°F oven for 3‑4 minutes to revive that gooey interior.
Best Reheating Method
Microwave a single cookie for 8‑10 seconds, but add a tiny splash of water (about a teaspoon) to the plate first; the steam restores moisture and prevents the cookie from becoming rubbery. For a larger batch, use a preheated oven at 325°F for 5 minutes, and you’ll get that freshly‑baked feel every time.