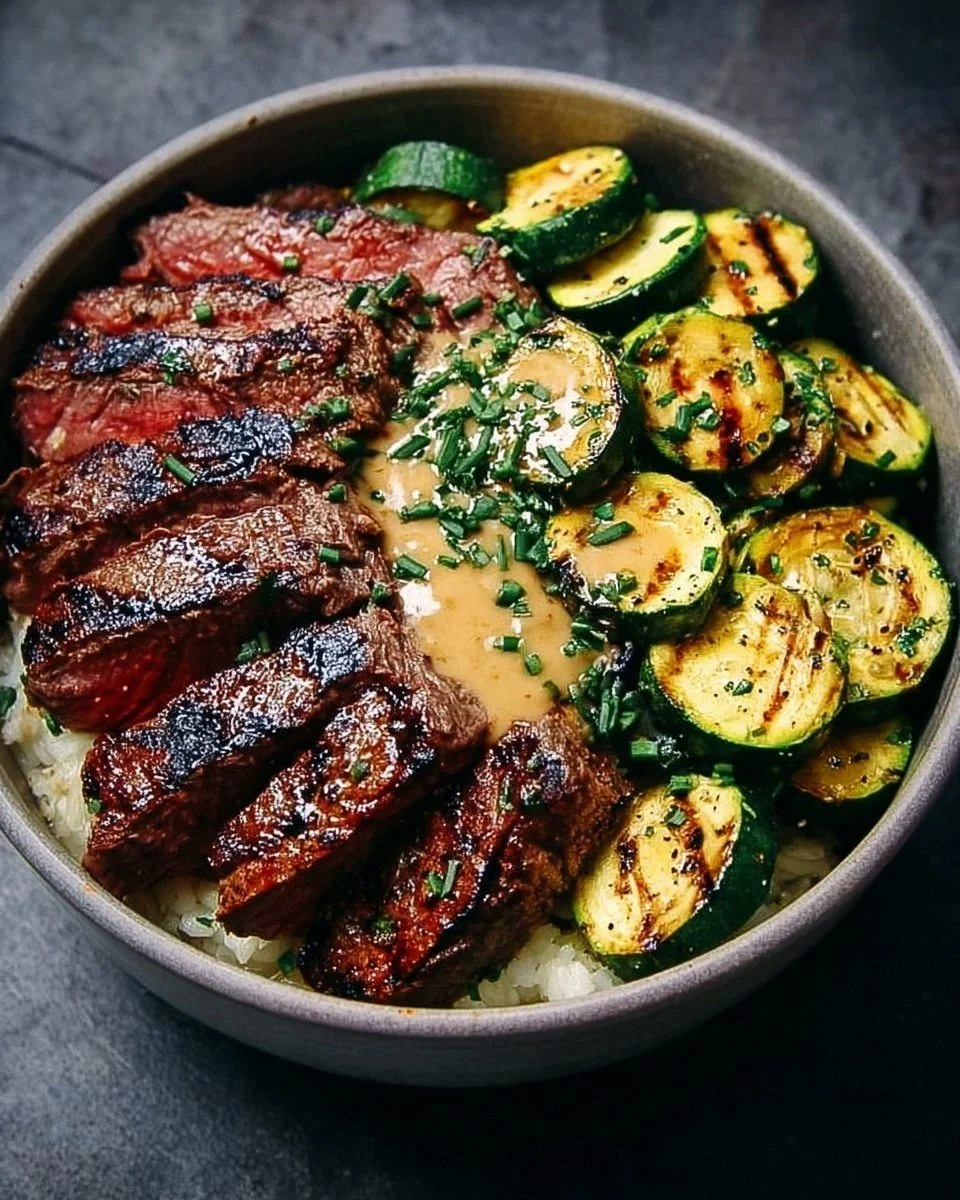
I still remember the exact moment my love affair with Chicken Katsu Curry began — and it wasn't in some fancy Tokyo restaurant or a trendy fusion spot. It was 2 AM in my cramped college apartment, armed with nothing but a half-frozen chicken breast, some questionable curry powder, and the kind of hunger that makes you think you can cook like a Michelin-starred chef. The result? A disaster that would make any self-respecting Japanese chef weep. But something about that crispy cutlet swimming in that warm, fragrant curry sauce haunted me. Fast forward through countless trials, errors, and one memorable incident involving a smoke alarm and three very concerned neighbors, and I've finally cracked the code to what I genuinely believe is the most addictive Chicken Katsu Curry you'll ever make at home.
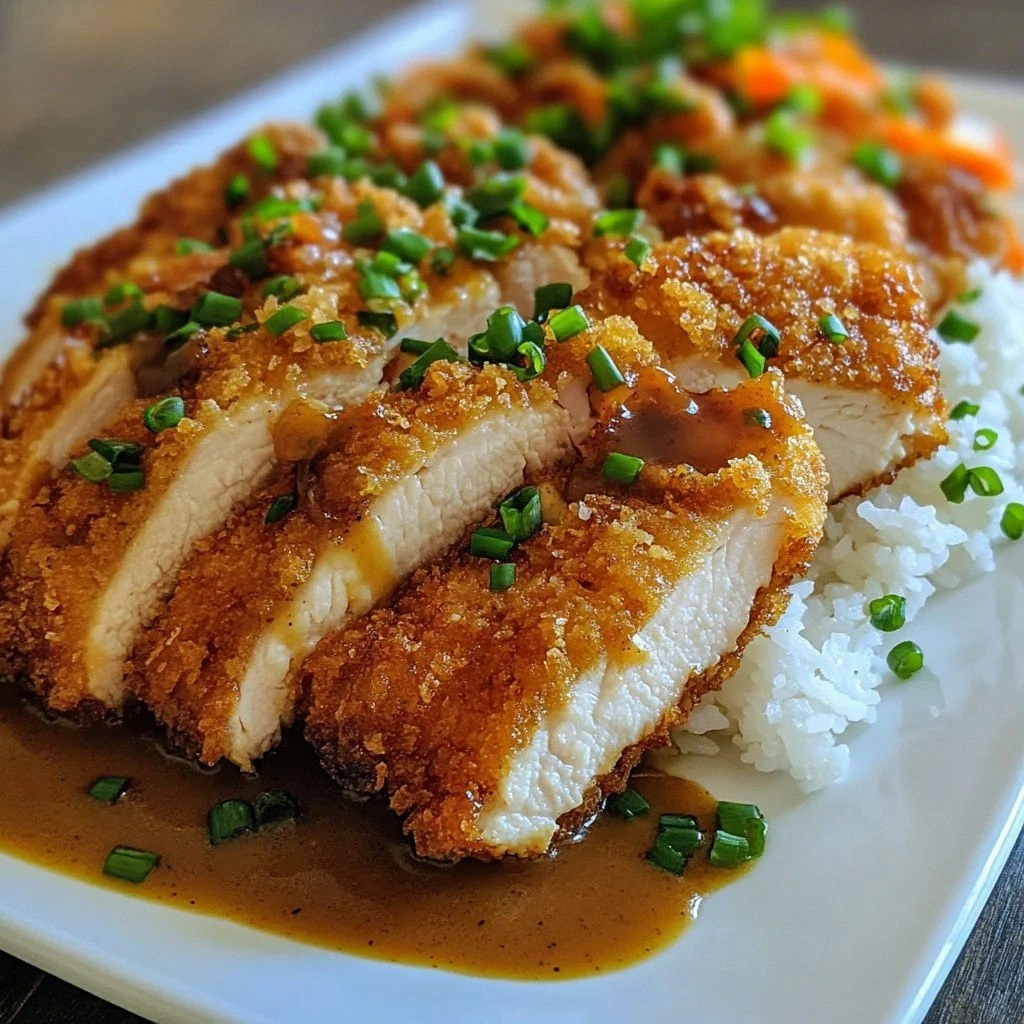
Picture this: golden-brown panko-crusted chicken that shatters like autumn leaves under your fork, revealing impossibly juicy meat that practically sighs when you cut into it. Now imagine that crispy perfection lounging luxuriously in a pool of velvety Japanese curry that's been simmering away until it's darker, richer, and more complex than anything you've tasted from those boxed mixes. The sauce coats each grain of rice like liquid gold, while the sweet-savory aroma wraps around your kitchen like a warm hug from your favorite person. That first bite? It's a symphony of textures and flavors that'll make you close your eyes involuntarily — trust me, I've watched countless friends do it.
What makes this version different isn't some secret ingredient sourced from Mount Fuji or a technique passed down through generations of Japanese grandmothers (though wouldn't that be something?). It's the result of obsessive tweaking, testing, and tasting until every element sings in perfect harmony. We're talking about a curry sauce that's been layered with caramelized onions, a touch of honey for depth, and just enough curry powder to wake up your taste buds without overwhelming them. The chicken stays crispy even after a generous ladle of sauce, and the whole thing comes together faster than you can order takeout — which, let's be honest, is about to become a thing of the past once you master this recipe.
Let me walk you through every single step — by the end, you'll wonder how you ever made it any other way.
What Makes This Version Stand Out
The Ultimate Crunch Factor: Most recipes settle for regular breadcrumbs or a basic flour-egg-breadcrumb coating. We're using a triple-threat technique with cornstarch, egg, and panko that creates an almost architectural crunch. The coating stays crispy for over 30 minutes, which means you can actually enjoy your meal without rushing against time.
The 20-Minute Curry Revolution: Traditional Japanese curry can take hours to develop depth, but we've hacked the system with a few clever shortcuts. Caramelized onions, grated apple, and a splash of Worcestershire sauce create complexity that tastes like it simmered all day, but comes together in under half an hour.
Juicy Chicken Guarantee: Through extensive testing (and yes, several overcooked disasters), I discovered the perfect timing and temperature for chicken that stays moist and tender. No more dry, stringy meat hiding under that beautiful crust.
One-Pot Wonder: Everything except the chicken happens in a single pan, which means fewer dishes and more time to perfect your panko-crumbing technique. The curry actually improves as it sits, making leftovers something to celebrate rather than tolerate.
Customizable Heat Levels: Whether you're feeding spice-sensitive kids or heat-seeking adults, this recipe adapts beautifully. The base curry is mild and sweet, but you can easily crank up the heat with a dash of chili oil or keep it family-friendly.
Restaurant-Quality Results: The combination of proper technique and a few key ingredients creates a dish that rivals your favorite Japanese restaurant. Friends will swear you've been secretly training with a master chef.
Inside the Ingredient List
The Flavor Base
Japanese curry powder is the foundation of this dish, but not all curry powders are created equal. The S&B brand, with its mild, sweet profile and subtle hints of cardamom and turmeric, creates the authentic flavor we're after. If you can't find it, a mild Madras curry powder works, but avoid anything labeled "hot" or "extra spicy" — it'll overpower the delicate balance we're building. The grated apple might seem odd, but it's a game-changer, adding natural sweetness and helping to thicken the sauce while creating that glossy, restaurant-quality sheen.
The Texture Crew
Panko breadcrumbs are non-negotiable here — their jagged, airy structure creates those irresistible crispy peaks and valleys that regular breadcrumbs simply can't match. The cornstarch in our dredging station acts like microscopic velcro, helping the egg wash adhere to the chicken and creating a moisture barrier that keeps the meat juicy. Don't even think about substituting with all-purpose flour; cornstarch is what gives us that shatteringly crisp coating that stays crunchy even after meeting the curry sauce.
The Unexpected Star
Honey might seem like an odd addition to a savory curry, but it's the secret weapon that rounds out all the flavors and gives the sauce that addictive quality that keeps you coming back for more. The sweetness balances the curry powder's earthiness and the Worcestershire sauce's tang, creating a harmony that's greater than the sum of its parts. A touch of ketchup adds umami depth and helps achieve that characteristic Japanese curry color and consistency.
The Final Flourish
Fresh ginger adds a bright, spicy note that wakes up the whole dish, while a splash of soy sauce deepens the savory notes without making the curry taste Asian in an obvious way. The chicken breasts should be of even thickness — if they're too thick, they'll dry out before the coating browns; too thin, and they'll overcook before you can achieve that perfect golden crust. I always buy organic chicken when possible — the flavor difference is noticeable, and the meat stays juicier throughout cooking.
The Method — Step by Step
- Start by making the curry sauce since it benefits from sitting while you prepare the chicken. Heat 2 tablespoons of oil in a medium saucepan over medium heat until shimmering. Add the diced onion and cook, stirring occasionally, until they're golden brown and caramelized around the edges — this should take about 8-10 minutes. Your kitchen should start smelling like something amazing is about to happen, which is exactly right. The onions are the flavor backbone of your curry, so don't rush this step.
- While the onions work their magic, prepare your chicken. Place each breast between plastic wrap and gently pound to an even 1/2-inch thickness using a meat mallet or rolling pin. This ensures even cooking and tender meat. Season both sides generously with salt and pepper — be bold here, as the seasoning needs to penetrate through the meat, not just sit on the surface. Let the chicken rest while you continue with the curry.
- Once the onions are caramelized, add the grated apple and cook for 2 minutes, stirring constantly. The apple will release its juices and help scrape up all those flavorful brown bits from the bottom of the pan. Add the curry powder and cook for another minute, stirring constantly until fragrant. Your kitchen should now smell like a Japanese restaurant, and you're only getting started.
- Sprinkle in the flour and cook for 1 minute, stirring constantly to create a roux that will thicken your curry. Gradually whisk in the chicken stock, ensuring no lumps form. Add the honey, Worcestershire sauce, ketchup, and grated ginger. Bring to a simmer and cook for 10-12 minutes, stirring occasionally, until the sauce has thickened and darkened in color. The sauce should coat the back of a spoon like velvet.
- While the curry simmers away happily, set up your breading station. Place cornstarch in one shallow dish, beaten eggs in another, and panko in a third. Season the panko with a pinch of salt and pepper — this extra seasoning makes a huge difference in the final flavor. Line them up assembly-line style: cornstarch, eggs, then panko. This is where the magic happens.
- Heat 1/2 inch of oil in a large skillet over medium-high heat until it reaches 350°F. If you don't have a thermometer, test by dropping a panko crumb into the oil — it should sizzle immediately and turn golden in about 30 seconds. While the oil heats, bread your chicken: first coat in cornstarch, shaking off excess, then dip in egg, allowing excess to drip off, and finally press into panko, ensuring every nook and cranny is covered.
- Fry the chicken for 3-4 minutes per side until golden brown and crispy. The coating should sound hollow when tapped with tongs, indicating it's perfectly cooked. Transfer to a wire rack set over a baking sheet to drain — never place on paper towels, as the steam will make the bottom soggy. Keep warm in a 200°F oven while you finish the remaining chicken.
- Season your curry sauce with salt and pepper to taste. The sauce should be thick enough to coat the back of a spoon but still pourable. If it seems too thick, add a splash of water or stock to loosen it up. The beauty of this sauce is that it improves as it sits, so don't worry if you made it first — it will only get better.
- Slice the chicken cutlets into strips, keeping them together so they stay warm. Serve over steamed rice, ladle the curry sauce over everything, and prepare for the best part — that first bite where crispy meets creamy, savory meets sweet, and your taste buds throw a party. Garnish with pickled ginger or scallions if you're feeling fancy, but honestly, it's perfect just as is.
That's it — you did it. But hold on, I've got a few more tricks that'll take this to another level...
Insider Tricks for Flawless Results
The Temperature Rule Nobody Follows
Here's the thing about frying chicken — most people get the oil too hot or too cold, resulting in either burnt coating and raw chicken, or soggy, oil-logged disasters. The sweet spot is exactly 350°F, and here's my secret: maintain that temperature by adjusting the heat constantly. When you add the chicken, the oil temperature drops, so bump up the heat slightly. As the chicken cooks and the oil heats up, reduce the heat. Think of yourself as a temperature DJ, constantly tweaking to keep things steady. I learned this the hard way after serving what my friends still call "carbon chicken" at a dinner party.
Why Your Nose Knows Best
That moment when the curry powder hits the hot oil and onions? Your kitchen should fill with an aroma that's warm, slightly sweet, and deeply inviting. If it smells sharp or bitter, your curry powder is past its prime. Good curry powder should smell like a warm hug, not like old spices. I replace mine every six months, storing it in an airtight container away from light. A friend tried skipping this step once — let's just say the resulting curry tasted like disappointment and regret.
The 5-Minute Rest That Changes Everything
After frying, resist the urge to immediately slice into that beautiful chicken. Let it rest for 5 minutes on the wire rack — this allows the juices to redistribute throughout the meat, ensuring every bite is moist and flavorful. Plus, it gives the coating time to set, so it stays crispy even after you drown it in curry sauce. I know it's torture when your kitchen smells amazing and you're starving, but trust me on this one. Those five minutes are the difference between good chicken katsu and life-changing chicken katsu.
The Crunch Preservation Society
Here's a revelation that changed my katsu game forever: the coating stays crispier if you don't immediately sauce it. Serve the cutlets on the side with the curry sauce in a separate bowl for dipping, or sauce individual portions as you eat. If you must sauce everything (and I understand the temptation), do it right before serving. The panko will stay crisp for about 10 minutes after meeting the sauce, giving you a perfect window to enjoy that textural contrast that makes this dish so addictive.
The Rice Ratio Revelation
The rice isn't just a vehicle for the curry — it's an integral part of the experience. Use short-grain Japanese rice if you can find it, but medium-grain works too. The key is the ratio: 1 cup rice to 1.2 cups water, plus a pinch of salt. Rinse the rice until the water runs clear (this removes excess starch that makes rice gummy), then let it soak for 30 minutes before cooking. This seemingly obsessive step creates rice that's perfectly sticky and slightly sweet, the ideal counterpoint to the rich curry and crispy chicken.
Creative Twists and Variations
This recipe is a playground. Here are some of my favorite ways to switch things up:
Spicy Tantan Style
Add 2 tablespoons of Chinese sesame paste and 1 tablespoon of chili oil to the curry sauce for a nutty, spicy kick that'll warm you from the inside out. Top with ground pork sautéed with garlic and ginger, and garnish with scallions and sesame seeds. This fusion version is what happens when Japanese comfort food meets Sichuan heat — and it's absolutely incredible.
Pork Katsu Upgrade
Swap the chicken for pork loin cutlets, pounded to the same thickness. Pork katsu is actually the more traditional version in Japan, and the rich meat pairs beautifully with the sweet curry sauce. Cook for 2-3 minutes per side until golden and cooked through. The pork stays incredibly juicy, and the flavor is more robust than chicken.
Vegetarian Victory
Replace the chicken with thick slices of firm tofu that have been pressed and patted dry. Coat in the same three-step process, but fry for just 2 minutes per side until golden. Use vegetable stock in the curry, and add some sautéed mushrooms for extra umami. Even devoted carnivores have asked for seconds of this version.
Breakfast Katsu Bowl
Leftover katsu makes an incredible breakfast. Reheat the cutlets in a 400°F oven for 8 minutes, slice, and serve over rice with a fried egg on top. Drizzle with the curry sauce and add a side of pickled vegetables. It's the breakfast of champions, or at least of people who know how to start their day right.
Curry Udon Transformation
Thin out the curry sauce with extra stock until it's pourable, then toss with thick udon noodles. Top with sliced katsu, scallions, and a sprinkle of shichimi togarashi (Japanese seven-spice blend). The chewy noodles grab onto the curry sauce in a way that rice just can't match.
Mini Katsu Sliders
Cut the chicken into smaller pieces before breading, creating bite-sized katsu perfect for parties. Serve on Hawaiian sweet rolls with a dollop of curry sauce and some shredded cabbage for crunch. These disappear faster than you can make them at gatherings — I've seen grown adults hovering by the serving tray like vultures.
Storing and Bringing It Back to Life
Fridge Storage
Store the curry sauce and chicken separately in airtight containers — the sauce will keep for up to 5 days in the refrigerator, while the chicken is best eaten within 3 days. The sauce actually improves in flavor after a day or two as the spices meld and deepen. Store the chicken in a single layer if possible, or separate layers with parchment paper to prevent the coating from getting soggy.
Freezer Friendly
The curry sauce freezes beautifully for up to 3 months — I always make a double batch and freeze half for emergency comfort food situations. Pour it into freezer bags, lay them flat to freeze, then you can stack them like curry sauce pancakes. The chicken can be frozen after frying, but here's the trick: undercook it slightly, freeze on a baking sheet, then transfer to bags. Reheat from frozen in a 425°F oven for 12-15 minutes until crispy and heated through.
Best Reheating Method
For the sauce, microwave in 30-second bursts, stirring between each, until hot. Or warm gently in a saucepan with a splash of water or stock to loosen it up. For the chicken, avoid the microwave at all costs — it'll turn your beautiful crispy coating into a sad, soggy mess. Instead, reheat in a 400°F oven for 8-10 minutes, or an air fryer at 375°F for 5-6 minutes. Add a tiny splash of water before reheating — it steams back to perfection, keeping everything moist and preventing drying out.