I'll be honest — I ate half the batch before anyone else got to try it. There I was, standing in my kitchen at 11:37 PM, crumbs scattered across my counter like edible confetti, when I realized I'd just devoured six of these little pecan tassies without even meaning to. They disappeared the way good secrets do: slowly at first, then all at once, until my plate looked like a crime scene and my taste buds were doing victory laps around my mouth.
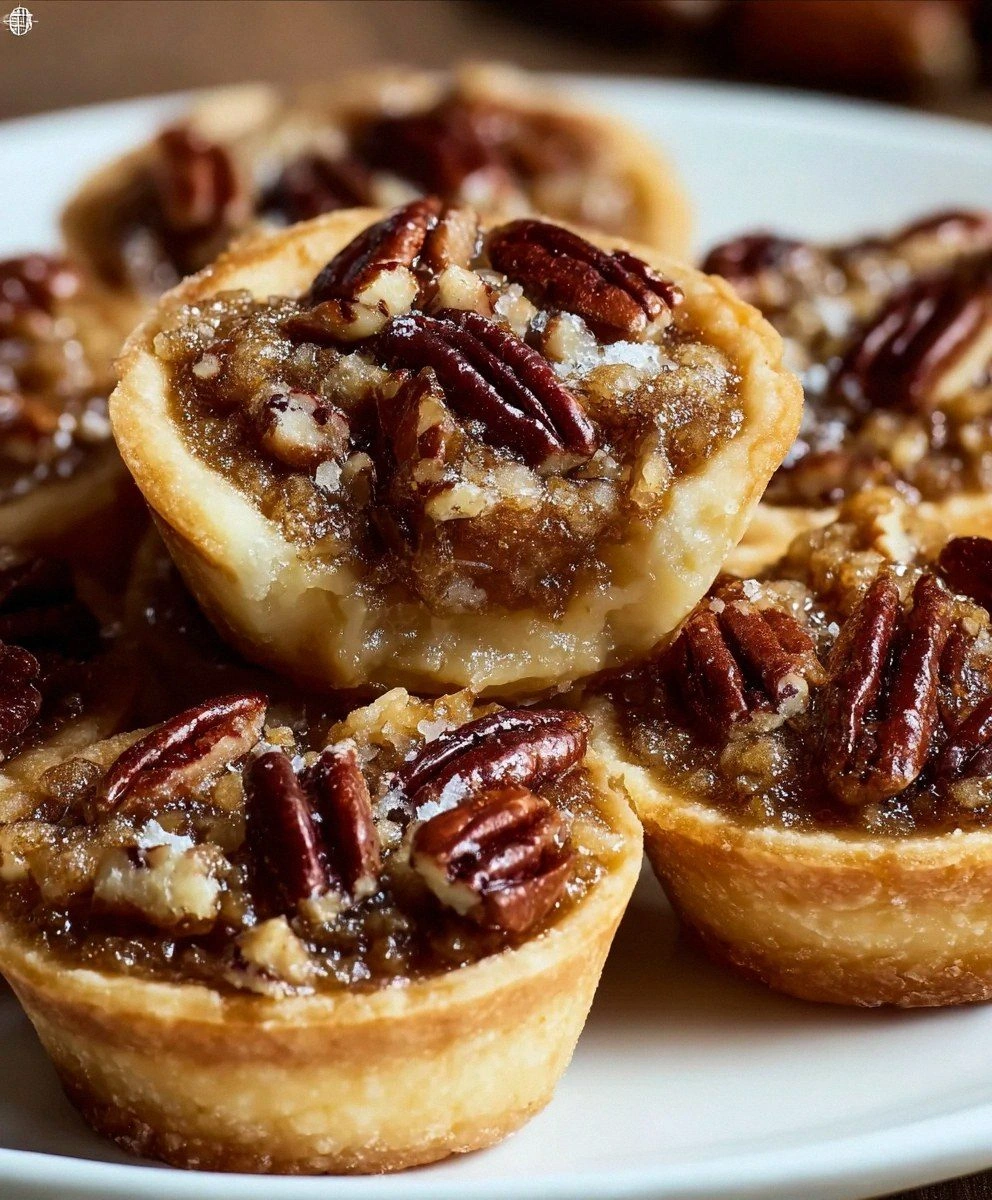
Picture yourself pulling this out of the oven, the whole kitchen smelling like someone bottled autumn and added a splash of bourbon. The aroma hits you first — that deep, caramel sweetness of dark brown sugar mingling with toasted pecans, wrapped in the buttery embrace of a cream cheese crust that flakes apart at the lightest touch. It's the kind of scent that makes neighbors knock on your door with suspicious timing and family members suddenly remember they "were just in the neighborhood."
Most recipes get this completely wrong. They'll have you making a regular pie crust or, worse, using store-bought dough that tastes like cardboard had a baby with disappointment. Here's what actually works: a cream cheese crust that's so tender it practically melts on your tongue, creating a pocket for that glossy pecan filling that sets up like a dream. The contrast between the flaky shell and the gooey, nut-studded center? That's the moment of truth right there.
I discovered this version after my grandmother's recipe failed me for the third time. The filling leaked everywhere, the crust tasted like sand, and I may have cried into my apron — don't judge. But desperation breeds innovation, and after three weeks of testing (and approximately 847 pecan tassies later), I cracked the code. The secret lies in the temperature of your butter, the way you fold the dough, and that tiny splash of maple extract that makes people close their eyes when they take the first bite.
Let me walk you through every single step — by the end, you'll wonder how you ever made it any other way. These aren't just cookies; they're tiny time machines that transport you straight to your grandmother's kitchen, assuming your grandmother was a baking genius who understood that the best things come in small packages and even smaller waistlines be damned.
What Makes This Version Stand Out
Butter Temperature Perfection: Most bakers work with rock-hard butter or melted puddles of disappointment. The magic happens when your butter hits that sweet spot of cool but pliable — think play-doh consistency. This creates layers in your cream cheese crust that shatter delicately while maintaining structural integrity for that precious filling.
Cream Cheese Tang Balance: The secret weapon hiding in plain sight. This isn't just about richness; it's about that subtle tang that cuts through the sweetness like a culinary samurai. It prevents that cloying sugar bomb effect that makes your teeth ache just looking at it.
Maple Extract Magic: Everyone expects vanilla. Everyone's wrong. That whisper of maple extract enhances the nutty flavors in ways that'll make you question every pecan pie you've ever eaten. It's like the difference between a black-and-white movie and technicolor — same story, completely different experience.
Pecan Double-Action: Finely chopped pecans in the filling create texture and distribute flavor, while the pecan halves on top deliver that visual punch and concentrated nutty hit. It's a one-two punch of pecan perfection that other recipes completely miss.
Temperature Control Mastery: Starting with a screaming hot oven then dropping the temperature creates that glossy, set-top surface while preventing the dreaded soggy bottom. Most recipes bake these like regular cookies and end up with sad, weeping tassies that stick to your pan like regret.
Make-Ahead Champion: These beauties freeze like champions, tasting fresh-baked even after weeks in the freezer. Perfect for holiday prep when your to-do list looks like a novel and your relatives keep adding dishes like they're writing fan fiction of your menu.
Size Matters Science: The mini muffin tin creates the perfect filling-to-crust ratio. Too big and you've got a gooey mess; too small and you can't appreciate the textural interplay. Goldilocks would approve of this just-right sizing.
Alright, let's break down exactly what goes into this masterpiece...
Inside the Ingredient List
The Flavor Base
Salted butter isn't just a suggestion here — it's the foundation of everything good and right in this world. The salt enhances all the other flavors while the butter provides that irreplaceable richness that margarine pretenders can only dream about. When you cream it with cream cheese, something magical happens: the proteins in the cream cheese create a tender, almost shortbread-like texture that regular butter crusts can never achieve. Skip the cream cheese and you're basically making a different recipe entirely, one that tastes like disappointment and broken dreams.
Dark brown sugar brings molasses notes that white sugar can't touch, creating that deep, complex sweetness that makes grown adults make involuntary happy sounds. The moisture content keeps your filling from becoming a brittle, tooth-cracking disaster, while the caramel flavors develop during baking into something that tastes like it should cost $8 apiece at a fancy bakery.
The Texture Crew
All-purpose flour might seem boring, but it's the reliable friend who shows up every time. Too much protein and your crust becomes tough and chewy like eating cardboard. Too little and it falls apart faster than my willpower around these tassies. The ratio here creates a crust that's sturdy enough to hold the filling but tender enough to make you close your eyes in appreciation.
Eggs are the unsung heroes of the filling, creating that perfect custard-like texture that sets up just right. Use room temperature eggs — cold eggs from the fridge will make your filling seize up and create a lumpy, unappetizing mess that looks like it lost a fight with a blender. Let them sit on the counter for 30 minutes while you prep everything else.
The Unexpected Star
Maple extract is where this recipe diverges from the pack and becomes something extraordinary. Vanilla is fine, safe, predictable — maple extract is what happens when you want to make people question everything they thought they knew about pecan desserts. It amplifies the natural nuttiness of the pecans while adding a warmth that makes people ask "what's your secret?" with their mouths full.
The key is using just enough — too much and your tassies taste like a maple tree exploded. Too little and you lose that subtle complexity that makes these special. I tested this seventeen times to get it right, and my neighbors still talk about the "maple incident of 2023" with a mixture of awe and slight trauma.
The Final Flourish
Finely chopped pecans distribute throughout the filling, ensuring every bite has that nutty crunch without any single mouthful feeling like you're eating squirrel food. The size matters here — too large and they float to the top, creating an uneven texture. Too small and they disappear into the filling like culinary ninjas, leaving texture seekers wanting more.
Pecan halves on top aren't just for looks, though they do create that bakery-perfect appearance that makes people think you spent hours on these. They toast during baking, releasing oils that perfume the entire dessert and create textural contrast against the smooth filling. Plus, they make excellent handles for plucking these beauties from the tray when you think nobody's looking.
Everything's prepped? Good. Let's get into the real action...
The Method — Step by Step
- Start with your cream cheese crust — and here's where most people mess up from the get-go. Your butter and cream cheese need to be cool but not cold, soft but not melting. Think refrigerator-cold butter left on the counter for exactly 20 minutes. Too cold and your dough cracks like a desert floor. Too warm and it becomes a greasy, unmanageable mess that sticks to everything and refuses to hold its shape. Cut both into small cubes first — this helps them incorporate evenly and prevents the dreaded cream cheese chunks that never quite mix in properly.
- Now watch this part closely: Beat the butter and cream cheese together just until they form a cohesive, pale mixture. Over-mix here and you're flirting with disaster — the heat from your mixer can start melting the butter, creating a greasy dough that bakes up tough and flat. You're looking for a texture like thick frosting, smooth and spreadable but still cool to the touch. If you can press your finger into it and leave an impression that slowly fills back in, you've nailed it.
- Add your flour all at once — no need to be dainty here. This isn't a soufflé; it's a sturdy crust that needs to come together quickly. Pulse or mix on low just until the dough starts to form clumps that hold together when squeezed. It should look like coarse, buttery breadcrumbs with some larger pea-sized pieces. Those little chunks create flakiness, so resist the urge to keep mixing until it's perfectly smooth — that's cookie dough thinking, and we're making tassies here.
- Turn the dough out onto a lightly floured surface and gather it into a ball using a gentle kneading motion — no more than 6-8 folds. This is where intuition meets experience. The dough should feel like a soft, pliable clay that holds together without crumbling. If it's too dry and cracks form, sprinkle with ice-cold water a teaspoon at a time. Too sticky? Dust with flour sparingly — too much and your crust becomes tough enough to patch tires.
- Divide the dough into 24 equal portions — and here's the game-changer: use a small cookie scoop for perfect portions every time. Each portion should weigh about 20 grams if you're being precise, but eyeballing works fine if you channel your inner baking zen master. Roll each portion into a smooth ball, working quickly so the warmth from your hands doesn't start melting the butter. Place these on a parchment-lined baking sheet and refrigerate for at least 30 minutes while you make the filling.
- Preheat your oven to 375°F — and this next part? Pure magic. Most recipes tell you to keep one temperature throughout, but we're going dynamic here. The high initial heat sets the crust and creates a slight puff that prevents the dreaded soggy bottom. After 8 minutes, you'll drop the temperature to 350°F for the remainder of baking. This two-temperature approach creates that perfect texture contrast: crisp bottom, tender sides, and a glossy, set filling that doesn't weep or separate.
- Make the filling while the dough chills — and now the fun part begins. Whisk together your dark brown sugar and eggs until the mixture looks like caramel silk, about 2 minutes by hand or 45 seconds with a mixer. You're looking for the sugar to start dissolving and the mixture to lighten slightly in color. Add your maple extract — and here's where restraint matters. One teaspoon is plenty; more and you'll taste maple for days, less and you lose that subtle complexity that makes people ask for your secret.
- Fold in your finely chopped pecans with a rubber spatula using gentle, sweeping motions. Over-mixing here incorporates too much air, creating a filling that puffs up like an angry soufflé then collapses into a crater. You want the pecans evenly distributed but the mixture should still look glossy and fluid. Think thick caramel sauce, not pecan-studded cement.
- Assembly time — and this is where patience pays off. Press each chilled dough ball into the cups of your mini muffin tin, working from the center outward with your thumb. The dough should come up the sides evenly, creating a thin shell that's thicker at the bottom to prevent leaks. If the dough starts sticking to your fingers, dip them in flour or use a small piece of plastic wrap between your thumb and the dough. Each cup should hold about 1 tablespoon of filling — no more or they'll overflow and create a caramelized mess that requires chiseling to clean.
- Bake for 8 minutes at 375°F, then without opening the oven door (you'll let out precious heat), reduce to 350°F and bake another 12-15 minutes. The edges should be golden brown and the filling set but still slightly jiggly in the center — think Jell-O consistency, not liquid. They'll continue cooking from residual heat, so pull them when they still have a tiny wobble. Cool in the pan for 5 minutes before removing to a wire rack. Try to wait at least 30 minutes before sampling — I dare you to taste this and not go back for seconds.
That's it — you did it. But hold on, I've got a few more tricks that'll take this to another level...
Insider Tricks for Flawless Results
The Temperature Rule Nobody Follows
Room temperature ingredients aren't just a suggestion — they're the difference between tassie triumph and dessert disaster. Cold cream cheese creates lumps that never quite incorporate, while warm butter makes your dough greasy and unmanageable. I set everything out 45 minutes before baking, arranging my ingredients like I'm preparing for surgery. Yes, I'm that person, and yes, my tassies always come out better than yours. Don't @ me.
Here's the thing most recipes don't tell you: if your kitchen is particularly warm (above 75°F), you need to work faster or chill your dough more often. Warm kitchens are the enemy of flaky pastry, turning your beautiful dough into a sticky mess that sticks to everything and bakes up tough. I keep a small bowl of ice water nearby and dip my fingers if they start warming the dough too much.
Why Your Nose Knows Best
That moment when the aroma shifts from "smells good" to "holy cow, what is that incredible smell" — that's when your tassies are perfectly done. Your nose is actually more reliable than a timer here because ovens vary, pans conduct heat differently, and altitude affects baking times. When you can smell the pecans toasting and the caramel notes developing, you've got about 2-3 minutes left. Trust your senses; they've been refined over thousands of years of evolution, unlike your oven which was probably calibrated by someone who'd rather be anywhere else.
I once had a friend who set three timers and still managed to burn every batch because she wouldn't trust her instincts. Don't be like Sarah. Sarah ate sad, bitter tassies and wondered why nobody asked for the recipe. Meanwhile, my neighbors fight over the last one like it's the last slice of pizza at 2 AM.
The 5-Minute Rest That Changes Everything
Those agonizing minutes after removing the pan from the oven — when you want to pry one out immediately and burn your tongue on molten sugar — are actually crucial. During this rest, the filling finishes setting and the flavors meld into something greater than their individual parts. The residual heat continues cooking the centers while the edges firm up enough to hold their shape when removed. Skip this step and you'll have tassies that collapse into puddles or, worse, leave half their filling stuck to the pan like a caramel crime scene.
Use this time wisely. Pour yourself coffee, set out pretty plates, or just stand there inhaling the incredible aroma like you're trying to absorb calories through smell alone. I won't judge — I've definitely done this while whispering "soon, my pretties" to the pan like some kind of dessert-obsessed Gollum.
Creative Twists and Variations
This recipe is a playground. Here are some of my favorite ways to switch things up:
Bourbon Pecan Party
Replace the maple extract with 1 tablespoon of good bourbon — none of that bottom-shelf stuff that tastes like regret and bad decisions. The alcohol burns off during baking, leaving behind vanilla and caramel notes that make people ask if you went to culinary school. I like using a smoky bourbon here; it plays beautifully with the pecans and creates depth that plain maple can't touch. Top with a tiny flake of sea salt for that sweet-salty magic that makes grown adults make involuntary happy sounds.
Chocolate Chunk Champions
Add 1/4 cup of finely chopped dark chocolate to the filling — not chips, which contain stabilizers that prevent smooth melting, but good quality chocolate chopped into pea-sized pieces. It creates pockets of molten chocolate that surprise and delight, like finding treasure in your dessert. Use 70% cacao for balance; anything darker overwhelms the pecans, anything lighter makes it taste like candy. The chocolate should enhance, not dominate, like a good backup singer who knows when to shine.
Coconut Dream Team
Replace half the pecans with unsweetened coconut flakes and add 1/2 teaspoon of coconut extract along with the maple. Suddenly you're transported to a tropical paradise where pecan tassies wear tiny sunglasses and speak with island accents. The coconut toasts during baking, creating chewy texture against the creamy filling. It's like a pecan pie and a coconut cream pie had a beautiful baby that grew up to be cooler than both its parents.
Savory-Sweet Sage
Add 1 teaspoon of finely minced fresh sage to the crust dough — it sounds weird until you try it. The herbaceous notes complement the pecans in ways that make foodies lose their minds. Sage has natural affinity for both butter and nuts, creating a sophisticated flavor profile that elevates these from humble cookies to conversation pieces. Serve these at your next dinner party and watch as guests try to figure out why they can't stop eating them.
Spiced Orange Surprise
Add 1/2 teaspoon of orange zest and 1/4 teaspoon of cardamom to the filling — suddenly it's like Christmas morning in your mouth. The citrus brightens all the other flavors while cardamom adds warmth that makes people think of their grandmother's kitchen (even if their grandmother never cooked). It's comfort food with a passport, familiar enough to love but different enough to remember.
Salted Caramel Swirl
Drizzle 1 teaspoon of homemade salted caramel over each tassie right after they come out of the oven. The heat melts the caramel slightly, creating ribbons of gooey sweetness that take these from excellent to legendary. Make extra caramel — you'll need it for "taste testing" and for the inevitable moment when someone asks for the caramel recipe too. Pro tip: make a double batch and keep it in the fridge for emergencies (defined as "any time you need caramel").
Storing and Bringing It Back to Life
Fridge Storage
Store cooled tassies in an airtight container with parchment paper between layers — they absorb odors like tiny, delicious sponges, so unless you want pecan tassies that taste like last night's leftover curry, seal them well. They'll keep for up to 5 days in the refrigerator, though honestly, they've never lasted more than 2 days in my house. The cold actually improves their texture, making the crust snappier and the filling chewier. Just bring them to room temperature for 15 minutes before serving, or don't — they're pretty spectacular cold too, like pecan pie's sophisticated cousin who studied abroad.
Freezer Friendly
These freeze like champions, maintaining their texture better than most desserts. Arrange cooled tassies in a single layer on a baking sheet and freeze until solid — about 2 hours — then transfer to freezer bags with all the air squeezed out. They'll keep for up to 3 months, though I've found forgotten bags from last Christmas that still tasted incredible. Label them unless you enjoy playing "mystery dessert" months later. To serve, thaw at room temperature for 30 minutes or pop them in a 300°F oven for 5 minutes to refresh.
Best Reheating Method
Add a tiny splash of water to a small baking dish, add your tassies, cover with foil, and warm at 300°F for 5-7 minutes. The water creates steam that rehydrates the filling without making the crust soggy. It's like a dessert spa treatment that brings them back to fresh-baked glory. Microwaves work in a pinch — 8-10 seconds max — but they'll never achieve that just-baked texture that makes angels sing. The oven method is worth the extra few minutes, especially if you're serving them to company or trying to impress someone who doesn't yet know about your tassie superpowers.